
Pruning
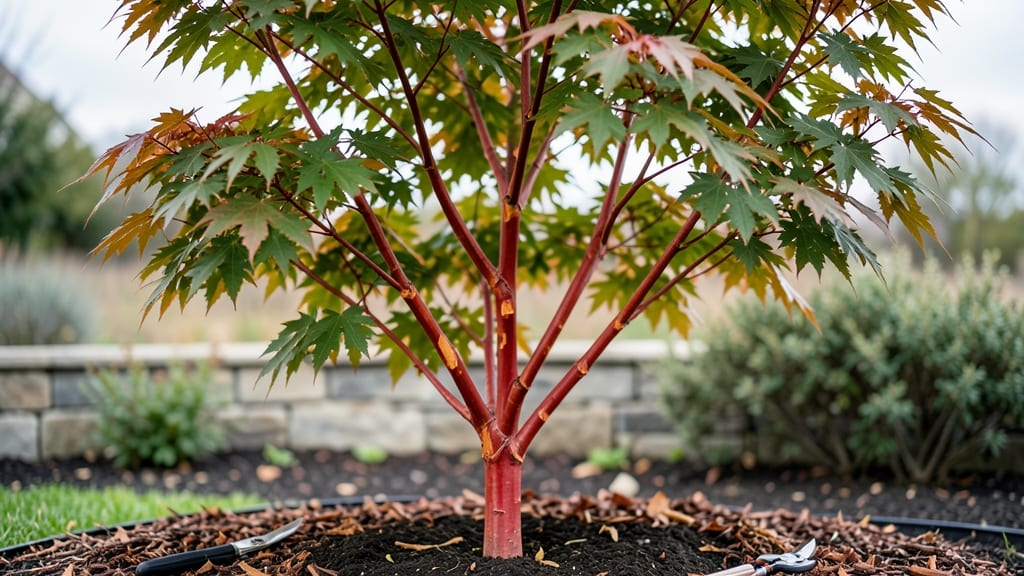
The red tip tree transforms your yard into a winter wonderland with its fiery stems—until you learn how to prune it right. I’ve spent years watching these trees go from vibrant to sad, all because of a few simple cuts done at the wrong time.
The secret isn’t complicated: timing, tools, and a little patience turn a messy pruning job into a foolproof way to keep your tree stunning year-round.
Most red tip trees—like red-twig dogwood or red maple—thrive with just three strategic cuts: shaping in late winter, thinning in early spring, and cleaning up after flowering. You don’t need fancy equipment, either.
A sharp pair of pruners, a ladder (if needed), and a clear day are all you’ll need. The payoff? Bright red stems that pop against snow, lush green foliage in summer, and a tree that looks intentional, not overgrown.
By summer’s end, you’ll notice new growth where old branches once crowded the canopy. The stems stay vibrant, the shape stays balanced, and you avoid that “wild bush” look that ruins the tree’s ornamental value.
Even better, these cuts encourage healthier blooms next year—because pruning isn’t just about looks, it’s about long-term health.
Works for both small yards and large landscapes, whether you’re dealing with a young sapling or a mature tree. Let’s get those branches looking sharp without stressing the tree—or yourself.
📚 In This Guide
- What you need
- Instructions
- Tips and common mistakes
- Wrapping up and next steps
What you need
- ● Pruning shears: Bypass pruners (sharp, clean, and disinfected with rubbing alcohol or a 10% bleach solution). Size: 6–8 inches for small branches.
- ● Loppers: For branches ½–2 inches thick. Look for ratcheting or bypass-style for precision.
- ● Pruning saw: Curved-tooth saw for branches 2+ inches thick (avoid cheap tools—they dull fast!).
- ● Gloves: Heavy-duty, gardening gloves (nitrile-coated for grip and protection from thorns).
- ● Disinfectant: 70% isopropyl alcohol or household bleach (1 part bleach to 9 parts water) to sterilize tools between cuts.
- ○ Pruning sealant: Optional but helpful for larger cuts (>1 inch) to prevent disease. Use a latex-based sealant like Tanglefoot Tree Wound Pruning Seal.
- ● Extension pole: Attaches to loppers/saws for hard-to-reach branches (10–15 feet).
- ● Ladder: Sturdy, aluminum (avoid plastic) with non-slip feet for taller trees (6+ feet).
- ● Safety gear: Safety glasses and long sleeves to protect from debris.
- ● Trash bags: Heavy-duty for collecting pruned branches (10–20 gallon size).
- ● Notebook/pencil: To sketch a simple pruning plan before you start!
- ● Know your tree: Confirm it’s a red tip photinia (check for glossy leaves and red new growth).
- ● Timing: Prune in late winter/early spring (dormant season) for best results.
- ● Weather: Choose a dry, overcast day to avoid stressing the tree.
- ● Safety first: Ensure the area is clear of pets/kids and power lines are out of reach.
Step-by-Step guide for pruning red tip trees
Here's how to keep your red tip tree vibrant with just three straightforward cuts.
✂️ Step 1: Remove Dead or Diseased Branches Year-Round
Start by inspecting your red tip tree for any branches that are brown, brittle, or showing signs of disease—these are the first to go. Use sharp pruning shears to make clean cuts just outside the branch collar, where the branch meets the trunk. This prevents unsightly stubs and promotes faster healing.
I always prune dead wood first because it can harbor pests or fungal spores that might spread to healthy branches. If a branch is larger than ½ inch in diameter, use loppers instead of shears to avoid tearing the bark. Work slowly, and don’t rush—this is the foundation for healthy growth.
✂️ Step 2: Thin Out Crowded Branches in Late Winter or Early Spring
The best time to thin out overcrowded branches is when the tree is still dormant but just before new growth begins—typically in late February or March. Look for branches that rub against each other or grow inward, as these compete for sunlight and nutrients. Remove no more than 25% of the tree’s foliage in one session to avoid stressing it.
When thinning, cut back to a lateral branch or bud that’s growing outward. This opens up the canopy and allows better airflow, which reduces the risk of fungal diseases. If you’re unsure which branch to keep, choose the one with the strongest growth angle—usually the one that’s more upright.
✂️ Step 3: Shape the Tree for Balance in Early Summer
After the tree has finished its primary flush of growth, usually in early June, it’s time to refine its shape. Focus on removing branches that disrupt the tree’s natural form or grow in odd directions. For red tip trees, the goal is to maintain an open, vase-like structure that showcases those striking red tips.
Use hand pruners to trim back any overly long or leggy branches to a strong lateral branch. Avoid cutting back into old wood—always leave a bud or small branch to encourage new growth. Step back occasionally to check your progress; the tree should look balanced from all angles. This is also a great time to remove any suckers growing from the base.
Tips & tricks for pruning red tip trees
Here's what nobody tells you about keeping your red tip tree thriving—these little details make all the difference.
Tool Prep: Always sterilize your pruning tools with rubbing alcohol before you start. I learned this the hard way after accidentally spreading a fungal infection between cuts. Wipe down shears, loppers, and pruners between each branch to prevent cross-contamination. This is especially important if you're working with diseased branches in Step 1.
Seasonal Timing: The late February to March window for Step 2 isn't just about avoiding new growth—it's also about catching pests before they wake up. I've seen Japanese beetles start their damage as early as April, so timing your prune just before their emergence gives your tree a head start on defense. Mark your calendar now so you don't miss this critical window.
Visual Cues for Step 3: When shaping in early June, look for branches that create "V" shapes when viewed from below—they're usually the ones growing straight up and blocking light from the lower canopy. These are prime candidates for removal. Step back every 5-10 cuts to check your progress; your goal is that open vase shape that lets every branch show off its red tips.
Pro Tips for Red Tip Tree
- Here's what nobody tells you about keeping your red tip tree thriving—these little details make all the difference.
- Tool Prep: Always sterilize your pruning tools with rubbing alcohol before you start.
- Seasonal Timing: The late February to March window for Step 2 isn't just about avoiding new growth—it's also about catching pests before they wake up.
Frequently asked questions
Got questions about keeping your red tip tree vibrant and healthy? You’re not alone! Here are answers to the most common queries—from pruning timing to troubleshooting—so you can confidently care for your tree year-round.
When is the best time to prune a red tip tree?
The ideal time to prune is late winter or early spring, just before new growth begins. This minimizes stress and encourages healthy blooms. Avoid heavy pruning in fall or winter, as cold weather can slow recovery. Light shaping can be done anytime, but never prune when the tree is flowering!
How much can I trim off without harming the tree?
For mature red tip trees, you can safely remove up to 25% of the foliage in one session. Focus on dead, diseased, or crossing branches first, then thin out crowded areas. Over-pruning (beyond 30%) can stress the tree, so prioritize structure and airflow over drastic cuts.
Why are my red tips losing color or turning brown?
Brown or dull tips often signal overwatering, underwatering, or nutrient deficiencies. Check soil moisture—red tip trees prefer well-draining soil. Yellowing leaves may mean too much water, while crispy edges suggest drought. A balanced fertilizer (10-10-10) in spring can also revive vibrancy.
Can I prune a red tip tree in summer?
Yes, but lightly! Summer pruning is best for removing only dead or damaged branches to avoid shocking the tree. Heavy cuts in summer can stress the plant and reduce next year’s blooms. If you must shape, do so early morning or late evening to prevent heat stress.
What’s a good alternative if my red tip tree isn’t thriving?
If your red tip tree struggles with disease, pests, or poor growth, consider these low-maintenance alternatives:
- Japanese maple (disease-resistant, stunning foliage)
- Smoke tree (Cotinus) (tolerates pruning, vibrant colors)
- Dwarf lilac (hardy, fragrant blooms, similar structure)
Wrapping up and next steps
The red tip tree is a stunning addition to any landscape, and with just three simple cuts, you can keep it thriving year-round! Remember, the key is timing—prune in late winter/early spring for shape, summer for maintenance, and fall for cleanup.
A little effort now means vibrant foliage and fewer pests later.
Ready to give your tree the TLC it deserves? Grab your tools and schedule that pruning session—your red tip tree will thank you with bold, healthy growth! 🌿✂️