Pruning
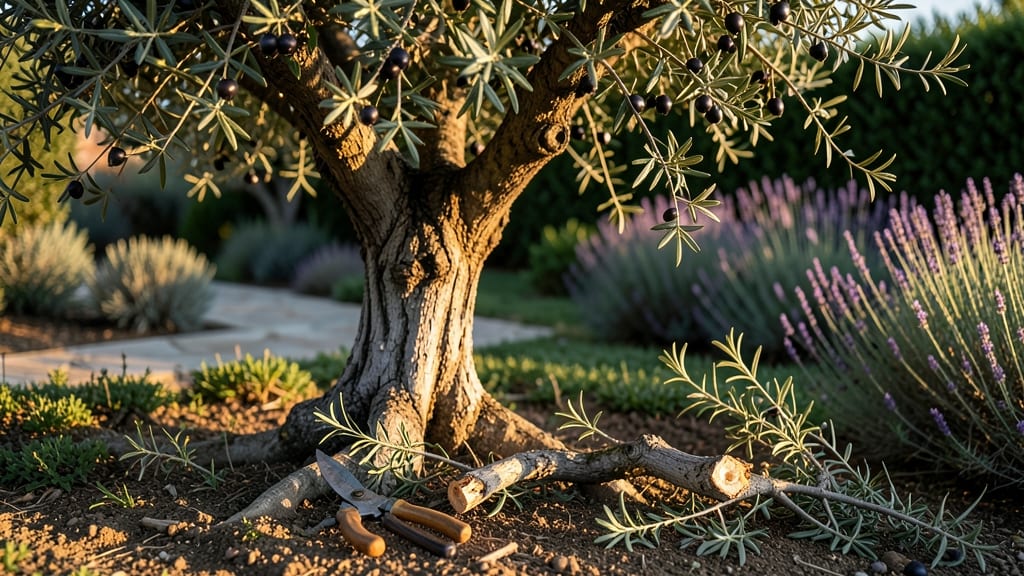
See the dramatic before and after olive tree pruning results in just a few hours—no green thumb required. ✂️ I’ve pruned mine for years, and the difference between tangled, fruitless branches and an open, productive tree is shocking.
The key isn’t complexity; it’s knowing where to cut and when to stop.
Most people overcomplicate it, but olive trees thrive with just 4 strategic cuts: shaping the canopy, thinning crowded branches, and removing dead wood. You’ll need sharp pruners, a ladder (for taller trees), and about 30 minutes of focused work.
The payoff? Better air circulation, more sunlight for fruit, and a tree that looks like it belongs in a Mediterranean garden.
After pruning, you’ll notice new growth within 4-6 weeks, with the first wave of olives appearing larger and more abundant. The tree’s structure becomes balanced, and pests have fewer places to hide. It’s not just about looks—it’s about health and productivity that keeps improving every year.
Works for mature trees, young saplings, and even container-grown olives. The same principles apply whether you’re shaping a dwarf variety or a towering standard. Ready to see that transformation for yourself?
📚 In This Guide
- What you need
- Instructions
- Tips and common mistakes
- Wrapping up and next steps
What you need
- ● Pruning shears (bypass or anvil type) – Sharp, clean, and properly sized (for small to medium branches, 6–8" blades). Avoid dull tools—they crush branches instead of cutting cleanly.
- ● Loppers – Long-handled (24–36") for thicker branches (½"–1.5"). Look for ratcheting or bypass styles for precision.
- ● Pruning saw – For branches thicker than 1.5". A bow saw or folding pruning saw with fine teeth (10–14 TPI) works best.
- ○ Extension pole (optional but handy) – For high branches (10–15 ft reach). Choose one with a detachable saw or shears attachment.
- ● Disposable gloves – Thick, cut-resistant (e.g., leather or synthetic). Protects hands from thorns and blisters!
- ● Rag or paper towels – For wiping tools between cuts (keeps them sanitized).
- ○ Sealing wax or pruning paint – Optional but recommended for cuts > ½". Helps prevent disease in large wounds.
- ● Ladder (if needed) – Sturdy, non-slip, and tall enough to reach the highest branches safely.
- ● Bucket or tarp – For collecting debris. A 5-gallon bucket or large tarp makes cleanup easy.
- ● Weather check – Prune on a dry, calm day. Avoid windy or rainy conditions.
- ● Safety glasses – Protects eyes from debris (especially when using a saw).
- ● Long sleeves/pants – Covers arms and legs from thorns and scratches.
- ● First-aid kit – Bandages, antiseptic wipes, and tweezers for minor cuts.
- ● Water and snacks – Stay hydrated, especially in hot climates!
Step-by-Step olive tree pruning for a clean, productive canopy
Here's the method I've used for years to transform tangled olive trees into open, sun-filled structures—without stressing the plant.
✂️ Step 1: Identify and Remove Dead or Diseased Wood First
Start by scanning the entire tree for branches that are brown, brittle, or showing signs of disease like blackened spots or fungal growth. These branches won’t recover and will only compete with healthy growth for resources. Use sharp pruning shears to cut just outside the branch collar—the swollen area where the branch meets the trunk. This prevents unsightly stubs and promotes faster healing.
I always make this my first cut because it clears the way for the rest of the pruning. If you skip this step, you risk spreading disease or weakening the tree’s structure. Look for branches that snap easily when bent—these are dead and should be removed immediately. Healthy wood will bend slightly before breaking, giving you a clear visual cue.
✂️ Step 2: Thin the Canopy to Improve Airflow and Sunlight
Olive trees thrive when they receive plenty of sunlight and air circulation. Focus on removing branches that cross or rub against each other, as these create wounds and weak points. Aim to reduce the canopy by about 20-30%—this might sound aggressive, but it’s the key to a healthier tree. Start from the inside and work your way out, cutting back branches that block light from reaching the center.
Here’s the thing—you’ll want to make your cuts at a 45-degree angle, about ¼ inch above an outward-facing bud or leaf node. This encourages new growth to sprout in the right direction. Avoid cutting flush with the trunk or leaving stubs, as these invite infection. If a branch is thicker than ½ inch, use a pruning saw for a clean cut.
✂️ Step 3: Shape the Tree for Balance and Structure
Now it’s time to refine the tree’s shape. Olive trees respond well to an open-center or vase-like structure, which allows sunlight to penetrate deeply. Start at the top and work your way down, cutting back the longest branches by about ⅓ of their length. This prevents the tree from becoming top-heavy and encourages a more compact, bushy growth habit.
Pay attention to the tree’s natural growth patterns—you’re not trying to force a rigid shape, just guide it. If a branch is growing straight up, you can shorten it slightly to encourage lateral branching. For horizontal branches, leave them slightly longer to promote fruit production. Step back every few cuts to assess the tree’s balance—this is where the transformation becomes visible.
✂️ Step 4: Refine and Clean Up for a Polished Look
The final step is about precision. Look for small, weak branches—often called "water sprouts"—that grow straight up from the trunk or larger branches. These compete with the tree for nutrients and should be removed entirely. Use your pruning shears to cut them at the base. You’ll also want to trim any suckers growing from the base of the tree, as these drain energy from the main canopy.
Once you’ve made all your cuts, take a moment to clean up the area. Remove all pruned branches and dispose of them properly—don’t leave them on the ground, as they can harbor pests or disease. Wipe down your tools with rubbing alcohol to prevent the spread of any potential pathogens. Step back and admire your work—the tree should now look open, airy, and ready for new growth.
Tips & tricks for perfect olive tree pruning
Transforming a tangled olive tree into an open, sunlit canopy doesn’t have to be intimidating—just follow these key insights to ensure you’re working with, not against, the tree’s natural growth patterns.
The Pruning Sequence Matters: Always start with Step 1—removing dead or diseased wood—before moving to thinning. This prevents spreading pathogens through your tools and gives you a clear view of the tree’s structure. I’ve seen pruners skip this step and end up with a tree that looks healthy on the outside but is actually stressed underneath. Take your time here—this foundational cut determines how well the rest of the pruning will work.
Angle and Location Are Everything: When making cuts in Step 2 and Step 3, remember the 45-degree angle and ¼-inch above an outward-facing bud rule. This isn’t just about aesthetics—it’s about directing the tree’s energy where you want it. If you cut too close to the trunk or leave stubs, you’re inviting infection and slowing down the healing process. For branches thicker than ½ inch, use a pruning saw to avoid tearing the bark, which can be just as damaging as the initial cut.
Visual Cues for Healthy Cuts: In Step 3, when shaping the tree, step back every few cuts to assess balance. The goal is an open-center structure, but don’t force it—let the tree’s natural growth patterns guide you. If a branch feels too stiff or snaps easily when bent, it’s likely dead and should be removed. Healthy wood will bend slightly before breaking, almost like a bow. This simple test saves you from making unnecessary cuts that could weaken the tree.
Cleanup Prevents Future Problems: After pruning, dispose of all cut branches immediately—don’t leave them on the ground. They can harbor pests and diseases that will reinfect your tree. Wipe down your tools with rubbing alcohol between cuts, especially if you’ve removed diseased wood. This might seem like overkill, but it’s the difference between a tree that thrives and one that slowly declines. Think of it as sanitizing your workspace before cooking.
Pro Tips for Before And After Olive Tree Pruning
- Transforming a tangled olive tree into an open, sunlit canopy doesn’t have to be intimidating—just follow these key i...
- The Pruning Sequence Matters: Always start with Step 1—removing dead or diseased wood—before moving to thinning. This...
- Angle and Location Are Everything: When making cuts in Step 2 and Step 3, remember the 45-degree angle and ¼-inch abo...
Frequently asked questions
Got questions about olive tree pruning? You’re not alone! Here are answers to the most common concerns—so you can prune with confidence and see that dramatic before-and-after transformation.
When is the best time to prune an olive tree?
Prune olive trees in late winter or early spring (just before buds swell) for best results. Avoid pruning in fall or winter when the tree is dormant, as this can stress it. If you must prune for safety (e.g., dead branches), do it after harvest but before new growth starts. Pro tip: Mature trees can handle light pruning in summer, but heavy cuts should wait for dormancy.
How often should I prune my olive tree?
Young olive trees need annual pruning to shape their structure, while mature trees (5+ years old) can be pruned every 2–3 years for maintenance. Focus on removing dead, diseased, or crossing branches yearly, regardless of age. Over-pruning weakens the tree, so aim for no more than 25% of the canopy at once.
What happens if I prune at the wrong time?
Pruning at the wrong time (e.g., fall or deep winter) can lead to frost damage, slower recovery, or even dieback. If you prune too late, new growth may not harden off before cold snaps. For container-grown olives, avoid pruning 6 weeks before first frost. Signs of stress: Yellowing leaves, stunted growth, or oozing sap at cuts.
Can I prune an olive tree too much?
Yes! Over-pruning removes too many leaves, reducing the tree’s ability to photosynthesize and produce fruit. Stick to the “one-third rule”: Never remove more than 1/3 of the canopy in a single session. Heavy pruning can also invite pests or fungal issues. Alternative: Space cuts over 2–3 years for a gentler shape.
What if my olive tree doesn’t look better after pruning?
Patience is key! Olive trees are slow to recover—give them 1–2 growing seasons to fill out. If the tree looks worse (e.g., bare branches, no new growth), check for:
- Underwatering (olives hate soggy roots)
- Over-fertilizing (burns roots)
- Pest/disease (e.g., scale insects, verticillium wilt)
Wrapping up and next steps
Pruning your olive tree isn’t just about aesthetics—it’s a game-changer for health, productivity, and longevity! 🌿 With just four strategic cuts, you can transform a tangled, struggling tree into a thriving, fruit-bearing powerhouse. The key? Patience, precision, and timing—plus a little confidence in your green thumb.
Now that you’re armed with the how-to, roll up your sleeves and give your olive tree the TLC it deserves. Start small, observe the changes, and soon you’ll be the proud gardener of a before-and-after masterpiece.
Ready to see the magic? Grab your pruners and get pruning! ✂️