Landscaping
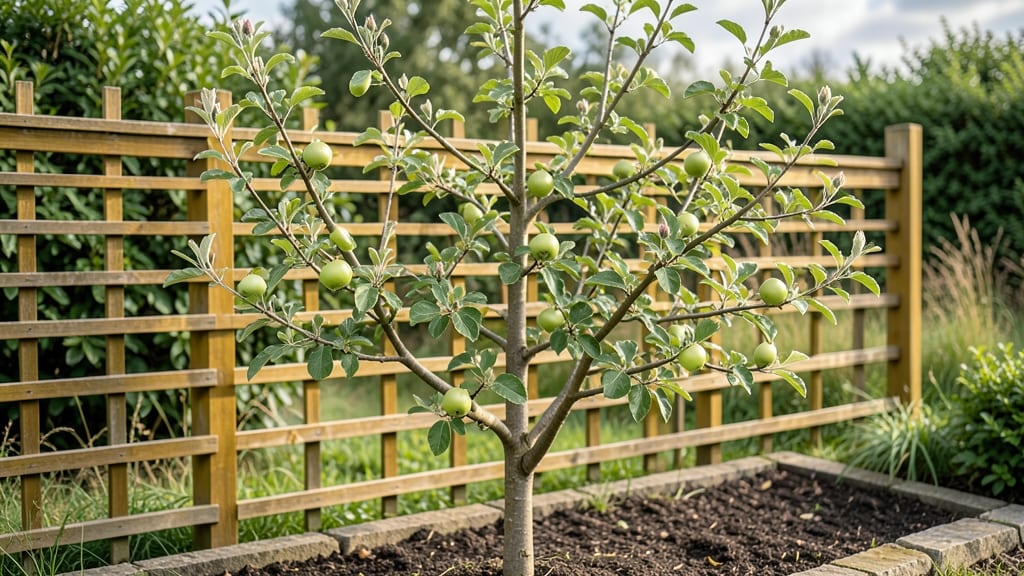
An espalier tree fence turns wasted vertical space into a lush, living privacy screen that outshines any wooden or metal alternative. 🌿 I first saw this trick in a French cottage garden, where apple trees arched gracefully along a fence, their blossoms spilling over like confetti.
The secret lies in training trees to grow flat against a support, creating a year-round display of fruit, flowers, or foliage while saving precious ground space.
You’ll need just a few basics: dwarf or semi-dwarf fruit trees (like apples, pears, or cherries), sturdy posts or trellis wire, and a pruning saw. Spacing matters—plant trees 6–8 feet apart for a solid screen, or closer for a more decorative look.
The real magic happens in late winter, when you shape the branches into horizontal layers, encouraging them to grow flat and wide. With consistent pruning, you’ll transform a bare fence into a living tapestry of color and harvest.
The payoff? A privacy screen that blooms in spring, fruits in summer, and holds golden foliage in fall—all while producing edible rewards. My espaliered apple tree now gives me dozens of crisp fruits every year, plus a backdrop that neighbors envy.
Plus, it’s far more durable than lattice or chain-link, lasting decades with minimal care. Ready to turn your fence into a vertical garden?
Works for any climate—just pick cold-hardy varieties for northern zones (like 'Liberty' apples) or heat-tolerant types (like 'Anjou' pears) for warmer areas. The same principles apply to flowering espaliers like crabapples or even ornamental cherries for pure drama.
Start small with one tree, and watch how it transforms your space—both practically and beautifully.
📚 In This Guide
- What you need
- Instructions
- Tips and common mistakes
- Wrapping up and next steps
What you need
- ● Espalier tree(s) – Choose 1-3 young, flexible trees (e.g., apple, pear, peach, or ornamental varieties like Forsythia or Crabapple). Select trees with a single main trunk and semi-flexible branches (avoid fully rigid species). Quantity: 1 per 4–6 feet of fence length.
- ● Fence structure – A wooden picket fence (4–6 ft tall), metal trellis fence, or PVC lattice panel. Ensure it’s sturdy and weather-resistant. Size: Match your desired height and length.
- ● Garden twine or plant ties – 100% natural jute or soft plastic (avoid wire, which can damage bark). Quantity: 1–2 rolls (50–100 ft each).
- ● Pruning shears – Bypass pruners (sharp, clean, and sterilized to prevent disease).
- ● Support stakes or wires – Galvanized steel stakes (for initial training) or twist ties/wires to secure branches to the fence.
- ● Potting soil or well-draining mix – High-quality, organic soil amended with compost (avoid heavy clay). Quantity: 1–2 bags (2–3 cubic feet per tree).
- ● Mulch – Organic mulch (wood chips, straw, or bark) to retain moisture. Quantity: 1–2 bags (cover base of fence).
- ● Measuring tape – For precise spacing (aim for 12–18 inches between trees).
- ● Post-hole digger or auger – If installing a new fence (for 4–6 ft deep holes every 6–8 ft).
- ● Level – Ensures your fence is plumb and even.
- ● Drill/driver – For assembling fence panels or attaching hardware.
- ● Gloves – Heavy-duty gardening gloves to protect hands from thorns and rough bark.
- ● Watering can or hose – For deep watering after planting.
- ● Fertilizer – Slow-release granular fertilizer (10-10-10 or organic options like compost tea).
- ● Drip irrigation kit – For low-maintenance watering (especially useful for tall fences).
- ● Decorative elements – String lights, climbing roses, or ivy to add extra texture.
- ● Tree guards – Plastic spiral wraps to protect young trunks from pests.
- ● Espalier training kit – Pre-made branch spreaders or flexible wire for shaping.
Step-by-Step instructions for creating a stunning espalier tree fence
Here's how to transform a simple fence into a living work of art—functional, beautiful, and packed with seasonal interest.
🪴 Step 1: Choose and Prepare Your Trees
Select 4-6 young trees (like apple, pear, or ornamental cherry) that respond well to espalier training—dwarf varieties work best for fences. Prune back any existing branches to 6-8 inches from the base, leaving just the main stem. This forces new growth that you'll shape into your design.
I always choose trees with flexible young wood—older branches snap under pressure. Space them 8-12 inches apart along the fence, securing each trunk with a 3-inch diameter tree stake tied loosely with soft garden twine. The goal is to give them support without restricting growth.
✂️ Step 2: Establish the Framework and Initial Pruning
Mark your design on the fence using a string line stretched horizontally at 3-4 feet high—this will be your main branch line. For a classic horizontal espalier, select 3-4 strong lateral branches on each tree and bend them gently along the string line. Secure each branch with espalier wire or soft garden ties, making small cuts in the bark if needed to prevent splitting.
Remove all other branches and growth below your marked line—this ensures energy goes into developing the espalier structure. Here's the thing: don't rush this step. Wait until new shoots appear along your wired branches before pruning again. These shoots will become your next year's framework.
☀️ Step 3: Train and Maintain the Structure Year-Round
During the first growing season, focus on guiding new shoots along your wire framework. Use flexible ties to gently weave shoots into your design, never forcing them—think of it like teaching a child to climb rather than pushing them up a ladder. In late winter (just before buds swell), prune back all growth to just above a bud that faces outward from the fence.
This is where year-round drama comes in: winter interest matters. Leave some bare branches untouched to create texture, and consider adding ornamental grasses or climbing roses between trees for extra vertical interest. Water deeply once a week during dry spells—espalier trees have less root space than ground-planted trees.
🌿 Step 4: Refine and Harvest for Long-Term Success
By year three, your fence will have a defined structure. Now's the time to refine: prune any branches that cross or rub together (they'll create wounds that attract disease), and thin out crowded growth to improve airflow. For fruiting varieties, choose 2-3 main branches per tree to bear fruit—this ensures larger, more manageable harvests.
Real talk: you'll need to re-tie branches annually as they thicken. I use soft fabric ties that won't cut into the bark. And here's the payoff—when your trees flower and fruit along the fence, every season becomes a showstopper. Just remember: patience is key. A well-trained espalier takes 3-5 years to reach its full potential.
Tips & tricks for perfect espalier tree fences
Turning a fence into a living canvas takes more than just planting trees—it's about understanding the subtle art of growth. Here's what I've learned after years of shaping these vertical gardens.
Tree Selection Matters: While apple and pear trees are classic choices, don't overlook ornamental varieties like Japanese maple or flowering cherry. These offer stunning seasonal color without requiring fruit harvests. The key is selecting trees with natural flexibility—younger wood bends without breaking, which is critical when you're gently shaping branches along your 3-4 foot string line. Look for nursery stock labeled "dwarf" or "columnar" as they're specifically bred for this kind of training.
Framework Flexibility: Your espalier wire should be sturdy but flexible enough to adjust as branches grow thicker. I've found that 18-gauge copper wire works beautifully—it's durable yet malleable. When securing branches in Step 2, make small vertical cuts in the bark (about 1/4 inch deep) before bending. This prevents clean breaks when you're shaping those 3-4 lateral branches along your horizontal line. Think of it like gently persuading a vine rather than forcing it into position.
Seasonal Pruning Strategy: The late winter pruning in Step 3 is your chance to sculpt the year's growth. Always cut just above an outward-facing bud—this ensures new growth will extend away from the fence, creating that beautiful three-dimensional effect. I like to mark my cuts with a white pencil first to visualize the final shape before making any snips. And here's a pro move: leave some winter interest by not pruning every branch completely—those bare stems add texture and contrast when everything else is dormant.
Watering Wisdom: Those once-a-week deep waterings in Step 3 are non-negotiable, especially during the first growing season. Espalier trees have limited root space compared to their ground-grown counterparts, so they dry out faster. I've seen beautiful espaliers fail because homeowners assumed the trees needed less water just because they're vertical. Use your finger to check soil moisture—if the top 2 inches are dry, it's time to water. A soaker hose along the fence line makes this maintenance a breeze.
Pro Tips for Espalier Tree Fence
- Turning a fence into a living canvas takes more than just planting trees—it's about understanding the subtle art of growth.
- Tree Selection Matters: While apple and pear trees are classic choices, don't overlook ornamental varieties like Japanese maple or flowering cherry.
- Framework Flexibility: Your espalier wire should be sturdy but flexible enough to adjust as branches grow thicker.
Frequently asked questions
Got questions about creating a stunning espalier tree fence? You’re not alone!
Here are some of the most common queries—and their practical answers—to help you get started or troubleshoot along the way.
What’s the best time of year to plant an espalier tree fence?
The ideal time is early spring (just as buds swell) or early fall (6–8 weeks before frost). This gives roots time to establish before extreme weather. Avoid planting in summer heat or winter cold, which can stress young trees. If you’re training existing trees, prune them in late winter or early spring for best results.
Can I use any tree for an espalier fence, or are there specific varieties?
Not all trees thrive as espaliers! Opt for flexible, fast-growing varieties like apple, pear, peach, or citrus (in warm climates). Avoid rigid trees like oaks or maples—they’ll snap under pressure. Dwarf or semi-dwarf rootstocks work best for fences, as they’re easier to train and maintain.
Is an espalier tree fence more expensive than a traditional wooden fence?
Upfront costs can be higher—$10–$30 per tree (depending on size and variety) vs. $15–$50 per linear foot for wood. However, long-term savings come from no replacement costs, year-round privacy, and potential harvests (like fruit!). Factor in labor for training and pruning, but DIYers can cut costs significantly.
How do I protect my espalier fence from pests or diseases?
Prevention is key! Start with healthy, disease-resistant varieties and ensure proper spacing (3–6 feet apart) for airflow. Monitor for pests like aphids or spider mites—spray with neem oil or insecticidal soap if needed. Prune regularly to remove dead wood, and mulch at the base to deter fungal issues. Copper tape can also deter borers.
What if my espalier trees aren’t growing as expected?
Check these common culprits:
- Poor soil: Amend with compost or organic matter for better drainage.
- Over/under-watering: Keep soil consistently moist but not soggy.
- Improper pruning: Cut back to outward-facing buds to encourage growth.
- Nutrient deficiency: Use a balanced fertilizer in spring and early summer.
Are there alternatives to a living espalier fence?
Yes! If espaliers seem too labor-intensive, consider:
- Vines on trellises (e.g., wisteria, clematis, or grapes).
- Hedges (like boxwood or privet) for low-maintenance privacy.
- Ornamental grasses (e.g., pampas grass) for texture and height.
- Living walls with shallow-rooted plants in modular planters.
Wrapping up and next steps
An espalier tree fence isn’t just a trend—it’s a game-changer for small spaces, blending beauty, functionality, and sustainability. Whether you’re craving privacy, fresh fruit, or a stunning focal point, this vertical garden solution delivers year-round drama with minimal footprint. 🌿✨
Ready to transform your yard? Start by sketching your design, gathering supplies, and choosing the perfect tree variety. Take the first step today—your future garden (and neighbors!) will thank you.