Pruning
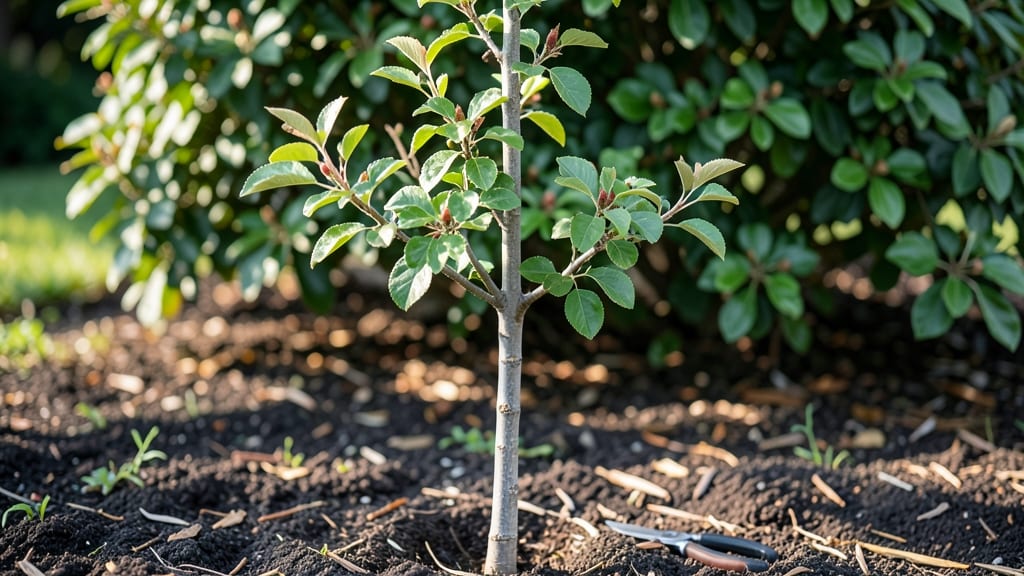
Planting a pear tree sapling this fall means a frost-hardy canopy in just a few years—if you prune right from day one. 🌱 I learned the hard way that skipping those first cuts leads to weak branches and fewer pears, but the right technique keeps your tree strong through winter and ready to fruit by summer.
The secret isn’t complicated: three simple cuts at planting time shape the tree’s future. You’ll need a sharp pruner, a sunny spot with well-draining soil, and about 30 minutes to get it done. Dwarf varieties stay compact, while standard trees need more space—but both benefit from the same pruning rules.
By next spring, you’ll see new growth where you made those cuts, and the tree’s structure will be sturdy enough to handle snow and wind.
The first harvest might take 3-5 years, but the foundation you build now ensures every branch is strong and every bud has a chance to bloom.
Works for both backyard orchards and small urban gardens—just adjust spacing and support as your tree grows. Let’s get those roots in the ground and those branches shaped for success.
📚 In This Guide
- What you need
- Instructions
- Tips and common mistakes
- Wrapping up and next steps
What you need
- ● Pear tree sapling: A healthy, young sapling (1-3 years old) with a sturdy trunk and branches. Choose a variety known for frost resistance, like Kieffer or Moonglow.
- ● Pruning shears: Sharp, bypass-style shears (4-6 inches) for clean cuts on small branches.
- ● Loppers: Bypass loppers (8-12 inches) for thicker branches (½ inch or larger).
- ● Hand pruners: Anvil-style for emergency cuts (though bypass is preferred).
- ● Rubbing alcohol (70%+) or bleach solution: (1 part bleach to 10 parts water) to sterilize tools between cuts and prevent disease spread.
- ○ Pruning sealant (optional but helpful): Tree wound paint or pruning wax to protect larger cuts (½ inch or wider).
- ● Garden gloves: Heavy-duty, cut-resistant gloves to protect your hands from thorns and sharp tools.
- ● Measuring tape or ruler: For precise branch measurements (especially for the "3 simple cuts" technique).
- ● Disposable bags or bucket: To collect pruned branches and debris.
- ● Notebook & pencil: To sketch your sapling’s structure before and after pruning.
- ● Extension pole saw: For taller saplings (if you’re working alone and branches are out of reach).
- ● Tree pruning saw: For stubborn, thick branches that loppers can’t handle.
- ● Ladder (stable & sturdy): Only if your sapling is over 6 feet tall—safety first!
- ● Spray bottle with water: To mist cuts on very large branches (helps seal them naturally).
- ● Camera or phone: To document your progress—because every pruning pro started somewhere!
Step-by-step instructions for planting and pruning a frost-hardy pear tree sapling
Here's how to establish a sturdy young tree that thrives in cooler climates.
🌱 Step 1: Choose and Prepare the Planting Site
Pick a location with full sun exposure (at least 6-8 hours daily) and well-draining soil. Pear trees hate soggy roots, so avoid low spots where water pools. I dig a hole twice as wide as the sapling's root ball but only as deep—planting too deep suffocates the roots and encourages rot.
Loosen the soil at the bottom of the hole with a shovel or your hands. If your soil is heavy clay, mix in 2-3 inches of compost from the provided materials to improve drainage. Tap the sapling's container gently to release it, then remove it carefully without breaking the root ball. Real talk: if the roots are circling tightly, gently tease them apart with your fingers before planting.
🪴 Step 2: Plant and Stake for Stability
Position the sapling in the center of the hole so the top of the root ball sits 1-2 inches above ground level. This prevents soil from settling later and burying the trunk. Fill the hole halfway with soil, then water deeply to settle it. After the water drains, add more soil until the hole is full but don't pack it down—you want air pockets for root growth.
Stake the sapling only if it leans noticeably. Use two stakes placed 6 inches from the trunk on opposite sides, tied loosely with soft fabric strips (no wire—it cuts into bark). The goal is to support the tree without restricting its natural movement, which strengthens the trunk over time. Water again after staking to help roots settle into place.
✂️ Step 3: Prune for Strong Structure and Frost Resistance
Wait until late winter or early spring (just before buds swell) to prune. Remove any dead, damaged, or crossing branches first—these compete for energy and invite disease. I make cuts just outside the branch collar (the swollen area where the branch meets the trunk) using clean, sharp pruners. Don't leave stubs; they rot and weaken the tree.
Shape the canopy by selecting 3-4 strong, evenly spaced branches to form the main structure. Cut back these branches by one-third to encourage bushier growth. Avoid heavy pruning in the first year—you're training the tree, not shaping a mature canopy. Water deeply after pruning to help the tree recover.
☀️ Step 4: Maintain Through the First Growing Season
Water deeply once a week during dry spells, aiming for 1-1.5 gallons per watering. You'll know you're doing it right when water reaches 12 inches deep—stick your finger in the soil to check. Mulch the base with 2-3 inches of organic mulch, keeping it 6 inches away from the trunk to prevent rot. This conserves moisture and protects roots from temperature swings.
Monitor for pests like aphids or scale early in the season. A strong spray of water usually knocks them off, but if infestations persist, apply neem oil (if available) as a natural deterrent. Avoid fertilizing in the first year—your sapling has enough energy to establish roots without extra nutrients.
Tips & tricks for frost-hardy pear tree sapling success
Here's what I've learned from years of planting these resilient trees—simple tricks that make all the difference.
Sunlight Secret: That 6-8 hours of full sun is non-negotiable, but here's the thing: morning sun is more important than afternoon. East-facing locations get the gentle warmth without the harsh afternoon heat that can stress young roots. If your yard has partial shade, prioritize the sunniest spot you can find—even an extra hour makes a difference in winter survival.
Root Ball Rescue: Before planting, check for those tight, circling roots that form when saplings grow in containers. I've seen gardeners skip this step and end up with stunted trees. Gently separate those roots with your fingers—it takes about 30 seconds and prevents the dreaded "pot-bound" growth that weakens your tree. Think of it as giving your sapling a fresh start before it even hits the ground.
Pruning Precision: When shaping your canopy in Step 3, focus on creating an "open center" by removing branches that grow inward. This improves air circulation and reduces frost damage in winter. I like to visualize a vase shape—wider at the top than the bottom. And remember, those one-third cuts should be made just outside the branch collar, never leaving a stub. A clean cut heals faster and looks professional.
Watering Wisdom: Those 1-1.5 gallons per week might seem like a lot, but here's the trick: water slowly over 15-20 minutes to let it soak deep. Fast watering just wets the surface. I use a garden hose with a slow setting or a soaker hose—both ensure that water reaches those 12 inches deep where the roots need it most. The soil should feel moist but not soggy; you're aiming for "damp sponge" consistency.
Pro Tips for Pear Tree Sapling
- Here's what I've learned from years of planting these resilient trees—simple tricks that make all the difference.
- Sunlight Secret: That 6-8 hours of full sun is non-negotiable, but here's the thing: morning sun is more important than afternoon.
- Root Ball Rescue: Before planting, check for those tight, circling roots that form when saplings grow in containers.
Frequently asked questions
Got questions about growing and caring for your pear tree sapling? You’re not alone! Here are some of the most common concerns—plus quick, practical answers to keep your young tree thriving.
When is the best time to plant a pear tree sapling?
The ideal time to plant your sapling is late fall or early spring—when the soil is workable but not frozen. This gives roots time to establish before summer heat or winter frost. Avoid planting in extreme heat or cold, as stress can stunt growth. If you must plant in summer, water deeply daily for the first 2 weeks.
How do I prune a young pear tree sapling correctly?
Focus on three key cuts:
- Remove any dead, diseased, or crossing branches at the base.
- Trim back overly vigorous shoots to encourage a balanced canopy.
- Prune water sprouts (vertical shoots) to redirect energy to fruit production.
Why aren’t my pear tree sapling’s leaves turning green?
Yellow or pale leaves often signal nutrient deficiencies (like nitrogen or iron) or overwatering. Test your soil pH (ideal: 6.0–7.0) and amend with compost if needed. Yellowing between veins? It’s likely iron chlorosis—apply chelated iron or mulch with well-rotted manure. Need more help?
What pests should I watch for on a pear tree sapling?
Keep an eye out for:
- Pear psylla: Tiny insects causing curled leaves—spray with neem oil or insecticidal soap.
- Codling moths: Worms in fruit—use pheromone traps or organic sprays like kaolin clay.
- Aphids: Sap-sucking pests—blast off with water or introduce ladybugs.
Can I grow a pear tree in a container?
Yes! Dwarf varieties (like ‘Hooded’ or ‘Moonglow’) thrive in 5-gallon+ containers with well-draining soil. Use a large pot with drainage holes and repot every 2–3 years. Place in full sun (6+ hours/day) and water when the top inch of soil is dry. Pro tip: Fertilize monthly with a balanced fruit-tree formula in spring/summer.
How cold-hardy are pear tree saplings?
Most pear varieties tolerate USDA Zones 4–8, but young saplings (<3 years old) need extra winter protection. Mulch the base with straw or wood chips (3–4 inches deep) and wrap the trunk with tree guard to prevent sunscald. Avoid heavy snow buildup—gently brush it off to prevent branch breakage.
Wrapping up and next steps
Growing a pear tree sapling with a frost-hardy canopy is totally within your reach—just remember those three simple cuts! Pruning with purpose ensures a sturdy, productive tree while keeping winter’s chill at bay. 🌳❄️
Now that you’re armed with the know-how, it’s time to get your hands dirty! Start by marking your calendar for late winter or early spring—your pear tree’s future health depends on timing.
Grab those pruners, take a deep breath, and watch your sapling thrive into a beautiful, resilient tree for years to come.
Pro tip: Snap a photo of your pruned branches for reference as your tree grows—you’ll love tracking its progress! 📸✨