
Pruning
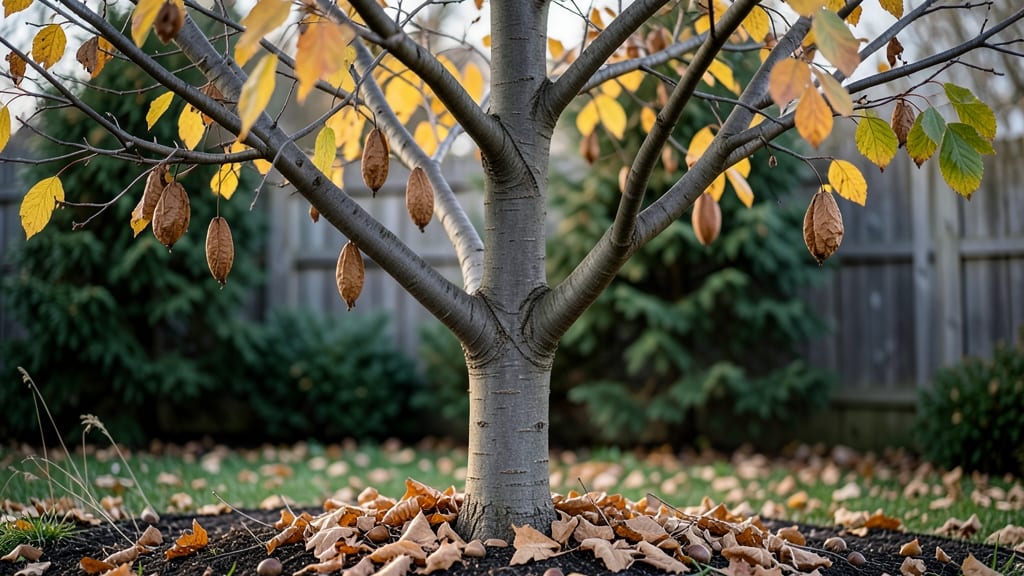
Your pawpaw tree’s winter survival starts with the right cuts—pruning now builds the frost-resistant framework that keeps it thriving through cold snaps. I learned this the hard way after a late winter thaw followed by a sudden freeze left my tree looking like a sad, leafless skeleton.
The key isn’t just cutting back; it’s shaping the tree to handle weight, improve airflow, and protect vulnerable branches from cracking under ice.
You’ll need sharp pruning shears, a ladder (for taller trees), and a clear day when temps are above freezing—32°F is the absolute minimum for safe work. Focus on removing dead, diseased, or crossing branches first, then thin out the canopy by about 20-30% to reduce wind damage.
Every cut should be clean and angled just above a bud, pointing in the direction you want new growth to go. This isn’t about drastic changes; it’s about setting your pawpaw up for a strong spring comeback.
After pruning, the real magic happens with mulch and protection. Spread a 3-inch layer of wood chips or straw around the base (keep it 6 inches away from the trunk) to insulate roots, and wrap young trees in burlap or frost cloth if your winters dip below -10°F.
The goal is to mimic the tree’s natural dormancy needs—pawpaws handle cold better than most people think, but they still need a little help when temperatures flirt with record lows. By spring, you’ll see fresh green shoots pushing through, proof that your winter prep paid off.
This method works for both young saplings and mature trees, though older specimens need less aggressive pruning. If you’re in Zone 5 or colder, add extra mulch in early winter before the ground freezes solid.
The payoff? A tree that not only survives winter but comes back stronger, with fewer weak branches and more energy for fruit production next season. Let’s get those shears ready—your pawpaw’s revival starts now.
📚 In This Guide
- What you need
- Instructions
- Tips and common mistakes
- Wrapping up and next steps
What you need
- ● Pruning shears: Bypass pruners (sharp, 6–8" blades) for small branches (¼"–¾" diameter). 1 pair required.
- ● Loppers: Bypass or anvil type (10–14" handles) for medium branches (¾"–2" diameter). 1 pair required.
- ● Pruning saw: Curved-tooth or folding saw for thick branches (2"+ diameter). 1 saw required.
- ● Gloves: Heavy-duty, cut-resistant (nitrile or leather) to protect hands from thorns and sap. 1 pair required.
- ● Disinfectant: 70% isopropyl alcohol or bleach solution (1:9 ratio) to sterilize tools between cuts. Small bottle or spray required.
- ○ Rubbing alcohol or hand sanitizer: For cleaning hands after pruning. Optional but recommended.
- ○ Pruning sealant: Tree wound dressing (optional) for large cuts (>2" diameter). Small tube required.
- ● Disposable bags or bucket: For collecting debris. 1–2 bags or a 5-gallon bucket required.
- ● Weather check: Prune on a dry, frost-free day (ideally 40–60°F). Avoid pruning after rain or during freezing temps.
- ● Safety glasses: Protect eyes from debris. 1 pair required.
- ● Long sleeves/pants: Lightweight, long-sleeve clothing to guard against sap and thorns. Recommended.
- ○ Ladder or step stool: If your tree is over 6 feet tall. Optional, based on tree height.
- ○ Map or sketch: Quick notes or a camera to mark branches to remove. Optional but helpful.
Step-by-step guide to pruning pawpaw trees in winter
Winter's the perfect time to shape your pawpaw tree for stronger spring growth.
Assess the Tree's Structure Before Pruning
Start by examining your pawpaw tree in late winter, just as buds begin to swell but before new growth emerges. Look for dead, diseased, or crossing branches—these are your priorities. I always scan from the ground up, using a flashlight to spot hidden issues in dense foliage. Healthy branches have smooth bark with a slight sheen, while deadwood appears gray, brittle, and often covered in lichen.
Check for branches growing toward the center of the tree—these compete for sunlight and weaken the structure. You'll also spot any suckers or watersprouts that popped up last season. Mark these with a small piece of twine or a paint marker before you begin cutting. This step ensures you don't miss anything while working.
Remove Dead, Diseased, and Problem Branches
Use sharp, clean pruning shears or a pruning saw for branches over ½ inch in diameter. Cut just outside the branch collar—the swollen area where the branch meets the trunk—to promote faster healing. For small branches, make the cut at a 45-degree angle about ¼ inch above a bud facing the direction you want growth to continue.
Sterilize your tools between cuts by wiping them with rubbing alcohol or a bleach solution to prevent spreading disease. I always remove larger dead branches first, working my way down to smaller limbs. This keeps the tree stable and prevents excessive weight on remaining branches. Discard all diseased wood immediately—don't compost it.
Thin Out Crossing and Overcrowded Branches
Focus on removing branches that cross or rub against each other—these create wounds where pests and diseases enter. Aim to create an open center that allows sunlight to reach the inner branches. Pawpaw trees naturally grow with a vase-like shape, so I remove any branches growing straight upward unless they're part of the main scaffold.
Step back frequently to visualize the tree's form. You want a balanced structure with branches spaced evenly along the trunk. Avoid removing more than 25% of the tree's foliage in one season—this stresses the plant. If you're unsure, take a photo before pruning to compare your progress.
Shape for Airflow and Light Penetration
Pawpaw trees thrive with good airflow, so open up the canopy by selectively thinning branches. Start at the bottom and work upward, removing any limbs that block light from reaching lower branches. This encourages fruit production along the entire tree rather than just the top.
For larger branches, make cuts just outside the branch collar and avoid leaving stubs. Smooth the cut with a pruning knife if needed. I always step back after each cut to check the tree's balance. The goal is to create a framework that supports healthy growth while preventing future overcrowding.
Tips & tricks for perfect pawpaw tree winter pruning
Here's what nobody tells you about pruning pawpaws—these tricks make all the difference between a healthy spring and a struggling tree.
Tool Preparation: Sterilize your pruning shears and saw between every cut using rubbing alcohol or a bleach solution. I learned this the hard way after seeing fungal infections spread between cuts. For larger branches over ½ inch, use a pruning saw to avoid tearing the bark—this prevents disease entry points. Always carry a small spray bottle with the sterilizing solution for quick clean-ups between branches.
Visualizing the Final Shape: Before making any cuts, step back and visualize your tree's ideal structure. Pawpaws naturally grow in a vase shape, so aim to maintain that open center while removing branches that grow straight upward or inward. Take a photo before you start—this reference point helps you make balanced decisions as you work. I've seen many gardeners over-prune because they lost sight of their original vision midway through.
Branch Collar Technique: When removing branches in Step 2, always cut just outside the branch collar—the swollen area where the branch meets the trunk. This promotes faster healing and prevents unsightly stubs. For small branches, make your cut at a 45-degree angle about ¼ inch above a bud facing outward. This simple technique makes a huge difference in how quickly your tree recovers from pruning.
Seasonal Timing Insight: Late winter, just as buds begin to swell but before new growth emerges, is the absolute best time for pruning. This timing allows your tree to heal before spring's growth surge. If you're unsure about the exact moment, look for those tiny bud swellings—they're your cue to start. I've seen trees pruned too early (during dormancy) struggle more than those pruned at this precise window.
Pro Tips for Pawpaw Tree Winter
- Here's what nobody tells you about pruning pawpaws—these tricks make all the difference between a healthy spring and a struggling tree.
- Tool Preparation: Sterilize your pruning shears and saw between every cut using rubbing alcohol or a bleach solution.
- Visualizing the Final Shape: Before making any cuts, step back and visualize your tree's ideal structure.
Frequently asked questions
Got questions about keeping your pawpaw tree thriving through winter? Here are some common concerns—and their answers—to help you prune with confidence!
When is the best time to prune pawpaw trees in winter?
The ideal window is late winter (February–early March), after the worst frost but before buds swell. Pruning too early risks damaging tender wood, while waiting too long may encourage new growth vulnerable to spring frosts. Aim for a crisp, dry day for cleaner cuts!
Can I prune pawpaw trees in freezing temperatures?
Avoid pruning when temps drop below 20°F (-6°C). Cold wood is brittle and can splinter, making cuts messy and inviting disease. Wait for a day with temps above freezing—your tree (and tools!) will thank you. Think of it as a winter break for both of you.
How do I know which branches to cut back on a pawpaw tree?
Focus on:
- Dead/dying branches (no leaves, cracked bark, or hollow centers).
- Crossing or rubbing branches (they’ll compete for sunlight and damage each other).
- Suckers (shoots at the base) unless you’re propagating.
- Overcrowded growth—aim for an open canopy to improve airflow (and fruit production!).
What if my pawpaw tree looks sad after winter? Is it too late to prune?
If branches are brown but still pliable, they’re likely dormant and can be pruned. But if wood is black, mushy, or oozing sap, it’s dead—remove it immediately. For extreme cases, light pruning in early spring (March) can stimulate recovery. Monitor for pests or disease first!
Are there alternatives to winter pruning for pawpaw trees?
While winter pruning is ideal, you can lightly prune in late fall (October–November) to remove only dead or diseased wood. Avoid heavy cuts—pawpaws are sensitive to late-season stress. Summer pruning (June–July) is another option, but it may reduce next year’s fruit yield. Pro tip: Always sterilize tools with rubbing alcohol to prevent spreading pathogens!
Wrapping up and next steps
Winter is the perfect time to shape your pawpaw tree for a bountiful spring revival—just remember to prune after the first hard frost but before the ground freezes.
By removing dead wood, thinning dense canopies, and promoting airflow, you’re setting the stage for healthier growth and those delicious pawpaw fruits. Your efforts now will pay off in summer’s sweet rewards!
Ready to take action? Grab your tools, follow the steps above, and give your pawpaw tree the care it deserves. 🌱✂️ Whether you’re a seasoned gardener or just starting out, every cut counts toward a thriving orchard. Happy pruning!