Pruning
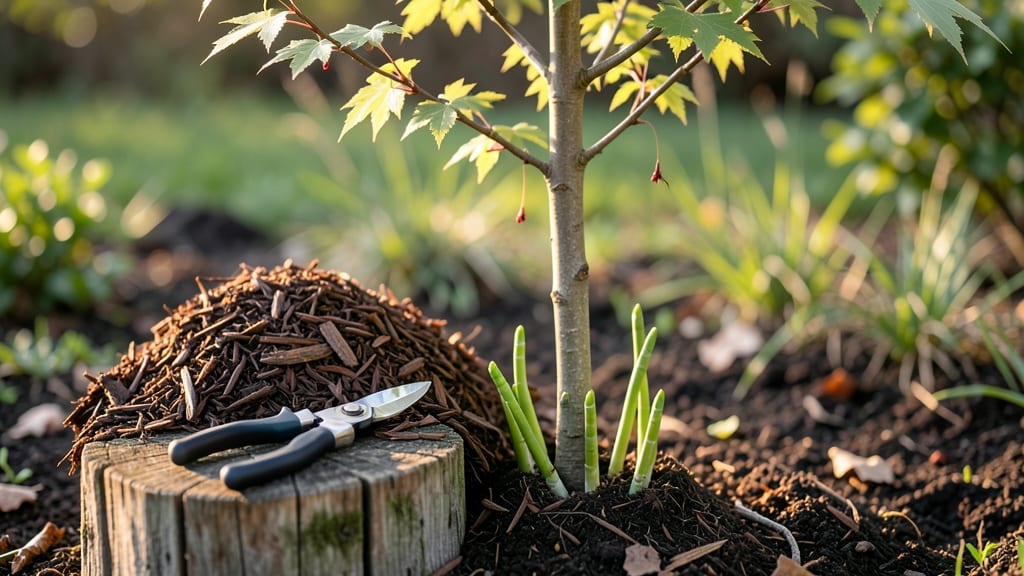
"How to stop tree sprouts without killing the tree—it’s all about timing and technique, and I’ve finally cracked the code after years of trial and error. 🌳
Most people grab pruners and hack away, only to watch the sprouts return stronger. The secret is cutting at the base where the sprout meets the root collar, without damaging the tree’s bark.
You’ll need sharp pruners, gloves, and a clear day to work—no rushing. This method works for fruit trees, shade trees, and even stubborn suckers from your neighbor’s oak.
What you’ll end up with is a cleaner base, fewer regrowths, and a tree that directs its energy into stronger branches and foliage. The first few cuts might feel hesitant, but once you see the difference in just a few weeks, you’ll never go back to brute-force trimming again.
Works for any mature tree, whether it’s a young fruit tree or a decades-old maple. The key is patience—one sprout at a time, and the tree will thank you with years of healthier growth.
📚 In This Guide
- What you need
- Instructions
- Tips and common mistakes
- Wrapping up and next steps
What you need
- ● Pruning shears or loppers – Choose bypass pruners (sharp, clean blades) for precision cuts on small sprouts. For thicker sprouts, opt for loppers with 6- to 8-inch handles for leverage.
- ● Hand pruners – A pair of anvil pruners (for tougher cuts) or bypass pruners (for cleaner cuts) for finer work.
- ● Gloves – Heavy-duty gardening gloves (waterproof, with reinforced palms) to protect from thorns, sap, or rough bark.
- ○ Disinfectant (optional but recommended) – A 70% isopropyl alcohol spray or bleach solution (1 part bleach to 9 parts water) to sterilize tools between cuts and prevent disease spread.
- ● Rubbing alcohol or hand sanitizer – For cleaning hands after handling sap or sap-infested tools.
- ● Small trash bag or bucket – To collect pruned sprouts and debris.
- ○ Pruning sealant (optional) – A tree wound sealant (like Tanglefoot Tree Seal) to cover larger cuts if needed (though many experts argue it’s unnecessary for small sprouts).
- ● Ladder or step stool – If sprouts are high up, use a stable, extendable ladder (3+ feet tall) or a foldable step stool with non-slip feet.
- ● Safety glasses – To shield eyes from debris or sap splashes.
- ● Long-sleeved shirt and pants – Protects against scratches, sap, or insect bites.
- ○ Notebook & pen (optional) – To jot down notes on sprout locations or tree health observations.
Step-by-Step guide for removing tree sprouts safely
Here's how to control unwanted growth while keeping your tree strong.
🌱 Step 1: Identify and Assess the Sprouts
First, examine the sprouts carefully. These are called "water sprouts" or "suckers" and typically grow from the trunk, branches, or even the roots. Look for thin, fast-growing shoots that don't resemble the tree's natural growth pattern. These are the ones you want to remove—never prune the tree's main trunk or primary branches.
Here's the thing—some sprouts are actually beneficial. If they're growing from the base of the tree or along a branch and look like miniature versions of the tree's natural growth, leave them alone. These can become future limbs and strengthen the tree. Only remove the weak, leggy, or aggressive-looking ones that drain energy from the main tree.
✂️ Step 2: Use the Right Tools and Technique
Grab your pruning shears or a sharp hand pruner—never use dull tools or scissors. Cut the sprout as close to the trunk or branch as possible, but don't leave a stub. A clean cut prevents disease and encourages faster healing. If the sprout is thicker than your shears can handle, use a pruning saw for a precise cut.
I like to make the cut at a slight angle to prevent water from pooling on the wound. This keeps the area dry and reduces the risk of rot. If the sprout is very small, you can even snap it off by hand—just twist gently until it breaks cleanly. Avoid tearing the bark, which can damage the tree.
🌿 Step 3: Monitor and Repeat as Needed
After trimming, keep an eye on the area for new sprouts. Trees often respond to pruning by sending up more growth, especially if they're young or stressed. Check the tree every 2-4 weeks during the growing season (spring and summer) to catch any new sprouts early. Early removal is easier and less stressful for the tree.
Don't overdo it—removing too many sprouts at once can weaken the tree. Focus on the most aggressive ones first. If you notice the tree looking tired after pruning (yellowing leaves, slow growth), back off and let it recover. A healthy tree will bounce back quickly, while an over-pruned one may struggle.
☀️ Step 4: Support the Tree's Health Long-Term
To prevent future sprouts, give your tree the care it needs. Water deeply once a week during dry spells, especially if the tree is young or newly planted. Mulch around the base with 2-3 inches of organic mulch (like wood chips or shredded bark) to retain moisture and regulate soil temperature. Keep the mulch 6 inches away from the trunk to avoid suffocating the roots.
Fertilize lightly in early spring with a balanced, slow-release fertilizer. Too much fertilizer can encourage weak, fast growth—including more sprouts. A little goes a long way. If your tree is particularly prone to sprouts, consider applying a dormant oil spray in late winter to discourage new growth while the tree is still dormant.
Tips & tricks for healthy tree maintenance
Keeping your tree strong while managing unwanted sprouts takes the right approach—and a few smart tricks can make all the difference.
Timing is Everything: In Step 3, when you're checking every 2-4 weeks, focus on early removal. New sprouts are easiest to handle when they're just a few inches tall. I've seen stubborn sprouts grow into thick, tangled messes in just two weeks—don't let them get that far! The earlier you catch them, the less stress on your tree.
Tool Selection Matters: For Step 2, invest in a good pair of pruning shears with bypass blades—they make clean cuts that heal faster. I used to struggle with dull tools that tore the bark, which can invite disease. A sharp tool glides through sprouts like butter, leaving a smooth surface that seals quickly. For larger sprouts, a pruning saw with a curved blade gives you better control and precision.
Seasonal Strategy: Late winter is your best time to tackle sprouts before new growth begins. In Step 4, that dormant oil spray I mentioned? Apply it right after your last pruning session in winter. It creates a protective barrier that discourages new sprouts from forming. Just be sure to follow up with proper watering in spring to help the tree recover from any winter stress.
Visual Cues for Identification: In Step 1, look for these red flags: sprouts growing straight up from the trunk (never from branches), thin stems with no leaves, and growth that looks more like weeds than tree branches. These are the ones to remove. Healthy tree growth should have leaves at the tips and grow outward, not upward. I once removed a sprout thinking it was a sucker, only to realize it was actually a new branch—my mistake taught me to look closer!
Pro Tips for Stop Tree Sprouts Without Killing Tree
- Keeping your tree strong while managing unwanted sprouts takes the right approach—and a few smart tricks can make all the difference.
- Timing is Everything: In Step 3, when you're checking every 2-4 weeks, focus on early removal.
- Tool Selection Matters: For Step 2, invest in a good pair of pruning shears with bypass blades—they make clean cuts that heal faster.
Frequently asked questions
Got questions about managing tree sprouts without harming your tree? You’re not alone!
Here are some of the most common concerns—and practical answers—to help you tackle this task like a pro. Let’s dive in.
What’s the best time of year to prune tree sprouts?
For most trees, late winter or early spring—just as new growth begins—is ideal. This timing ensures you remove sprouts before they drain energy from the tree, but after the worst winter stress has passed. Avoid pruning in fall, as it can stimulate late-season growth that won’t harden off before cold weather.
Can I just pull out tree sprouts by hand?
While pulling may seem easy, it often damages the root system or leaves stubborn stumps that regrow. Instead, use sharp pruners to cut sprouts at the base (or slightly below) to minimize stress. For thick sprouts, a small pruning saw works better. Pro tip: Wear gloves—sprouts can be sharp!
Will removing sprouts hurt my tree’s health?
Not if done correctly! Sprouts compete for nutrients, weakening the tree over time. By removing them properly, you’re actually helping the tree redirect energy to stronger branches. Just avoid over-pruning—never remove more than 25% of the tree’s foliage in one season.
How often should I check for new sprouts?
Monitor your tree monthly during the growing season (spring to summer). Sprouts grow fast, so early intervention is key. Set a reminder or tie a ribbon around the trunk to mark where you last pruned. Consistency prevents a full-blown sprout invasion!
Are there chemical-free alternatives to stop sprouts?
Yes! For stubborn sprouts, try copper-based pruning sealants or horticultural wax to coat cut surfaces (prevents disease). You can also apply a thin layer of mulch around the base to suppress new growth—just keep it a few inches away from the trunk to avoid rot.
What if my tree keeps sprouting in the same spot?
This often means the root is still active in that area. Dig carefully around the base (1–2 inches deep) to expose the root and trim it with sterilized pruners. Apply a root inhibitor gel to the cut root to discourage regrowth. Patience is key—it may take a few seasons to fully suppress the spot.
Wrapping up and next steps
Stopping tree sprouts without harming your tree is all about precision, patience, and the right techniques. 🌱 By using sharp tools, timing your pruning correctly, and applying organic methods like mulching or root barriers, you can maintain a healthy tree while keeping unwanted growth in check.
Remember, consistency is key—regular maintenance will save you bigger headaches (and bigger cuts!) down the road.
Now that you’re armed with the know-how, grab those shears and give your tree the TLC it deserves! Start small, observe how your tree responds, and adjust your approach as needed. Happy pruning—your tree (and your yard) will thank you! 🌳✨