
Propagation
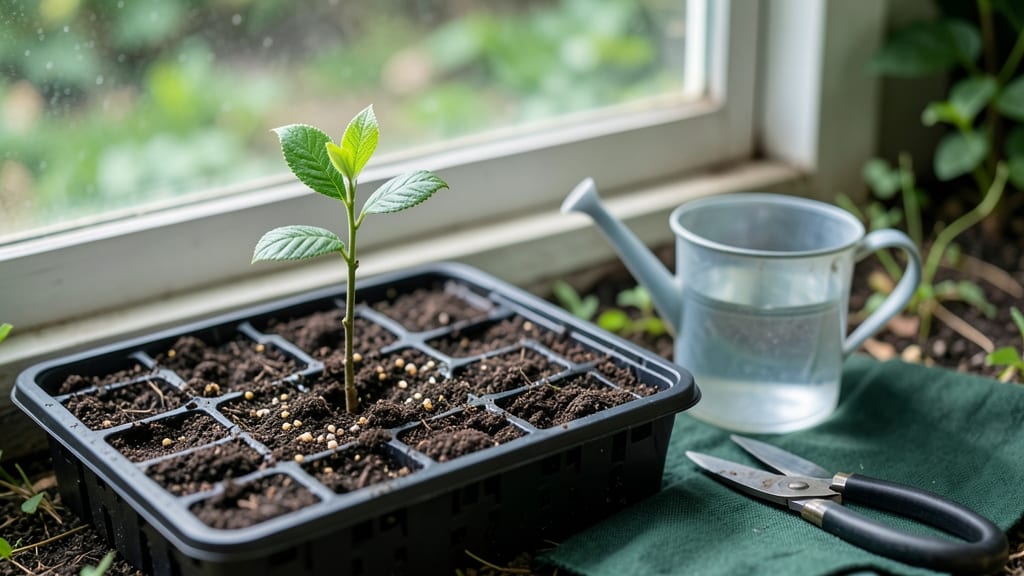
Starting a cherry tree from seed feels like planting a future you might never see—until that first sweet, tart fruit appears after years of waiting. 🌱 The process isn’t just about patience; it’s about unlocking a tree that’s uniquely yours, with roots (literally) in your own backyard.
My first attempt took me three years to reach the first blossoms, but the satisfaction of biting into a cherry grown from a seed I saved myself? Unmatched.
The secret lies in mimicking nature’s timing: seeds need a cold stratification period to break dormancy, just like they would underground. You’ll need a mix of potting soil and sand, a plastic bag with tiny holes, and a refrigerator for about 90 days—no fancy equipment, just a little science.
Most people rush this step, and that’s when germination stalls. I learned that the hard way after my first batch of seeds sprouted unevenly.
By the time you’re planting those little seedlings in the ground, you’ll be thinking ahead to year three, when your tree finally bears fruit. The cherries might not look like store-bought varieties—seed-grown trees often have smaller, less predictable fruit—but the taste?
That’s the real reward. Plus, you’ll have a tree that’s perfectly adapted to your climate, something you can’t guarantee with nursery-bought saplings.
This method works best for sweet cherries (sour cherries are easier to grow from seed), and it’s perfect for gardeners who love long-term projects. The payoff isn’t just fruit—it’s the story of a tree that started with a single seed in your hands. Ready to begin?
📚 In This Guide
- What you need
- Instructions
- Tips and common mistakes
- Wrapping up and next steps
What you need
- ● Cherry seeds: Fresh, pitted seeds from ripe cherries (10–20 seeds for best odds—some may not sprout!). Pro tip: 💡 Use organic, pesticide-free fruit to avoid seed contamination.
- ○ Small pots or seed trays: 4–6 inches deep, with drainage holes (3–5 pots for your seed batch). Optional: Biodegradable peat pots for easy transplanting!
- ● Well-draining potting mix: A blend of 50% peat moss or coconut coir and 50% perlite or coarse sand (1–2 bags, depending on pot size). 🌡️ Avoid garden soil—it’s too dense and can cause rot!
- ● Plastic wrap or humidity dome: To create a mini greenhouse effect (1 sheet or dome per tray).
- ● Spray bottle: For gentle watering (1 small bottle). ✨ Avoid overwatering—seeds need moisture, not soggy soil!
- ● Grow lights or sunny windowsill: A south-facing window or LED grow lights (12–16 hours/day) for seedlings.
- ● Patience! 😉 Cherry trees from seed can take 3–5 years to bear fruit—plan accordingly!
- ● Seed stratification kit: If you’re in a warm climate, a refrigerator (40–50°F for 4–6 weeks) mimics winter cold to break dormancy.
- ● Fungicide (like hydrogen peroxide 3%): 1 tsp per cup of water to prevent mold on seeds.
- ● Fertilizer (balanced 10-10-10 or seaweed extract): Light dose once seedlings sprout true leaves.
- ● Pruning shears: For trimming leggy seedlings later.
- ● Garden journal: To track seedling progress, watering dates, and growth milestones!
Step-by-Step instructions for growing a cherry tree from seed
Here's how to turn a single pit into a thriving tree—with patience as your best tool.
🌱 Step 1: Extract and Stratify the Cherry Pit
First, clean the seed by removing any remaining fruit flesh from the pit. Rinse it thoroughly under cool water, then pat dry with a paper towel. The key to germination is stratification—mimicking winter's cold period. Place the pit in a small plastic bag with a damp paper towel (not soaking wet—just enough to feel damp). Seal the bag and refrigerate for 8-12 weeks at 34-40°F. Check monthly to ensure the towel stays moist; if it dries, spritz lightly with water.
This cold treatment breaks seed dormancy. I like to label the bag with the variety and date—cherry pits can stay viable for years, but fresh ones germinate faster. Real talk: if you skip stratification, you might wait six months or more for germination, or never see sprouts at all.
⏰ Step 2: Plant the Stratified Pit in a Germination Mix
After stratification, fill a small 4-inch pot with a sterile seed-starting mix (never garden soil—it’s too dense). Make a ½-inch deep hole in the center and place the pit pointy side up (the flat side was attached to the fruit). Cover it with ¼ inch of soil—too deep and the seedling won’t break through. Water gently until the soil is evenly moist but not soggy. Place the pot in a warm, bright spot (65-75°F) with indirect light.
Here’s the thing—cherry pits germinate slowly. You’ll likely see nothing for 4-6 weeks, then a tiny sprout will emerge. Don’t move the pot or disturb the soil. Once the sprout reaches 1 inch tall, you can gradually introduce direct sunlight for a few hours daily to harden it.
🌿 Step 3: Transplant and Care for the Seedling
When the seedling has 3-4 true leaves (not just the first tiny cotyledons), it’s ready for its first transplant. Choose a 6-inch pot with fresh seed-starting mix and plant it at the same depth it was growing before. Water thoroughly after transplanting to settle the soil around the roots. Place the pot in full sun (6+ hours daily) and keep the soil consistently moist but never waterlogged. Cherry seedlings are delicate—overwatering causes root rot, while underwatering stunts growth.
This is the moment that matters: prune the main stem when it reaches 6 inches tall to encourage branching. Use clean scissors to snip just above a set of leaves where you want a side branch to form. You’ll see new growth sprout from those leaf nodes in 2-3 weeks. Without pruning, your tree will grow tall and leggy with no fruit-bearing branches.
☀️ Step 4: Acclimate and Plant Outdoors
After 6-8 weeks of indoor growth (or when the seedling reaches 12 inches tall), it’s time to move it outside. Start by placing the pot in a sheltered, shaded spot for 1-2 hours the first day. Gradually increase outdoor time over 10-14 days, moving it to morning sun first, then full sun by day 7. This hardening-off process prevents shock from temperature and wind changes.
Once the seedling tolerates a full day outside without wilting, plant it in the ground or a large container (at least 12 inches deep). Choose a location with full sun and well-draining soil. Dig a hole twice as wide as the root ball but no deeper. Water deeply before and after planting to reduce transplant shock. Mulch around the base with 2 inches of organic mulch to retain moisture and protect roots.
✂️ Step 5: Prune and Maintain for Fruit Production
In its first year, focus on structural pruning to shape the tree. Remove any dead, crossing, or weak branches using clean pruning shears. Aim to create an open-center shape with a strong central leader. Prune in late winter or early spring before new growth begins. Avoid heavy pruning—cherry trees are sensitive, and aggressive cuts can stress the plant.
Fertilize lightly in early spring with a balanced, slow-release fertilizer (10-10-10). Water deeply once a week during dry spells, but reduce watering in fall to prepare the tree for dormancy. It takes 3-5 years for a seed-grown cherry tree to bear fruit, but with patience, you’ll have a tree that produces sweet, homegrown cherries for decades. Don’t skip the pruning—it’s what turns a wild sapling into a productive tree.
Tips & tricks for growing a cherry tree from seed
Here’s what I’ve learned from years of growing cherry trees from seed—mistakes I made, shortcuts that work, and the little details that make all the difference.
Stratification Success: The 8-12 weeks of cold treatment in Step 1 is non-negotiable, but here’s the trick: use a second plastic bag to wrap the first one loosely. This creates a tiny air pocket that prevents mold while keeping the towel moist. I’ve had pits spoil when condensation built up in sealed bags—this method solves that. Also, if your fridge is warmer than 40°F, move the bag to a cooler spot like a garage or basement. Consistency matters more than exact temperature.
Germination Patience: Don’t be discouraged if nothing happens for 4-6 weeks after planting in Step 2. I’ve seen sprouts appear as late as 8 weeks. The key is to keep the soil consistently moist but never soggy—use a spray bottle to mist the surface rather than watering from above. Once that first sprout breaks through, resist the urge to move the pot. Cherry seedlings are sensitive to disturbance, and even a slight shift can stunt growth. Place the pot in a warm spot with indirect light, like a sunny windowsill with sheer curtains.
Transplant Timing: In Step 3, wait until you see 3-4 true leaves—not the first tiny cotyledons—to transplant. I learned this the hard way by moving seedlings too soon, which caused shock and stunted growth. When transplanting, use a small trowel to gently loosen the soil around the roots before transferring to the new pot. This reduces transplant shock. And here’s a pro move: label your pots with the date and variety if you’re growing multiple pits—you’ll forget otherwise!
Hardening Off: The 1-2 hour outdoor acclimation in Step 4 is critical, but I’ve found that starting with just 30 minutes on the first day works even better for delicate seedlings. Gradually increase exposure over 10-14 days, and always place the pot in morning sun first. This mimics natural light patterns and prevents sunburn. Watch for wilting—if it happens, move the seedling back indoors and try again the next day with slightly less sun. Once it tolerates full sun, you’re ready for permanent outdoor planting.
Pro Tips for Start A Cherry Tree From Seed
- Here’s what I’ve learned from years of growing cherry trees from seed—mistakes I made, shortcuts that work, and the little details that make all the difference.
- Stratification Success: The 8-12 weeks of cold treatment in Step 1 is non-negotiable, but here’s the trick: use a second plastic bag to wrap the first one loosely.
- Germination Patience: Don’t be discouraged if nothing happens for 4-6 weeks after planting in Step 2.
Frequently asked questions
about growing a cherry tree from seed—because even the most patient gardeners have questions! Here are answers to the most common ones to keep your green thumb thriving.How long does it take for a cherry seed to sprout?
A cherry seed typically takes 4–8 weeks to sprout after cold stratification. Some varieties may take longer, especially if the seed coat is thick. Patience is key—don’t disturb the soil while waiting! If nothing sprouts after 3 months, the seed may not be viable.
Can I plant cherry seeds directly in the ground instead of starting indoors?
Direct sowing is possible in mild climates (USDA Zones 7–9), but cold stratification is still critical. Plant seeds in fall, about ½ inch deep, and mulch heavily. However, starting indoors gives you more control over germination and early growth.
Will a tree grown from seed produce the same fruit as the parent?
Probably not! Seed-grown cherry trees often won’t match the parent’s flavor, size, or disease resistance. For consistent fruit, graft a known variety onto your seedling later. Think of it as a fun experiment—like growing a surprise plant!
What should I do if my cherry seed sprouts but the seedling dies?
Seedlings often struggle with damping off (a fungal issue) or overwatering. Ensure pots have drainage, use sterile soil, and avoid wetting leaves. If mold appears, treat with a fungicide or repot in fresh soil. Keep humidity moderate and light indirect.
Do I need to harden off cherry seedlings before transplanting?
Yes! Acclimate seedlings to outdoor conditions over 1–2 weeks before moving them. Start with 1–2 hours of shade, gradually increasing sun exposure. Skip hardening, and you risk shock—like moving from a cozy nursery to a windy front yard overnight!
Can I save seeds from store-bought cherries to grow trees?
Technically yes, but commercial cherries are often hybridized and may not grow true. Plus, some seeds are treated to prevent sprouting. If you try, use organic, fresh cherries and follow cold stratification steps. Pro tip: Pit seeds from heirloom varieties for better results!
Wrapping up and next steps
Starting a cherry tree from seed is a rewarding journey that blends patience with the joy of nurturing life from scratch.
While it may take 3-5 years to see fruit, every step—from scarifying seeds to transplanting seedlings—teaches you the art of gardening. Don’t let the timeline discourage you! With care, your tiny seed could grow into a thriving tree, offering sweet rewards for years to come.
Ready to take the next step? Plant your seeds today and watch nature unfold. For extra guidance, explore local gardening forums or connect with cherry tree enthusiasts—your green thumb is about to shine! 🌱✨