Propagation
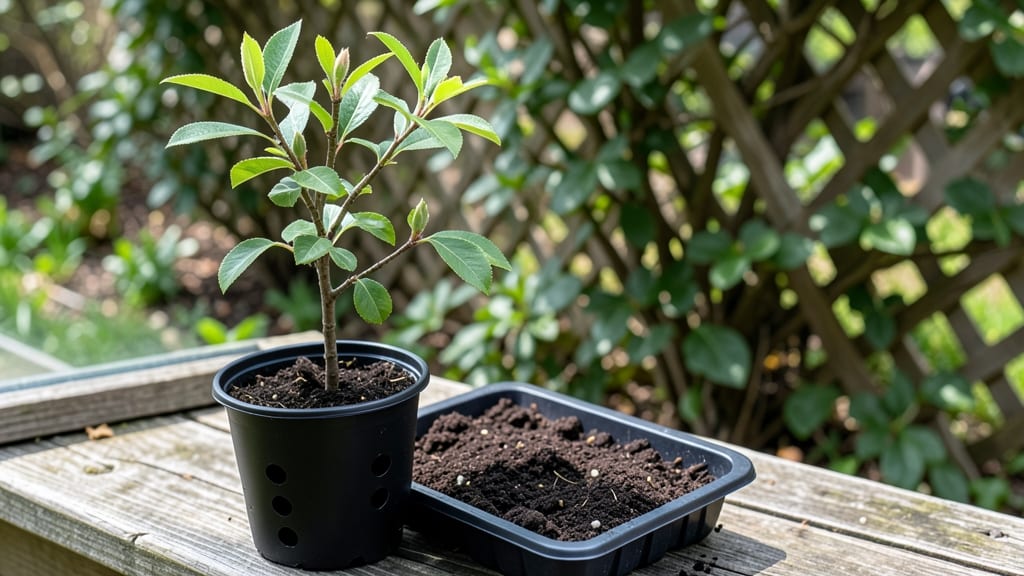
Growing a plum tree from seed is a long-game project that rewards you with a fruit tree you nurtured from the very beginning. 🌱 I started mine last spring with a single pit from a ripe fruit, and while it’s still just a sapling, the thought of future harvests keeps me coming back every day.
The process starts with the seed itself—selecting a fresh, firm pit and giving it a cold treatment (stratification) to break dormancy. You’ll need a small pot, well-draining soil, and a patient mindset, since germination can take 4-8 weeks and fruiting may not happen for 5-10 years.
But the journey is part of the magic.
Once the seed sprouts, you’ll focus on keeping the soil moist but not soggy, providing bright, indirect light, and protecting the young plant from harsh winds.
Early stages are delicate, but with consistent care, you’ll watch it grow into a sturdy tree with the potential to bear fruit that tastes like sunshine.
This method works best in USDA Zones 5-9, where plum trees thrive, but the principles apply anywhere you’re willing to wait. The real reward isn’t just the tree—it’s the story you’ll tell your grandchildren about the seed you planted today.
📚 In This Guide
- What you need
- Instructions
- Tips and common mistakes
- Wrapping up and next steps
What you need
- ● Plum seeds: Fresh, high-quality seeds from a ripe, organic plum (avoid hybrid varieties—they may not grow true to the parent plant). Quantity: 3–5 seeds per attempt.
- ● Small pots or seed trays: Biodegradable or plastic pots (3–4 inches deep) with drainage holes. Quantity: 1 per seed (or shared trays with individual cells).
- ● Well-draining potting mix: A blend of 50% peat or coconut coir, 30% perlite or vermiculite, and 20% compost. Avoid garden soil—it compacts too easily.
- ● Plastic wrap or clear lid: To create a mini greenhouse effect and retain moisture.
- ● Spray bottle: For gentle watering (avoid over-saturating seeds).
- ● Grow lights or sunny windowsill: A south-facing window or LED grow lights (12–16 hrs/day) for seedlings.
- ○ Fertilizer (optional but recommended): A balanced, water-soluble fertilizer (5-5-5 or 10-10-10) for seedlings once they sprout.
- ● Pruning shears: Small, sharp scissors for trimming seedlings later.
- ● Transplanting pot (5–7 gallons): For mature seedlings before outdoor planting.
- ● Mulch: Organic mulch (straw, wood chips) to retain moisture and regulate soil temperature.
- ● Seed stratification kit: If your climate is warm, a refrigerator (34–41°F for 4–8 weeks) mimics winter chilling to break seed dormancy.
- ● Heating mat: Keeps soil warm (70–75°F) to speed up germination.
- ● pH testing kit: Ensures soil pH is 6.0–7.0 (ideal for plum seeds).
- ● Label markers: To track seed varieties and planting dates.
- ● Compost tea or mycorrhizal fungi: Boosts root health during transplanting.
Step-by-step instructions for growing a plum tree from seed
Here's how to start your own fruit-bearing plum tree from seed—it takes time, but the reward is sweet.
🌱 Step 1: Harvest and Prepare the Seeds
Pick plums that are fully ripe but still firm from a healthy tree. Cut them open and scoop out the large, flat seed inside. Rinse the seed to remove any fruit pulp, then let it dry completely on a paper towel for 3-5 days in a warm, dry spot. This prevents mold from forming during cold stratification.
Once dry, place the seeds in a small paper bag or envelope. Store them in the refrigerator's crisper drawer for 6-8 weeks—this mimics winter's cold period and breaks seed dormancy. I mark the bag with the date so I don't forget when to plant them after cold treatment.
🌿 Step 2: Stratify and Plant the Seeds
After cold stratification, fill a small container with moistened seed-starting mix (not garden soil) and press the seeds ½ inch deep. Space them 1 inch apart since they'll need room to grow. Water gently until the soil is evenly damp but not soggy.
Cover the container with plastic wrap to retain moisture and warmth, then place it in a warm spot with indirect light. Keep the soil consistently moist—never let it dry out completely. You'll see sprouts in 2-4 weeks, though some seeds may take longer. Patience is key here.
☀️ Step 3: Transplant and Care for Seedlings
Once the seedlings reach 3-4 inches tall and have developed their first true leaves, transplant them into individual 4-inch pots filled with well-draining potting mix. Handle the seedlings carefully—they're delicate at this stage. Place the pots in a sunny window or under a grow light for 12-14 hours daily.
Water the seedlings when the top inch of soil feels dry to the touch. Avoid overwatering, as this can lead to root rot. Fertilize lightly with a balanced, water-soluble fertilizer every 4-6 weeks during the growing season to encourage strong, healthy growth.
🪴 Step 4: Harden Off and Plant Outdoors
After the last frost date in your area, gradually introduce the seedlings to outdoor conditions over 10-14 days. Start by placing them outside in a sheltered spot for 1-2 hours the first day, then slowly increase their time outside each day. This process, called hardening off, helps the seedlings adjust to wind, sun, and temperature changes.
Once the seedlings are fully hardened off, plant them in a sunny location with well-draining soil. Space them 15-20 feet apart to allow for proper growth. Mulch around the base of the tree with 2-3 inches of organic mulch to retain moisture and suppress weeds. Water deeply after planting to help the roots establish.
Tips & tricks for growing a plum tree from seed
Real talk: Growing a plum tree from seed is all about patience and precision. Here's what I learned the hard way to make sure your little seedlings have the best chance of thriving.
Seed Selection: Don't just grab any plum—pick the ripest, firmest fruit from a healthy tree. The seed's quality determines your tree's potential. I always choose plums that are fully colored and slightly soft to the touch, but not mushy. This ensures the seed has fully matured and will have better germination chances.
Cold Stratification: That 6-8 week cold treatment in the fridge isn't just a suggestion—it's essential for breaking seed dormancy. I've tried skipping it, and the seeds either took forever to sprout or never sprouted at all. Mark your calendar when you put them in the fridge so you remember to plant them after the cold treatment. The crisper drawer's consistent temperature is perfect for this process.
Light Conditions: When your seeds sprout in Step 2, they need bright but indirect light to prevent leggy growth. A sunny windowsill works well, but if your seedlings start stretching toward the light, it's time to move them to a spot with more even light distribution. I use a simple grow light on a timer for 12-14 hours daily—it makes all the difference in preventing weak, spindly seedlings.
Transplanting Care: Those delicate 3-4 inch seedlings in Step 3 need gentle handling. I use a small spoon to lift them from their starter pots rather than pulling by the stems. The key is to keep the root ball intact—any damage can set your seedling back weeks in recovery. Water thoroughly after transplanting to help settle the soil around the roots and reduce transplant shock.
Pro Tips for Grow Plum Tree From Seed
- Real talk: Growing a plum tree from seed is all about patience and precision.
- Seed Selection: Don't just grab any plum—pick the ripest, firmest fruit from a healthy tree.
- Cold Stratification: That 6-8 week cold treatment in the fridge isn't just a suggestion—it's essential for breaking seed dormancy.
Frequently asked questions
Got questions about growing a plum tree from seed? You’re not alone—this process has its quirks! Below, we’ve answered the most common queries to help you navigate your fruit tree journey with confidence.
How long does it take for a plum seed to germinate?
A plum seed typically germinates in 2 to 6 weeks when kept in warm, moist conditions (around 70–80°F). Some varieties may take longer, especially if the seed undergoes stratification (cold treatment). Patience is key—don’t give up if sprouting takes a few extra weeks!
Do I need to stratify plum seeds before planting?
Yes! Plum seeds have a hard seed coat that requires stratification (cold, moist treatment) to break dormancy. Soak seeds in water for 24 hours, then place them in a damp paper towel or peat moss in the fridge for 4–8 weeks. This mimics winter conditions and boosts germination rates.
Will a plum tree grown from seed produce fruit like the parent tree?
Probably not! Seed-grown plum trees often won’t match the parent’s variety—they may differ in size, flavor, or even fruit type. For consistent results, consider grafting a known cultivar onto your seedling later. If you’re okay with surprises, though, growing from seed is a fun experiment!
Can I grow a plum tree from seed in a pot, or does it need to be planted outside?
You can start seeds in pots, but plum trees thrive outdoors long-term. Use a 5–7 gallon container for seedlings, ensuring good drainage. Once the tree reaches 3–5 feet tall, transplant it to a permanent outdoor spot with full sun. Containers work temporarily, but outdoor planting yields healthier, fruit-bearing trees.
What should I do if my plum seedling looks weak or yellow?
Yellowing leaves or weak growth often signal overwatering, poor drainage, or pests. Check the soil—it should be moist but not soggy. If pests (like aphids) are the culprit, spray with soapy water or neem oil. Ensure the seedling gets 6+ hours of sunlight daily and fertilize lightly with a balanced formula once established.
Wrapping up and next steps
Growing a plum tree from seed is a rewarding journey that blends patience with the joy of nurturing life. While it may take years to bear fruit, every step—from scarifying seeds to transplanting seedlings—teaches you the art of gardening. Celebrate your progress, no matter how small!
Now that you’re equipped with knowledge, why not take the next step? Start with a few seeds this season and watch your green thumb grow—literally! Share your progress with fellow gardeners or even gift a sapling to a friend. Happy planting! 🌱✨