Trees
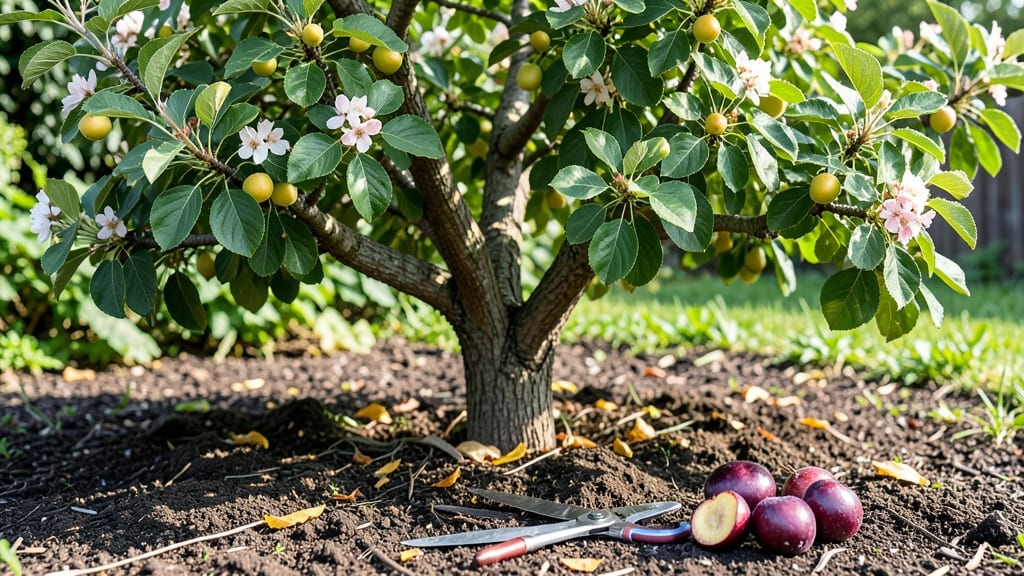
Thinning plum trees isn’t just pruning—it’s the secret to fruit so sweet and plentiful you’ll question why you didn’t do it sooner. I learned the hard way when my overcrowded tree produced tiny, sour plums despite all the care I put into watering and fertilizing.
The fix? Strategic cuts that let sunlight and air move freely through the branches.
Here’s the game-changer: focus on three types of branches—water sprouts (those vertical shoots), crossing branches (rubbing against each other), and overcrowded areas where limbs compete for sunlight.
A sharp pair of pruners and a clear day are all you need, plus a little patience as you step back to visualize the tree’s structure. The dormant season is ideal, but post-harvest thinning works too.
What you’ll get is fruit that’s noticeably larger, sweeter, and more abundant—plus a tree that’s easier to maintain and far less prone to disease. My tree now produces bushels of plums that neighbors rave about, and the work takes less than an hour.
The key is confidence: cut boldly but purposefully, and the tree will reward you.
This method works for any plum variety, whether you’re dealing with a young tree or an established one that’s been neglected. The only real mistake is hesitation—once you see the difference, you’ll never go back. Let’s get those branches trimmed!
📚 In This Guide
- What you need
- Instructions
- Tips and common mistakes
- Wrapping up and next steps
What you need
- ● Pruning shears or secateurs – Sharp, bypass-style shears (4-6" blades) for clean cuts. Sterilize with rubbing alcohol between cuts to prevent disease spread.
- ● Loppers – For thicker branches (8-10" blades). Look for ratchet-style models for easier leverage.
- ● Pruning saw – A bow saw or folding pruning saw for branches over 2" in diameter.
- ● Gloves – Heavy-duty, cut-resistant gloves (e.g., Mechanix or leather) to protect hands from thorns and sharp tools.
- ● Disinfectant (70% isopropyl alcohol or bleach solution) – 1 part bleach to 9 parts water for sterilizing tools.
- ● Tarp or drop cloth – To collect fallen branches and debris (10' x 10' minimum).
- ○ Marking twine or flags – For tagging branches to remove (optional but helpful for complex trees).
- ● Pole saw or pruning pole – Extends your reach for high branches (ideal for tall plum trees).
- ● Pruning sealant – Not always necessary for plums, but useful for large cuts to prevent disease entry.
- ● Work boots with grip – For stability on uneven or wet ground.
- ● Safety glasses – Protects eyes from debris, especially when using a saw.
- ● Notebook & pen – To sketch a simple pruning map of your tree’s structure.
- ● Know your tree’s age and variety – Young trees (light thinning (remove 10-20% of fruit), while mature trees can handle 20-30%.
- ● Choose the right timing – Thin plums when fruit is pea-sized (early spring) or walnut-sized (late spring). Avoid thinning after blooms fall.
- ● Check for pests/disease – Look for signs of plum curculio, brown rot, or aphids. Treat before pruning if needed.
- ● Clear the workspace – Remove weeds, rocks, or obstacles within a 10-foot radius of the tree.
Step-by-step guide for thinning plum trees
Here's how to prune strategically for stronger branches and fruit that bursts with flavor.
Identify the Right Time and Tools
Thin your plum tree during late winter or early spring before buds swell but before leaves appear. This timing gives the tree time to heal before summer stress. Use sharp, clean pruning shears—dull blades tear wood and invite disease. I always disinfect my tools with rubbing alcohol between cuts to prevent spreading any hidden pathogens.
Grab your hand pruners for branches up to ½ inch thick and loppers for anything thicker. Avoid pruning when the tree is wet—sap flows more freely, and the wounds take longer to seal. If you must prune in damp conditions, do it early in the day so the cuts have time to dry before nightfall.
Locate and Remove Sucker Growth
Start by scanning the tree for suckers—those vigorous, upright shoots sprouting from the base or along the trunk. These compete with fruit-bearing branches for energy. Use your hand pruners to cut suckers flush with the ground or trunk. If you leave even a small stub, the sucker will grow back stronger than before.
Next, look for water sprouts—fast-growing, vertical shoots that often appear at branch junctions. These are energy vampires, robbing the tree of nutrients needed for fruit development. Snip these back to a side branch or bud that faces outward. You’ll know you’ve done it right when the cut looks clean and the remaining bud points away from the center of the tree.
Thin Out Crowded Branches
Step back and assess the tree’s structure. Your goal is to create an open center with branches spaced 8-12 inches apart. Start at the outermost branches and work inward. Remove branches that cross or rub against others—these wounds create entry points for pests and diseases. Cut back to the branch collar (the swollen area where the branch meets the trunk) to avoid leaving a stub.
For branches growing inward, make your cut just above an outward-facing bud. This encourages new growth in the right direction. If you’re unsure which bud to target, look for one that’s larger and more prominent—it’s more likely to sprout vigorously. Avoid cutting back to a stub or a lateral branch, as this can lead to weak regrowth or disease.
Prune for Light and Airflow
Plum trees need good airflow to prevent fungal diseases like brown rot. Focus on removing branches that block sunlight from reaching the center of the tree. Thin out dense clusters of branches, leaving only the strongest, most vigorous ones. Aim for a balanced canopy where light can penetrate to the inner third of the tree.
If you’re dealing with a young tree, prioritize removing branches that grow straight up or down—they’ll compete with the main scaffold branches. For mature trees, limit yourself to no more than 25% of the tree’s total foliage in a single pruning session. Over-pruning stresses the tree and can reduce fruit production. Watch for sap bleeding—it’s normal, but excessive sap flow can weaken the tree, so avoid heavy pruning in early spring.
Tips & tricks for pruning plum trees like a pro
Mastering the art of pruning transforms your plum tree from a tangled mess into a fruit-bearing powerhouse. Here’s what I’ve learned after years of trial and error in the orchard.
Timing is Everything: The late winter to early spring window is critical because it allows the tree to heal before summer heat and pests arrive. If you prune too early, the tree might bleed sap excessively, while waiting too long risks encouraging new growth that could be damaged by frost. I’ve seen trees recover beautifully when pruned in this exact window—just don’t rush it.
The Cut Matters More Than You Think: Always cut at the branch collar, that swollen area where the branch meets the trunk. This ensures the wound seals properly and reduces the risk of disease. I used to make the mistake of leaving stubs, which led to weak regrowth and unsightly scars. Now, I take my time to make clean cuts—it’s worth the extra few seconds per branch.
Watch for Hidden Clues: When thinning crowded branches, look for the larger, more prominent buds—they’re the ones most likely to grow into strong, fruit-bearing branches. Smaller buds might not have the energy to produce quality fruit. This visual trick has helped me avoid guesswork and focus on the branches that will actually pay off with bigger, sweeter plums.
Don’t Overdo It: Remember the 25% rule—never remove more than a quarter of the tree’s foliage in one session. Over-pruning stresses the tree and can lead to poor fruit production. I’ve seen plum trees recover from light pruning but struggle when pushed too hard. Think of it like a haircut—you want to shape it, not shave it.
Pro Tips for Thinning Plum Trees
- Mastering the art of pruning transforms your plum tree from a tangled mess into a fruit-bearing powerhouse.
- Timing is Everything: The late winter to early spring window is critical because it allows the tree to heal before summer heat and pests arrive.
- The Cut Matters More Than You Think: Always cut at the branch collar, that swollen area where the branch meets the trunk.
Frequently asked questions
about thinning plum trees—because even expert pruners have doubts! Here are answers to the most common queries to help you confidently shape your tree for a bountiful harvest.When is the best time to thin plum trees?
Thin plum trees in late winter or early spring (just before buds swell) for dormant pruning. If you’re removing fruit, do it when fruits are pea-sized (about 6–8 weeks after flowering). Avoid thinning during extreme heat or cold—aim for mild, dry days for cleaner cuts and faster healing.
How do I know if I’m thinning too much?
You’re over-thinning if you see more than 25% of the tree’s foliage removed in one session or if branches look bare and skeletal. Signs of stress include yellowing leaves, excessive sap oozing, or stunted growth. Rule of thumb: Never remove more than 1/3 of the canopy in a single year—plum trees are resilient but not indestructible!
Can I thin plum trees by removing whole fruit clusters instead?
Yes! Fruit thinning (removing individual fruits or clusters) is just as important as structural pruning. Leave 6–8 inches between fruits on branches to ensure proper airflow and sugar development. Use your fingers or small pruners—avoid tearing the stem, which can invite disease. Pro tip: Thin on sunny days to reduce stress on the tree.
What if my plum tree doesn’t produce much fruit after thinning?
Patience is key! Thinning reduces current fruit to boost future harvests. If your tree still struggles, check for:
- Pollination issues (plums often need cross-pollination—plant a compatible variety nearby).
- Nutrient deficiencies (test soil pH; plums prefer 6.0–6.5).
- Over-fertilizing with nitrogen (too much = leafy growth, few fruits).
Are there alternatives to pruning if I’m not confident?
If pruning feels overwhelming, try these low-effort alternatives:
- Suction-cup pruners for high branches (safer than ladders!).
- Hire a local arborist for annual check-ups (invest in long-term tree health!).
- Focus on fruit thinning only—it’s easier and still improves quality.
- Use dwarf or columnar plum varieties (they require minimal pruning).
Wrapping up and next steps
Thinning your plum trees isn’t just about maintenance—it’s a game-changer for healthier growth and delicious, abundant fruit. By following the right techniques, you’ll encourage stronger branches, better airflow, and plums that burst with flavor. 🌱✨
Ready to transform your orchard? Start small—pick one tree this season to practice thinning, and watch your confidence (and fruit!) grow. Happy pruning!