
Propagation
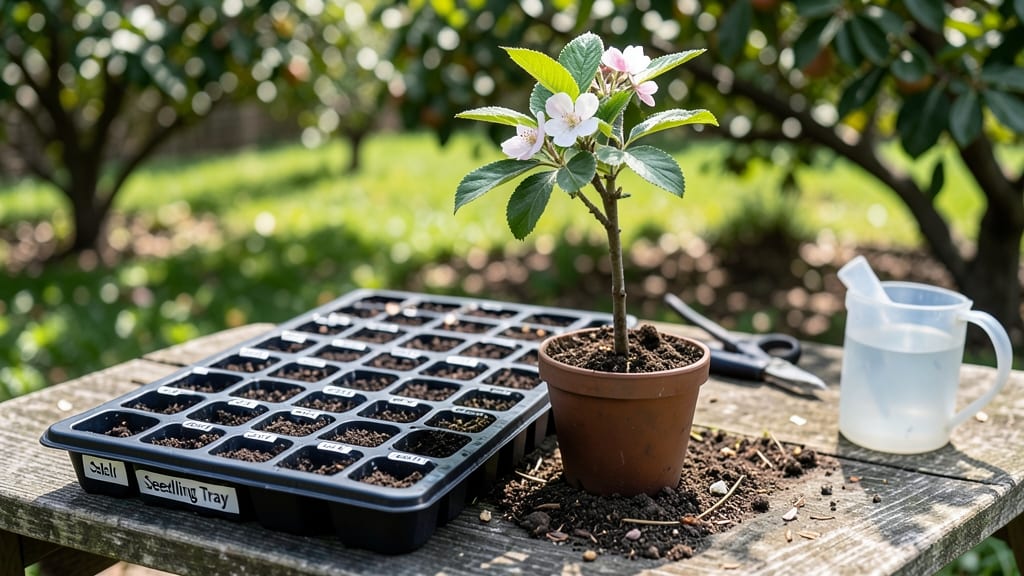
Growing a plumcot tree from seed means sweet-tart fruit in your backyard within four years—if you know the right steps. 🌱 I learned the hard way that patience and proper technique make all the difference between a scraggly sapling and a thriving fruit-bearing tree.
The process starts with fresh seeds from a ripe plumcot (or peach-plum hybrid), which need 60-90 days of cold stratification to break dormancy. You’ll need well-draining soil, a sunny spot, and a little extra care during the first two years when roots establish.
Most beginners skip the stratification step, which is why their seeds never sprout.
By year three, you’ll see strong branches and the first signs of blossoms—though fruit may take another season. The reward? Juicy, flavorful fruit that’s easier to grow from seed than store-bought trees. Just be ready to prune regularly and protect young trees from pests.
Works best in USDA zones 5-9, but with the right adjustments (like delayed planting in colder climates), you can adapt this method almost anywhere. Let’s get those seeds sprouting!
📚 In This Guide
- What you need
- Instructions
- Tips and common mistakes
- Wrapping up and next steps
What you need
- ● Plumcot seeds – 2–5 fresh, viable seeds (harvested from ripe fruit or purchased from a reputable supplier). Pro tip: 💡 Soak seeds in warm water for 24 hours before planting to speed up germination!
- ● Seed-starting mix – 1 small bag (5–10 quarts) of high-quality, sterile seedling mix (avoid garden soil—it can harbor pests or diseases).
- ● Seed trays or small pots – 2–4 biodegradable pots (2–3 inches deep) or a seed tray with individual cells (minimum 4 inches deep).
- ● Grow lights or sunny windowsill – A full-spectrum LED grow light (12–16 hours/day) or a south-facing window with consistent sunlight.
- ● Plastic wrap or humidity dome – To create a mini greenhouse effect while seeds germinate.
- ● Spray bottle – For gentle watering (avoid over-saturating the soil).
- ● Small hand trowel – For planting seeds at the correct depth (¼ inch).
- ○ Fertilizer (optional but helpful) – A balanced, water-soluble fertilizer (5-5-5 or 10-10-10) diluted to half-strength for young seedlings.
- ○ Warmth – Seeds germinate best in 70–80°F (21–27°C) soil. Use a seedling heat mat (optional but recommended for faster sprouting).
- ● Patience – Plumcot seeds can take 3–6 weeks (or longer!) to germinate. Stay consistent with care!
- ● Space for transplanting – A 5-gallon pot or garden bed with well-draining soil (pH 6.0–7.0) for seedlings after 4–6 weeks.
- ○ Protection from pests – Optional: Slug bait, neem oil, or a fine mesh cover to shield young seedlings.
Step-by-step guide to growing a plumcot tree from seed
Here's how to nurture a seed into a fruit-bearing plumcot tree—patience and precision pay off big time.
🌱 Step 1: Extract and Stratify the Seed
Plumcot seeds need cold stratification to break dormancy. Start by carefully removing the pit from a ripe plumcot fruit—don’t crush it, just wipe off any flesh. Place the clean seed between two damp paper towels in a sealed plastic bag. Store it in your refrigerator’s crisper drawer (around 35-40°F) for 8-12 weeks. Check monthly to ensure the towels stay moist but not soggy.
This cold treatment mimics winter conditions, tricking the seed into thinking it’s time to grow. Real talk: Skipping stratification means waiting years—or never—seeing germination. The seed’s natural defenses are strong, and this step weakens them just enough for life to begin.
☀️ Step 2: Plant the Stratified Seed
After stratification, fill a 4-inch deep container with sterile potting mix (not garden soil—it’s too dense). Plant the seed ½ inch deep, pressing lightly to ensure good soil contact. Water gently until the surface looks damp but not wet. Place the container in a warm, bright spot (around 65-75°F), like a sunny windowsill or under a grow light.
Germination can take 3-6 weeks, depending on your room’s warmth. You’ll know it’s working when you see a tiny sprout pushing through the soil. Here’s the thing—plumcot seeds are finicky. If nothing happens after 8 weeks, try repeating the stratification process with a fresh seed.
🌿 Step 3: Transplant and Care for the Seedling
Once the seedling reaches 3-4 inches tall and has 3-4 true leaves (not just the first tiny cotyledons), it’s time to transplant. Choose a 6-inch pot with drainage holes and fill it with well-draining potting mix. Gently remove the seedling, keeping the root ball intact, and plant it at the same depth it was growing before.
Place the pot in full sun (at least 6 hours daily) and water when the top inch of soil feels dry. Plumcot seedlings need consistent moisture but hate soggy roots. You’ll see new growth within a week—that’s your signal everything is working. If leaves yellow or wilt, you’re either overwatering or underwatering.
🪴 Step 4: Prepare for Outdoors and Long-Term Growth
After 1 year, when the seedling is 12-18 inches tall, it’s ready for its first taste of outdoor life. Harden it off by placing it outside in a sheltered spot for 1-2 hours the first day, gradually increasing time over 10-14 days. Once it tolerates a full day outside, transplant it into the ground in well-draining soil with full sun exposure. Plumcot trees thrive in USDA Zones 5-9 and need space—15-20 feet apart for mature trees.
Here’s the moment that matters: Prune any damaged or crossing branches now to encourage a strong structure. Mulch around the base with 2-3 inches of organic mulch to retain moisture and regulate soil temperature. In the first few years, focus on watering deeply once a week (unless it rains) and fertilizing lightly in early spring with a balanced fruit tree fertilizer.
⏰ Step 5: Patience Pays Off—Fruit in 4 Years
Plumcot trees grown from seed take 4-5 years to bear fruit, but the wait is worth it. You’ll know they’re mature when you see white blossoms in spring—that’s when pollinators arrive. Thin fruit clusters to 6-8 plums per branch to ensure larger, sweeter plums. Harvest when the fruit is fully colored and slightly soft to touch, usually late summer to early fall.
Real talk: Not every seed will make it this far, but those that do reward you with juicy, hybrid sweet-tart fruit—a cross between plums and apricots. Keep an eye out for pests like aphids or borers, and treat early with neem oil if needed. With proper care, your plumcot tree could live for decades, producing fruit long after you’ve mastered the process.
Tips & tricks for growing a thriving plumcot tree from seed
Between us, growing a plumcot tree from seed isn't just about following steps—it's about understanding the plant's rhythm. Here's how to give your seed the best shot at becoming a fruit-bearing beauty.
Stratification Success: Don't just toss that seed in the fridge! The key to breaking dormancy lies in consistent moisture during the 8-12 week stratification period. I've learned this the hard way—dry towels mean no germination. Use a spray bottle to mist the towels every 2-3 weeks, keeping them damp like a wrung-out sponge. The refrigerator's crisper drawer maintains that crucial 35-40°F range perfectly, mimicking winter conditions that trigger growth hormones in the seed.
Germination Patience: Those 3-6 weeks of waiting can feel like an eternity, but resist the urge to peek too often! Every time you open the container, you risk drying out the soil. Instead, place your container in a warm, bright spot (65-75°F) and watch for the first sign of life—a tiny green shoot pushing through the soil. If nothing appears after 8 weeks, don't give up. Some plumcot seeds need that extra push, so try repeating the stratification process with a fresh seed.
Transplanting Technique: When your seedling reaches 3-4 inches tall with 3-4 true leaves, handle it like you're moving a fragile treasure. Use a small trowel to carefully lift the seedling, keeping the root ball intact. Plant it at the same depth it was growing before—burying too deep can suffocate the roots. The 6-inch pot with drainage holes is your best friend here, preventing waterlogged roots that can kill your young tree.
Outdoor Transition Strategy: The hardening-off process is where many first-time growers stumble. Start with just 1-2 hours of sheltered outdoor time on day one, then gradually increase exposure over 10-14 days. This slow acclimation prevents shock that could set your progress back months. Once your seedling can handle full sun, choose a planting spot with well-draining soil—plumcot trees hate soggy feet. The 15-20 feet spacing between trees ensures each gets proper airflow and sunlight for optimal growth.
Pro Tips for Grow A Plumcot Tree From Seed
- Between us, growing a plumcot tree from seed isn't just about following steps—it's about understanding the plant's rhythm.
- Stratification Success: Don't just toss that seed in the fridge!
- Germination Patience: Those 3-6 weeks of waiting can feel like an eternity, but resist the urge to peek too often!
Frequently asked questions
Growing a plumcot tree from seed is rewarding but comes with questions! Here are answers to the most common queries to help you along the way.
How long does it take for a plumcot seed to germinate?
A plumcot seed typically germinates in 4–12 weeks when kept in warm, moist conditions. Cold stratification (refrigeration) for 4–8 weeks before planting can speed this up. Patience is key—some seeds may take longer, especially if they’re fresh from the fruit!
Can I grow a plumcot tree indoors?
While you can start seeds indoors, plumcot trees thrive outdoors and need full sun, space, and seasonal changes to grow strong. If you live in a cold climate, start seeds indoors 6–8 weeks before the last frost, then transplant seedlings outside once temperatures stabilize.
Will my plumcot tree produce fruit from seed?
Plumcot trees grown from seed are not guaranteed to produce fruit identical to the parent plant. They may take 4–7 years to bear fruit, and the flavor or size could vary. For consistent results, consider grafting or buying a young tree from a nursery.
What’s the best way to protect young plumcot seedlings?
Young seedlings are vulnerable to pests, frost, and strong winds. Use row covers in early spring, mulch to retain moisture, and cage or stake them for support. Avoid overwatering, which can lead to root rot—keep soil lightly moist but well-draining.
Can I use store-bought plumcot seeds, or do I need fresh ones?
Store-bought seeds (from reputable sellers) can work, but fresh seeds from ripe fruit often germinate better. If using store-bought, check the packaging date—seeds older than 1–2 years may have lower viability. Always soak them overnight to soften the seed coat before planting!
Wrapping up and next steps
Growing a plumcot tree from seed is a rewarding journey that combines patience, care, and a touch of gardening magic! While it may take 4-5 years to enjoy your first harvest, every step—from seed germination to pruning—builds your skills and deepens your connection to nature. 🌱✨
Now that you’re armed with the right knowledge, take that first step—whether it’s gathering seeds, preparing your soil, or even gifting a sapling to a fellow plant enthusiast. Your sweet-tart plumcot adventure starts today!