
Container Gardens
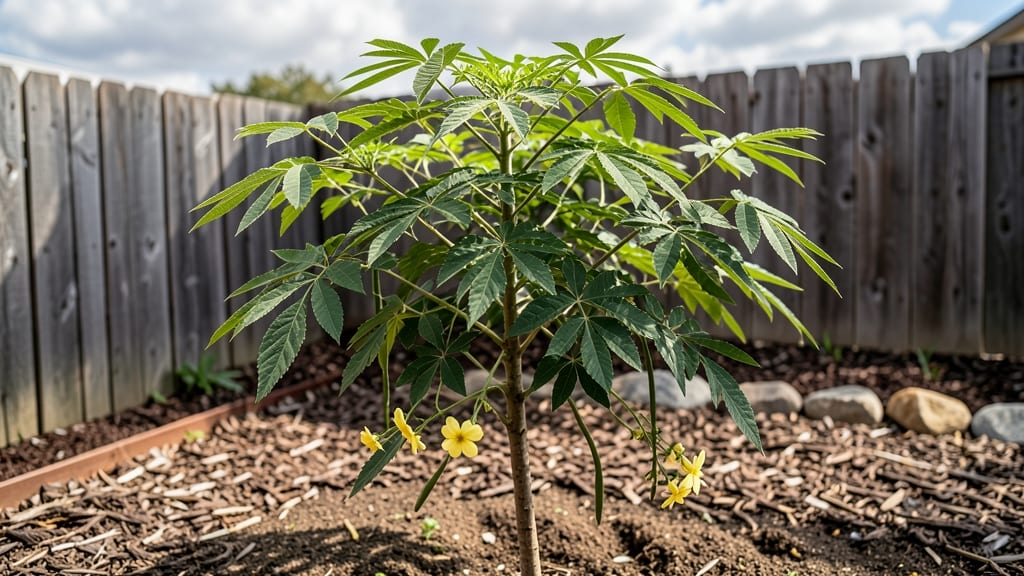
Growing a moringa tree in a pot means fresh superfood leaves just feet from your kitchen—no yard required. 🌱 I’ve watched mine go from a tiny seedling to a leaf-producing powerhouse in under six months, and the process is shockingly simple once you know the basics.
The key? Matching its tropical roots to container conditions that mimic its natural habitat.
You’ll need a 5-gallon pot with drainage holes, a lightweight potting mix rich in organic matter, and a spot that gets 6+ hours of sunlight daily. Moringa thrives in heat but hates soggy roots—water when the top inch feels dry, and always use a pot with stable drainage.
The right setup turns this fast grower into a year-round harvest machine, even in small urban spaces.
By month three, you’ll be snipping nutrient-dense leaves for smoothies or salads, with new growth appearing faster than most vegetables. The leaves stay tender and packed with protein, vitamins, and antioxidants—all while your plant grows 3-6 feet tall in ideal conditions.
Prune regularly to encourage bushier growth, and you’ll never need to buy moringa again.
Perfect for balconies, patios, or even sunny windowsills—just move pots indoors before frost. The only real challenge is keeping up with the harvest, not the plant itself. Ready to grow your own superfood factory?
📚 In This Guide
- What you need
- Instructions
- Tips and common mistakes
- Wrapping up and next steps
What you need
- ● Moringa seeds – 3–5 seeds (organic, non-GMO preferred for best results).
- ● Container – A 5–10 gallon pot (minimum 12–18 inches deep) with drainage holes. Terracotta or fabric pots work best!
- ● Potting mix – Well-draining, nutrient-rich soil (e.g., cactus/succulent mix + perlite or coconut coir for aeration). Avoid heavy garden soil!
- ● Drainage tray – To catch excess water and prevent root rot.
- ● Watering can or spray bottle – For gentle, even hydration.
- ● Fertilizer – Balanced liquid fertilizer (e.g., 10-10-10 or organic fish emulsion) or compost tea for organic growth.
- ● Sunlight access – A south-facing window, grow light, or outdoor spot with 6+ hours of direct sunlight daily.
- ● Pruning shears – For shaping and harvesting (small, sharp pair works).
- ● Grow light – If natural light is limited (LED full-spectrum bulbs are ideal).
- ● Mulch or bark chips – To retain moisture and regulate soil temp.
- ● pH test kit – Moringa prefers 6.0–7.5 pH; adjust with lime or sulfur if needed.
- ● Support stake or trellis – For taller varieties (e.g., Moringa oleifera).
- ● Humidity tray – If your home is dry (pebbles + water under the pot).
How to grow a moringa tree in a pot: quick start guide
Here's the method I've used to grow moringa trees in containers—fast, healthy, and ready for harvest in just a few months.
🌱 Step 1: Soak and Plant the Seeds
Moringa seeds have a hard outer shell that slows germination. Start by soaking 4-6 seeds in warm water for 12-24 hours—this softens the shell and speeds up sprouting. After soaking, place the seeds between two damp paper towels and fold them to keep the seeds enclosed. Store them in a warm, dark spot (around 75-80°F) until you see tiny white roots emerge, usually within 3-5 days.
Once sprouted, fill a 6-inch diameter pot with well-draining potting mix. Moringa hates soggy roots, so mix in 20% perlite or coarse sand to improve drainage. Plant each seedling 1 inch deep, spacing them 2 inches apart—they'll grow quickly, so don't crowd them. Gently pat the soil around the seeds to secure them without compacting it too tightly.
☀️ Step 2: Provide Warmth and Bright Light
Moringa seedlings need warmth to thrive. Place the pot in a location with full sun exposure (6-8 hours daily) and maintain soil temperatures between 70-85°F. If growing indoors, use a grow light positioned 4-6 inches above the seedlings for 12-14 hours daily. You'll notice the first true leaves (not the initial seed leaves) appear in 7-10 days—this is your cue that the seedlings are establishing strong roots.
Keep the soil consistently moist but not waterlogged. Stick your finger 1 inch into the soil—if it feels dry, water gently until moisture reaches the bottom of the pot. Avoid overhead watering, as wet leaves can lead to fungal issues. Once the seedlings reach 3-4 inches tall, thin them to the 2-3 strongest plants, snipping the others at the base with clean scissors.
💧 Step 3: Fertilize and Encourage Rapid Growth
Moringa is a heavy feeder, so after 4-6 weeks, when the plants show 4-5 sets of true leaves, switch to a balanced liquid fertilizer (like 10-10-10) diluted to half strength. Apply it every 2-3 weeks during the growing season. You'll see a growth spurt within a week—this is when moringa really starts to stretch toward the light, so ensure it gets plenty of sun or supplemental grow light.
Rotate the pot a quarter turn weekly to prevent the plant from leaning toward one side. Moringa grows fast, so expect 1-2 feet of height gain per month under ideal conditions. Prune the tips of the branches when they reach 12 inches tall to encourage bushier growth and more leaf production. Use clean, sharp pruners to make cuts just above a leaf node.
✂️ Step 4: Harvest Leaves for Maximum Yield
You can start harvesting young leaves when the plant reaches 18-24 inches tall, but wait until it's at least 3-4 feet tall for the best flavor and nutrient content. Use clean scissors or fingers to pinch off the youngest leaves and tender tips—these are the most tender and nutrient-dense. Avoid taking more than 20-30% of the foliage at once, as this can stress the plant.
Harvesting stimulates new growth, so you'll see fresh leaves emerge within 7-10 days. For continuous production, harvest every 2-3 weeks during the growing season. If your moringa starts to flower, you can also harvest the pods when they turn yellow—though leaves are the most commonly used part of the plant. Store harvested leaves in the fridge for up to 5 days or dry them for long-term storage.
Tips & tricks for growing a moringa tree in a pot
Here's what I learned from growing moringa trees in containers—tricks that cut down the waiting time and keep your plants thriving.
Soaking Strategy: Don't rush the 12-24 hour soak—this is when the seeds' hard shells soften enough for roots to emerge. I've found that warm water (around 80°F) speeds up the process, but never exceed 85°F or you risk damaging the seeds. Place your soaking container in a warm spot like near a sunny window or on top of the fridge to maintain that ideal temperature range.
Lighting Hack: If you're growing indoors, position your grow light just 4-6 inches above the seedlings—closer than you might think. Moringa seedlings are light-hungry, and that extra intensity in those first 12-14 hours daily makes all the difference in preventing leggy growth. I rotate my light fixture weekly to ensure even exposure on all sides of the pot.
Pruning Technique: When you reach Step 3 and need to prune at 12 inches, make your cuts just above a leaf node at a 45-degree angle. This encourages bushier growth and prevents disease entry points. I use clean, sharp pruners and immediately wipe them with rubbing alcohol between cuts—this keeps your equipment sterile and your plant healthy.
Harvesting Timing: The 7-10 day regrowth window after harvesting is your plant's natural recovery cycle. To maximize yield, harvest in the morning when leaves contain the highest nutrient concentration. I always leave at least 70% of the foliage to ensure the plant has enough energy to regrow quickly.
Pro Tips for Growing A Moringa Tree In A Pot
- Here's what I learned from growing moringa trees in containers—tricks that cut down the waiting time and keep your plants thriving.
- Soaking Strategy: Don't rush the 12-24 hour soak—this is when the seeds' hard shells soften enough for roots to emerge.
- Lighting Hack: If you're growing indoors, position your grow light just 4-6 inches above the seedlings—closer than you might think.
Frequently asked questions
Got questions about growing moringa in pots? You’re not alone! Here are some of the most common concerns—and their solutions—to help you cultivate this nutrient-packed plant like a pro.
How big should my pot be for a moringa tree?
A moringa tree thrives in at least 12–18 inches of depth and width (5–7 gallons) to support its deep roots. Use a pot with drainage holes and consider upgrading to a larger container (20+ inches) as the plant matures. Shallow pots can stunt growth or lead to root-bound stress.
How long does it take for moringa seeds to sprout in a pot?
With the right conditions, moringa seeds typically sprout in 5–14 days. Keep the soil consistently moist (not soggy) and warm (70–85°F). If germination takes longer, check for hard seed coats—soaking seeds overnight in warm water may help. Patience pays off!
Can I grow moringa in a pot indoors year-round?
Yes, but with caveats! Moringa needs 6–8 hours of sunlight daily, so place it near a bright window or use grow lights. In winter, supplement with artificial light if natural light is limited. Keep temps above 60°F—drafts or chilly spots can slow growth or cause leaf drop.
Why are my moringa leaves turning yellow or dropping?
Yellowing leaves often signal overwatering, nutrient deficiency, or root stress. Let the top inch of soil dry between waterings, and fertilize every 4–6 weeks with a balanced liquid fertilizer. Check for pests (like aphids) and ensure your pot has proper drainage. A little TLC usually revives the plant!
What’s the best alternative if I can’t grow moringa in my climate?
If your zone is too cold (<20°F), try container-friendly superfoods like lemongrass, basil, or kale. These thrive in pots and offer health benefits too! For a similar fast-growing, nutrient-rich option, consider amaranth—it’s hardy and packed with protein.
Wrapping up and next steps
Growing a moringa tree in a pot isn’t just rewarding—it’s a game-changer for your health and garden! 🌱 With the right care, you’ll enjoy a fast-growing, nutrient-packed superfood right at home.
Whether you’re a beginner or a seasoned gardener, this guide makes it simple to nurture your plant from seed to harvest.
Now that you’re armed with the knowledge, take the next step—plant your seeds today and watch your moringa thrive! Share your progress with fellow gardeners or experiment with recipes using your homegrown leaves. The fresher the better, so get growing and savor the benefits of this incredible tree!