Container Gardens
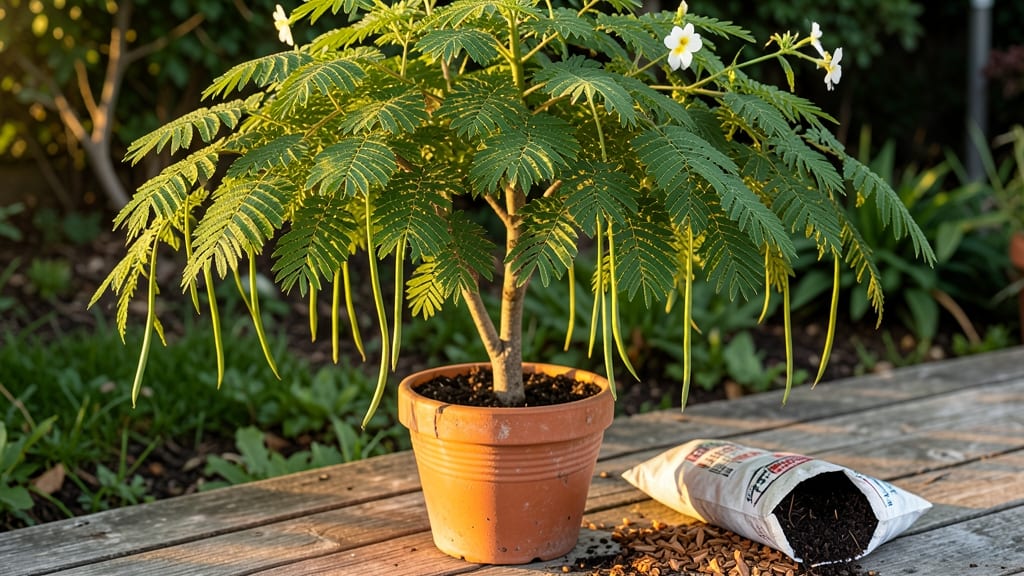
A moringa tree in a pot grows faster than most vegetables—and it packs more nutrients than kale, spinach, or broccoli combined. 🌱 I’ve watched mine shoot up 12 inches in just 3 weeks, turning a modest 5-gallon container into a leafy green factory.
The key? Matching its tropical roots to the right pot, soil, and sunlight without overcomplicating things.
You don’t need a greenhouse or a backyard—just a sunny spot, well-draining soil, and a pot big enough to prevent root-binding. My first attempt failed when I used regular potting mix (too dense), but switching to a 50-50 blend of cactus mix and perlite changed everything.
Watering is simple too: let the top inch dry out between drinks, and you’ll avoid the root rot that kills so many container plants.
By summer, you’ll be harvesting bright green leaves with three times the protein of beef and seven times the vitamin C of oranges. The flowers are edible too, adding a peppery kick to salads.
Prune regularly to encourage bushier growth, and you’ll have a year-round harvest—even indoors with grow lights if needed.
Perfect for balconies, patios, or kitchen windowsills, this isn’t just gardening—it’s a nutritional game-changer. Let’s get that moringa growing before the next harvest slips away.
📚 In This Guide
- What you need
- Instructions
- Tips and common mistakes
- Wrapping up and next steps
What you need
- ● Moringa seeds or saplings: 1–3 seeds (or a young seedling from a nursery). Choose organic, non-GMO seeds for best results.
- ● Container: A 5–10 gallon pot (minimum 12" deep) with drainage holes. Terracotta or fabric pots work best to prevent root rot.
- ● Well-draining potting mix: 2–3 cubic feet of a lightweight, airy blend (e.g., 60% coco coir, 20% perlite, 20% compost). Avoid heavy garden soil!
- ● Drainage medium: 1–2 inches of gravel, expanded clay pebbles, or pumice for the pot’s base.
- ● Watering can or spray bottle: With a gentle shower setting to avoid displacing soil.
- ● Hand trowel (for transplanting or adjusting soil).
- ● pH testing kit (to check soil acidity—ideal range: 6.0–7.5).
- ● Fertilizer: Balanced organic fertilizer (e.g., 10-10-10) or compost tea for a nutrient boost.
- ● Support stake (if growing indoors near windows; moringa can get top-heavy!).
- ● Sunlight: A south-facing window, grow light, or outdoor spot with 4–6 hours of direct sun daily.
- ● Warmth: Moringa thrives in 70–90°F (21–32°C). Avoid drafts or cold windowsills!
- ● Patience: Seeds take 7–14 days to sprout; saplings grow 3–6 feet tall in 6 months!
Step-by-Step guide for growing a moringa tree in a pot
Here's how to cultivate this nutrient-dense superfood in confined spaces—fast and efficiently.
🌱 Step 1: Choose the Right Container and Soil Mix
Moringa thrives in well-draining soil, so select a 12-15 inch diameter pot with drainage holes—this species hates soggy roots. I use a mix of 60% potting soil, 30% perlite, and 10% compost to ensure aeration while retaining moisture. Fill the pot halfway, then tap gently to settle the mix before adding your seedling.
Here's the thing—moringa roots are sensitive to compaction. If you press the soil too firmly, you'll restrict root growth. Instead, use your fingers to create a loose, crumbly texture around the root ball when planting. The goal is air pockets for oxygen flow while keeping the mix stable enough to support the young tree.
💧 Step 2: Plant and Water for Optimal Germination
Drop your moringa seedling into the center of the pot, spreading roots evenly. Cover with the remaining soil mix, leaving 1 inch of space between the soil surface and pot rim. Water immediately until moisture seeps from the drainage holes—this ensures the roots make contact with damp soil right away.
Moringa seedlings need consistent moisture but despise waterlogged conditions. After the initial watering, let the top 1-2 inches of soil dry slightly between waterings. You'll know it's time when the soil feels dry to the touch about an inch deep. Overwatering here leads to root rot, which can kill a young tree in days.
☀️ Step 3: Position for Maximum Sunlight and Airflow
Place your potted moringa in a spot with full sun exposure (6+ hours daily). A south-facing window or balcony works, but most indoor spaces won't provide enough light. I supplement with a grow light on a 14-hour timer during winter months to maintain growth speed.
Air circulation matters just as much as sunlight. Position the pot where there's gentle breeze—open windows or a small fan works. You'll notice leggy growth if airflow is poor, as the plant stretches toward light. Strong, compact growth means you've got the balance right.
✂️ Step 4: Prune and Fertilize for Fast, Bushy Growth
Pinch back the top set of leaves when the plant reaches 12 inches tall to encourage branching. This is where the magic happens—what would've grown into a single stem now splits into multiple stems, creating a fuller tree. Use clean, sharp scissors to make the cut just above a leaf node.
Feed every 4-6 weeks with a balanced liquid fertilizer (10-10-10 ratio) diluted to half-strength. Moringa grows fast, so it needs nutrients to keep up. You'll see new leaves emerge within a week—that's your signal everything is working. Real talk: don't skip this step if you want harvestable pods in under a year.
🪴 Step 5: Monitor and Adjust for Year-Round Productivity
Check the pot size every 6-12 months. Moringa can grow 6-10 feet tall in ideal conditions, so you'll need to upgrade to a 20+ gallon container within a year. Roots circling the pot or soil drying out within hours of watering are clear signs it's time to repot.
Harvest leaves by pinching off 20-30% of new growth when they're 4-6 inches long. This stimulates bushier growth and prevents the tree from becoming too tall for its container. I harvest every 2-3 weeks during growing season, and the tree keeps producing—it's truly a fast-growing nutrient powerhouse.
Tips & tricks for perfect moringa tree in a pot
Real talk: Growing moringa in pots isn't just possible—it's a game-changer for urban gardeners. Here's what nobody tells you about maximizing your yield in small spaces.
Soil Texture Matters: The 60-30-10 soil mix isn't just arbitrary—it's about creating the perfect balance. After mixing your potting soil, perlite, and compost, take a handful and squeeze gently. It should hold its shape but crumble easily when touched. If it sticks together, add more perlite; if it falls apart completely, mix in a bit more compost. This texture prevents compaction while keeping roots hydrated without suffocating them.
Watering Strategy: In Step 2, when you're checking soil moisture, use your finger to test about an inch deep—not just the surface. The top layer can dry quickly while roots stay damp below, creating anaerobic conditions that lead to rot. I've seen seedlings die from overwatering when people only check the surface. Pro move: Water until you see moisture seeping from the drainage holes, then wait until that inch feels dry before watering again.
Light Supplement Hack: For indoor growers, that 14-hour grow light timer is non-negotiable during winter. But here's the trick: Position your grow light about 6 inches above the plant and adjust as it grows. Too close and you'll scorch leaves; too far and it won't be effective. I use a simple clip-on light on a timer—no fancy setup needed. The key is maintaining consistent light intensity throughout the plant's growth cycle.
Harvesting Timing: Those 4-6 inch leaves are prime for harvesting, but timing matters more than you'd think. Harvest in the morning when leaves are fully hydrated and nutrient-dense. Use clean, sharp scissors to pinch just above a leaf node—this encourages new growth from that point. I harvest every 2-3 weeks during peak growth, and my plant responds by producing even more leaves. The secret? Never take more than 20-30% of new growth at once, or you'll shock the plant.
Pro Tips for Moringa Tree In A Pot
- Real talk: Growing moringa in pots isn't just possible—it's a game-changer for urban gardeners. Here's what nobody te...
- Soil Texture Matters: The 60-30-10 soil mix isn't just arbitrary—it's about creating the perfect balance. After mixin...
- Watering Strategy: In Step 2, when you're checking soil moisture, use your finger to test about an inch deep—not just...
Frequently asked questions
Got questions about growing a moringa tree in a pot?
You’re not alone! Here are some of the most common concerns—plus quick, practical answers to help you thrive.
How big does a moringa tree in a pot get?
A moringa tree in a pot typically reaches 6–10 feet tall (or taller with pruning) but stays compact in containers. Choose a 15–20 gallon pot for mature trees, and prune regularly to control size. Dwarf varieties like Moringa oleifera ‘Dwarf’ stay under 5 feet—perfect for small spaces!
How long does it take for a moringa tree to grow in a pot?
Moringa is a fast grower! From seed, expect 4–6 weeks for sprouts, and 3–6 months to harvest young leaves. In ideal conditions (full sun, warm temps, and consistent water), you can harvest every 2–4 weeks once established. Patience pays off—just like a superfood smoothie!
How often should I water a moringa tree in a pot?
Water when the top 1–2 inches of soil feel dry—usually every 2–3 days in hot weather or 3–4 days in cooler climates. Moringa hates soggy soil, so ensure pots have drainage holes. Overwatering = root rot. Pro tip: Check soil moisture daily during heatwaves!
Can I grow moringa in a pot indoors?
Moringa loves sunlight—at least 6–8 hours daily. Indoors? Place near a south-facing window or use grow lights (12+ hours/day). Temperatures below 50°F (10°C) stunt growth, so keep it cozy. If outdoors isn’t an option, a sunny balcony or greenhouse works too!
What if my moringa leaves turn yellow or wilt?
Yellow leaves often mean overwatering or nutrient deficiency. Check for:
- Root rot (soggy soil = bad). Let soil dry between waterings.
- Nitrogen lack (pale yellow leaves). Use a balanced fertilizer (20-20-20) every 4–6 weeks.
- Pests (aphids/spider mites). Spray with neem oil or insecticidal soap.
Can I grow moringa from cuttings instead of seeds?
Stem cuttings
root easily in water or soil. Take 4–6 inch cuttings, strip lower leaves, and dip in rooting hormone (optional). Plant in moist soil, keep humid (use a plastic bag), and place in bright, indirect light. Roots form in 2–4 weeks—faster than seeds!
Wrapping up and next steps
Growing a moringa tree in a pot is a rewarding way to enjoy this nutrient-packed superfood—even in tiny spaces! With the right care, you’ll have fresh leaves for smoothies, teas, or cooking in just a few months. 🌱
Ready to dive in? Start by gathering your supplies, choose a sunny spot, and give your moringa tree the love it deserves. Your green thumb is about to get a supercharge! 💚
Next, harvest, share, and savor—then watch your container garden become the talk of the neighborhood!