Pruning
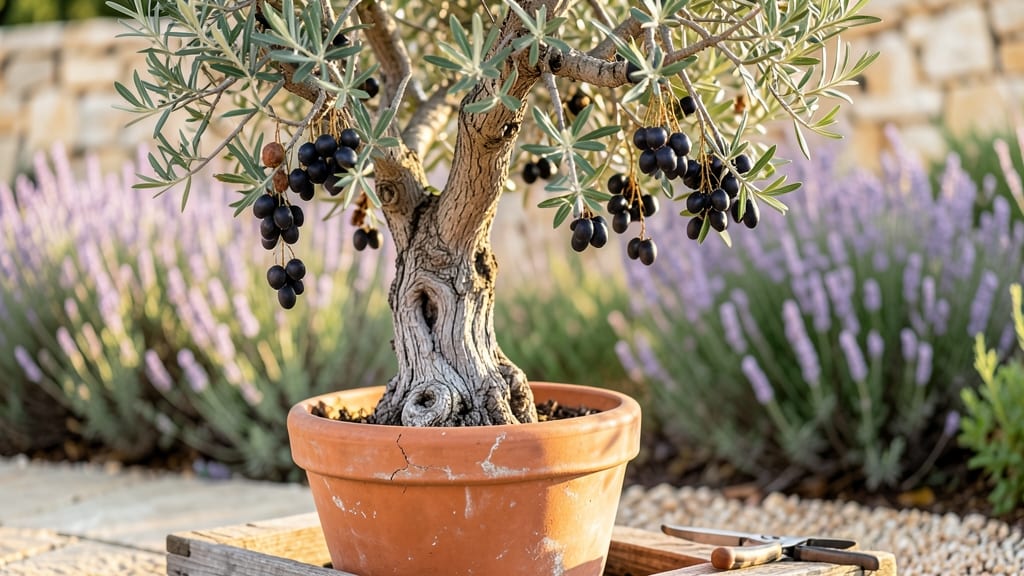
A fruiting olive tree in your landscape isn’t just about silver-green leaves—it’s about harvesting your own oil-rich olives year after year. I’ve pruned mine for five seasons, and the difference between a neglected bush and a productive tree comes down to when and how you cut.
The first year, I nearly chopped off too much; now, I time my pruning to encourage fruit-bearing branches while keeping the tree healthy. It’s a balance that rewards patience with jewel-toned olives by late fall.
The secret isn’t complicated: prune late winter or early spring before new growth starts, and focus on open-center shaping to let sunlight reach the center.
You’ll need sharp bypass pruners, a ladder (for taller trees), and a clear plan—remove dead wood first, then thin out crowded branches to improve air flow. Even in containers, olives thrive if you prune 20-30% of the canopy annually.
My dwarf variety in a 15-gallon pot produces pints of olives each season, proving size doesn’t limit harvests.
By summer, you’ll see the payoff: glossy green leaves and clusters of tiny olives forming where you made your cuts. The tree’s resilience means it handles pruning better than many fruit trees, but the key is consistency—skip a year, and you’ll lose that structured shape.
Harvest when olives turn deep purple-black, and you’ll have homegrown table olives or oil within months. The first taste of your own cured olives? That’s the real reward.
Works for USDA Zones 8-10, but container-grown trees can overwinter indoors with bright light and cool temps. Whether you’re shaping a young tree or rejuvenating an overgrown one, the principles stay the same. Let’s get those pruners out—your future harvest depends on it.
📚 In This Guide
- What you need
- Instructions
- Tips and common mistakes
- Wrapping up and next steps
What you need
- ● Pruning shears: Bypass pruners (sharp, 6–8-inch blades) for clean cuts on small branches.
- ● Loppers: 8–12-inch bypass loppers for thicker branches (up to 2 inches in diameter).
- ● Pruning saw: Curved-tooth saw for branches thicker than 2 inches.
- ● Disinfectant (70% isopropyl alcohol or bleach solution): To sterilize tools between cuts and prevent disease.
- ● Gloves: Heavy-duty, cut-resistant gloves (olive branches can be thorny!).
- ○ Pruning sealant (optional but helpful): Tree wound sealant for large cuts to prevent pests/disease.
- ● 5-gallon bucket or tarp: For collecting pruned branches and debris.
- ● Ladder or step stool: If your tree is taller than 6 feet (safety first! 🚧).
- ● Extension pole saw: For high branches without a ladder.
- ● Labeling tags: To mark branches for future reference (e.g., "fruit-bearing" vs. "deadwood").
- ● Pruning rope or spreader: For shaping large branches gently.
- ● Compost bin: To recycle pruned branches into nutrient-rich mulch.
- ● Sunscreen & water bottle: Because pruning in the sun is no joke! ☀️💦
Step-by-step guide to pruning for a productive olive tree
Mastering the art of pruning transforms a scraggly olive tree into a high-yielding fruit producer.
Understand the Pruning Window
Olive trees respond best to pruning when they're dormant—right after harvest in late winter or early spring, before new growth begins. This timing ensures you won't disrupt flowering or fruit set. In colder climates, wait until after the last frost when temperatures consistently stay above 40°F. You'll know it's the right moment when buds begin swelling but haven't yet burst open.
If you live in a mild-winter region, you can prune lightly after harvest in late fall. But avoid heavy pruning then—it stimulates new growth that won't harden off before winter. I always mark my calendar for February 1st as my target date, but I check the buds first to confirm they're still dormant.
Remove Dead, Diseased, or Crossing Branches
Start by inspecting the tree for branches that are dead, diseased, or rubbing against others. These are your first priorities—remove them completely back to the main trunk or a healthy lateral branch. Use sharp, clean pruning shears to make cuts at a 45-degree angle, about ¼ inch above a bud that faces outward. This encourages proper healing and future growth direction.
Look for branches growing directly toward the center of the tree—these compete for sunlight and air circulation. Thin these out first, even if they appear healthy. I always work from the inside out, gradually opening up the canopy. This creates an umbrella shape that catches sunlight efficiently while allowing air to circulate, which prevents fungal issues.
Shape the Tree for Optimal Fruit Production
Olive trees produce fruit on both old and new wood, so your goal is to maintain a balance of both. Start by reducing any overly long branches by ⅓ to ⅕ of their length—this encourages branching and fruit production. Make cuts just above an outward-facing bud to promote bushier growth. Avoid cutting back to stubs, as this invites disease and weakens the tree.
For mature trees, focus on maintaining an open center. Remove any suckers or water sprouts that grow from the trunk or lower branches—these divert energy from fruit production. I like to step back every few cuts to visualize the tree's shape. The ideal structure has a strong central leader with well-spaced lateral branches that catch sunlight from all directions.
Refine for Airflow and Sunlight Penetration
Next, prune to improve airflow and sunlight penetration to the inner branches. Remove any branches that grow too densely together, leaving 6-8 inches of space between them. This reduces humidity in the canopy, which helps prevent fungal diseases like peacock spot. You'll see the difference immediately—sunlight will start reaching the inner branches, which is where many of the best fruit clusters develop.
For horizontal branches, shorten them by ⅓ to encourage upward growth and better fruit exposure. Vertical branches can be left longer but should be thinned out to avoid overcrowding. I always prune on a dry, sunny day to allow wounds to dry quickly and heal faster. After finishing, I apply a thin layer of pruning sealant to larger cuts to prevent disease entry.
Post-Pruning Care for Recovery
Once pruning is complete, water the tree deeply to help it recover from the stress. Olive trees are drought-tolerant, but they still need moisture to regenerate new growth. Apply 1-2 inches of water directly to the root zone, avoiding the foliage. This encourages root growth and prepares the tree for the upcoming flowering and fruiting season.
Monitor the tree closely over the next 4-6 weeks for signs of stress, such as yellowing leaves or wilting. If you see any new growth emerging from the pruning cuts, it's a good sign the tree is recovering. Avoid fertilizing immediately after pruning—wait until new growth appears before applying any nutrients. This gives the tree time to focus on healing its wounds rather than producing leaves.
Tips & tricks for strategic olive tree pruning
Transforming your olive tree into a productive fruit machine starts with these pruning fundamentals that I've refined over years of hands-on experience.
Timing is Everything: The dormant season window—right after harvest and before buds swell—is your golden opportunity. In colder zones, that 40°F threshold isn't just a number; it's your cue that winter's grip has loosened enough for safe pruning. I've seen trees stressed when pruned too early, so always confirm buds are still tightly closed. For mild climates, that late fall window gives you a second chance, but keep cuts minimal to avoid stimulating vulnerable new growth before winter.
Cutting Technique Matters: Those 45-degree angles and ¼-inch bud spacing aren't arbitrary—they're designed to direct growth outward while minimizing wound exposure. I learned this the hard way when I made straight cuts that left jagged edges prone to disease. Always cut just above an outward-facing bud to encourage new shoots to grow away from the center. And for heaven's sake, sterilize your shears between cuts—diseased branches can spread pathogens faster than you can say "peacock spot."
Shape with Purpose: The ⅓ to ⅕ reduction rule for long branches isn't about random numbers—it's about creating that perfect balance between old and new wood production. I've watched trees struggle when I was too aggressive, so resist the urge to over-prune. Step back frequently to visualize how sunlight will penetrate after your cuts. The goal is an open umbrella shape where every branch gets its fair share of light and air circulation.
Post-Pruning Recovery: That 1-2 inches of water isn't just a suggestion—it's your tree's lifeline after the stress of pruning. I've seen trees wilt dramatically when skipped, especially in sandy soils. And remember, those 4-6 weeks of monitoring are critical. The first signs of new growth at the pruning cuts mean your tree is telling you it's ready to focus on fruit production again. Patience here prevents the most common mistake of over-fertilizing too soon.
Pro Tips for Fruiting Olive Tree
- Transforming your olive tree into a productive fruit machine starts with these pruning fundamentals that I've refined...
- Timing is Everything: The dormant season window—right after harvest and before buds swell—is your golden opportunity....
- Cutting Technique Matters: Those 45-degree angles and ¼-inch bud spacing aren't arbitrary—they're designed to direct ...
Frequently asked questions
Got questions about keeping your fruiting olive tree productive and healthy? You’re not alone! Here are answers to the most common concerns—from timing tricks to troubleshooting tips.
How often should I prune a fruiting olive tree?
Prune your olive tree once a year, ideally in late winter or early spring (before new growth starts). This timing maximizes fruit production while keeping the tree balanced. Avoid heavy pruning in fall—it can stress the tree before winter. Light shaping in summer (after harvest) is optional but helps airflow.
When will my olive tree start producing fruit?
Patience is key! Most olive trees take 3–5 years to bear fruit after planting, depending on variety and care. Dwarf varieties may fruit sooner (2–3 years), while standard trees can take up to 7 years. Healthy soil, full sun, and proper pruning speed up the process. Pro tip: Use well-draining soil and fertilize lightly with citrus/olive-specific nutrients to encourage fruiting.
What if my olive tree isn’t fruiting? How can I fix it?
Non-fruiting olives often stem from improper pruning, poor nutrition, or environmental stress. Try these fixes:
- Prune strategically: Remove overly dense branches to improve sunlight exposure.
- Fertilize: Use a low-nitrogen, high-phosphorus fertilizer (like 6-12-6) in early spring.
- Check watering: Olives hate soggy roots—water deeply but infrequently (1–2 inches/week).
- Pollination: Hand-pollinate flowers if bees are scarce (use a soft brush).
Can I grow a fruiting olive tree in cold climates?
Yes, but choose cold-hardy varieties like ‘Arbequina’ (Zone 7) or ‘Frantoio’ (Zone 8). Protect young trees with burlap wraps or mulch in winter. Mature trees tolerate brief dips to 15°F (-9°C), but extreme cold (<10°F/-12°C) may damage leaves. Pro tip: Plant near a south-facing wall or use row covers for extra insulation.
Are there alternatives to pruning for better fruit yield?
While pruning is essential, you can boost fruit production with these complementary steps:
- Thinning fruit: Remove excess olives (when they’re pea-sized) to improve size/quality.
- Mulching: Use wood chips to retain moisture and regulate soil temp.
- Harvest timing: Pick olives at peak ripeness (color changes from green to purple/black).
- Companion planting: Grow lavender or rosemary nearby to attract pollinators.
Wrapping up and next steps
Growing a fruiting olive tree is a rewarding journey that combines patience, care, and a little strategic planning. By mastering the art of year-round pruning, you’ll unlock a bountiful harvest and a healthier, more productive tree.
Whether you’re a seasoned gardener or just starting, every trim brings you closer to that golden harvest—so grab those shears and get pruning!
Ready to take the next step? Start small—pick one pruning task this season (like removing suckers or thinning branches) and build from there. Before you know it, you’ll be enjoying homegrown olives straight from your own tree! 🌿✨