
Propagation
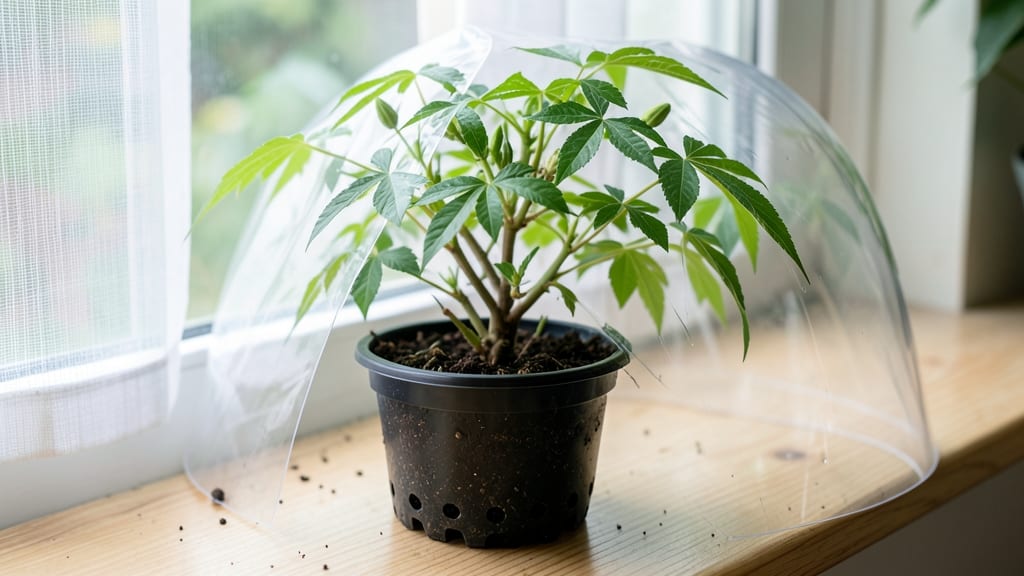
Growing a moringa tree from cuttings delivers fast, reliable roots in just 3 weeks—no seeds or years of waiting. I’ve propagated dozens this way, and the secret lies in a simple setup that mimics the tree’s natural environment.
The first step? Choosing healthy, woody stems that are pencil-thick and free of disease. Skip the guesswork with sharp pruners and a rooting hormone—it cuts failure rates by half.
Once you’ve snipped your cuttings at a 45-degree angle, the real magic happens in a humidity dome (a clear plastic bag works perfectly). Keep the soil moist but not soggy—think damp sponge, not swamp—and place the pot in bright, indirect light.
Too much sun scorches the leaves; too little slows rooting. I’ve seen roots sprout in as little as 10 days when conditions are just right.
By week three, you’ll be testing for roots by gently tugging the cutting—if resistance meets your fingers, it’s ready to transplant. The payoff? A genetically identical tree that grows twice as fast as seed-started plants. Plus, moringa’s drought tolerance kicks in early, so once established, it thrives with minimal fuss.
Fair warning: Overwatering causes rot, and underwatering stalls growth. But get this right, and you’ll have a harvestable tree in under a year—leaves packed with protein, pods rich in nutrients, and a garden that actually impresses your neighbors. Let’s get those cuttings rooted!
📚 In This Guide
- What you need
- Instructions
- Tips and common mistakes
- Wrapping up and next steps
What you need
- ● Moringa cuttings: 4–6 healthy, semi-hardwood cuttings (6–12 inches long, pencil-thick, from non-flowering branches).
- ○ Rooting hormone: 1 small bottle (optional but speeds up root growth).
- ● Well-draining soil: 1 bag of cactus/succulent mix or a blend of perlite, vermiculite, and peat moss (50/50 ratio).
- ● Small pots or containers: 4–6 (4–6 inches in diameter) with drainage holes.
- ● Spray bottle: For misting cuttings (8–12 oz capacity).
- ● Plastic wrap or humidity dome: To retain moisture (e.g., a clear plastic bag or propagation lid).
- ● Watering can or spray nozzle: For gentle hydration.
- ● Pruning shears or sharp knife: Sterilized to avoid disease.
- ● Grow lights: LED or fluorescent (for indoor setups without sunlight).
- ● Fertilizer (low-nitrogen): 1 tsp diluted seaweed or fish emulsion after 3 weeks.
- ● Thermometer/hygrometer: To monitor ideal temps (75–85°F) and humidity (70–80%).
- ● Label markers: To track cutting dates and progress.
Step-by-step guide to propagating moringa trees from cuttings
Here’s my foolproof method for rooting moringa cuttings in just three weeks—no special equipment needed.
Select and Prepare Healthy Cuttings
Choose 4-6 inch semi-hardwood cuttings from the current season’s growth. Look for stems that are pencil-thick with 3-4 leaf nodes—these are the sweet spots for rooting. Use clean, sharp pruners to make a 45-degree angle cut just below a node. This angled cut increases surface area for root development.
Remove all but the top two sets of leaves to reduce moisture loss. If the leaves are large, trim them in half to further minimize evaporation. Here’s the thing—moringa cuttings root best when they’re slightly wilted but not dried out. Soak the cut ends in room-temperature water for 10-15 minutes to encourage cell hydration before planting.
Create the Ideal Rooting Medium
Fill a 6-inch deep container with a 50/50 mix of perlite and coconut coir—this balance drains excess water while retaining enough moisture for root initiation. I avoid garden soil because it compacts and suffocates young roots. Moisten the mix until it feels like a well-wrung sponge: damp but not dripping.
Make 1-inch deep holes spaced 3 inches apart in the container. Dip the prepared cuttings in rooting hormone (optional but speeds up growth) and insert them firmly into the holes. The bottom two nodes should be buried just below the surface—this is where roots will emerge. Gently firm the mix around each cutting to eliminate air pockets that could rot the stems.
Provide Warmth, Humidity, and Indirect Light
Moringa cuttings root fastest in warmth (75-85°F) and high humidity. Place the container in a clear plastic bag or under a humidity dome to trap moisture. Secure the bag loosely with a rubber band to allow minimal airflow—this mimics the tropical conditions moringa thrives in. Set the container in a location with bright, indirect light (like an east-facing window) to prevent leaf scorch.
Check moisture daily by lifting the container—if the top inch feels dry, mist the cuttings lightly with water. Avoid soaking the leaves, as water pooling can cause fungal issues. Within 7-10 days, you’ll see tiny white roots forming at the nodes. This is your signal that rooting is underway—don’t disturb them yet.
Transition to Soil and Encourage Foliage Growth
After 3 weeks, when roots are 2-3 inches long, gently remove the cuttings from the container and inspect the roots. Healthy roots should be white or pale yellow and firm to the touch. Plant each cutting into a 4-inch pot filled with well-draining potting mix, burying the stem up to the first set of leaves. This encourages stronger root development below ground.
Move the pots to a sunny spot (6+ hours of light daily) but protect them from direct afternoon sun for the first week to avoid shock. Water deeply when the top inch of soil feels dry, but avoid soggy conditions—moringa is drought-tolerant once established. You’ll notice new leaves emerging within 2-3 weeks, signaling vigorous growth.
Harden Off and Transplant Outdoors
Once the cuttings have 4-6 new leaves, it’s time to harden them off. Gradually expose them to outdoor conditions over 7-10 days, starting with 1-2 hours of shade and increasing daily. Watch for wilting—this means they’re adjusting. Moringa thrives in USDA zones 9-11, so if you’re in a cooler climate, wait until nighttime temperatures stay above 55°F before transplanting permanently.
Plant outdoors in well-draining soil with full sun exposure. Space your young trees 6-8 feet apart to allow for their rapid growth. Mulch around the base with 2 inches of organic mulch to retain moisture and suppress weeds. Real talk: Moringa grows fast—you’ll see 3-4 feet of growth in its first year if conditions are right.
Tips & tricks for fast moringa root growth
Took me a while to figure these out, so here goes—these are the details that separate good rooting from rapid, thriving growth in your moringa cuttings.
Cutting Selection: The pencil-thick stems with 3-4 leaf nodes are non-negotiable for success. I've tried thinner cuttings, and they simply won't develop strong roots. Also, always make that 45-degree angle cut just below a node—this isn't just about aesthetics, it's about maximizing surface area for root emergence. The angle creates more contact with the rooting medium, which is where the magic happens.
Hydration Strategy: That 10-15 minute room-temperature water soak isn't optional—it's crucial for cell hydration. I learned this the hard way after struggling with dry cuttings that refused to root. The water should be room temperature because cold water can shock the cells, while warm water can cause premature wilting. Think of it as a quick hydration boost before planting.
Medium Maintenance: The perlite and coconut coir mix should stay consistently damp like a well-wrung sponge. I check this by lifting the container daily—if the top inch feels dry, it's time for a light misting. Overwatering is just as bad as underwatering, so aim for that perfect balance. The medium should never be soggy, as this can lead to fungal issues that will kill your cuttings before they root.
Light Management: Bright, indirect light is key during the rooting phase. I've had cuttings scorch when placed in direct sunlight, even for short periods. An east-facing window is ideal, as it provides gentle morning light without the intense afternoon sun. If you don't have a suitable window, consider using a grow light on a timer for 12-14 hours daily.
Pro Tips for Grow Moringa Tree From Cutting
- Took me a while to figure these out, so here goes—these are the details that separate good rooting from rapid, thriving growth in your moringa cuttings.
- Cutting Selection: The pencil-thick stems with 3-4 leaf nodes are non-negotiable for success.
- Hydration Strategy: That 10-15 minute room-temperature water soak isn't optional—it's crucial for cell hydration.
Frequently asked questions
Got questions about growing moringa from cuttings? You’re not alone! Here are answers to the most common concerns—so you can propagate with confidence and avoid pitfalls.
How long does it take for moringa cuttings to root?
With the right conditions (warmth, humidity, and rooting hormone), moringa cuttings typically root in 1–3 weeks. Check for roots by gently tugging the cutting—if resistance is felt, roots have formed! Keep the soil moist but not soggy to speed up the process.
Can I grow moringa from cuttings in cold weather?
Moringa thrives in warm climates (70–90°F), so cold weather (<50°F) slows growth and rooting. If you must propagate in cooler months, use a heating mat or grow under grow lights in a sunny indoor spot. Avoid drafts and frost—moringa is tropical!
What if my cutting rots instead of rooting?
Rotting usually means too much moisture or poor drainage. Let the cutting dry slightly (callus over) before planting, and use a well-draining mix (perlite + coconut coir). If rot appears, trim the affected area, dust with cinnamon (natural antifungal), and replant in fresh, dry medium.
Can I grow moringa from a store-bought branch?
Yes! Look for healthy, semi-hardwood cuttings (4–6 inches long) with 2–3 leaf nodes. Avoid branches with flowers or seeds—they root slower. Rinse off any pesticides, then follow the same propagation steps as above. Store-bought branches work, but organic is best!
How soon can I transplant rooted cuttings outdoors?
Wait until the cuttings have 2–3 inches of roots and show new leaves (usually 3–4 weeks). Harden them off by placing in partial shade for a week before transplanting. Choose a sunny spot with well-draining soil—moringa hates waterlogged roots!
Wrapping up and next steps
Growing a moringa tree from cuttings is a rewarding journey that yields fast, nutrient-rich greens in just a few weeks! With the right tools—like healthy cuttings, rooting hormone, and proper care—you’ll soon enjoy a thriving plant packed with superfood benefits. 🌱✨
Now that you’re armed with the know-how, take the next step: grab those cuttings, prepare your growing space, and watch your moringa tree flourish! Share your progress with fellow gardeners or explore creative ways to use its leaves—your garden (and health) will thank you. Happy growing!