
Pruning
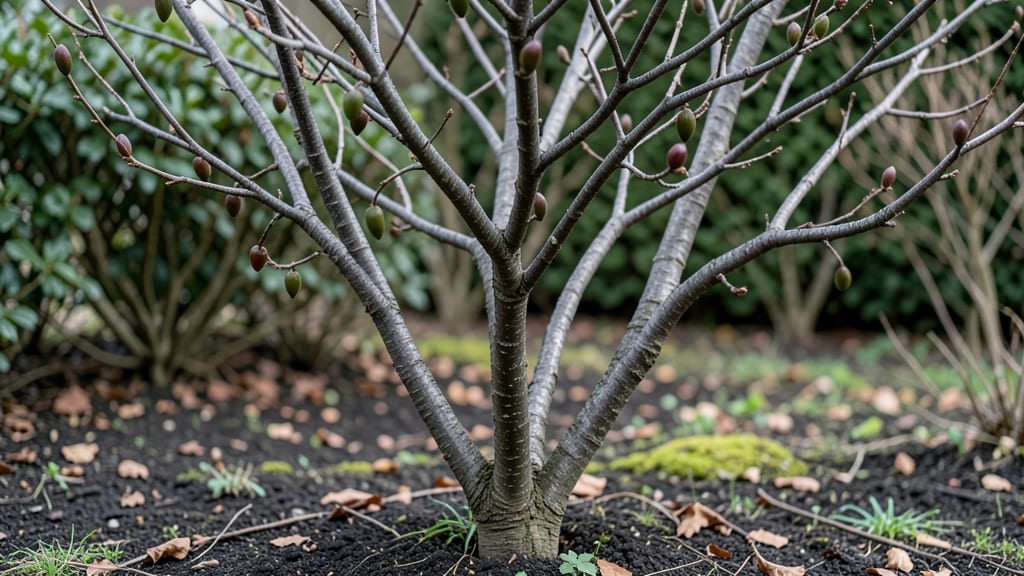
Pruning a dormant hibiscus tree in late winter isn’t just about shaping—it’s about waking up your plant for the Pacific Northwest’s rainy, mild growing season ahead. I’ve learned the hard way that cutting too late or too aggressively can leave your hibiscus struggling to rebound when spring finally arrives.
The key is timing: wait until after the worst frosts have passed but before new growth starts pushing through the soil.
You’ll need sharp pruners, a clean workspace, and a clear vision of your hibiscus’s natural shape—think of it like giving it a fresh haircut after a long winter nap. Start by removing dead or crossing branches first, then thin out the center to improve airflow.
My hibiscus has gone from a tangled mess to a vibrant, bushy plant in just a few seasons using this method, and the blooms arrive earlier each year.
After pruning, your hibiscus will need consistent moisture to recover, but don’t drown it—soil should stay damp, not soggy. A light mulch layer helps retain moisture and protect roots from late frosts. By late spring, you’ll see fresh green shoots emerging, and those bold, tropical blooms won’t be far behind.
This approach works for both tropical and hardy hibiscus varieties in the PNW, where winters are wet but rarely extreme. The same principles apply whether you’re dealing with a small potted hibiscus or a mature tree—just scale the tools and time accordingly.
Let’s get those branches trimmed and your hibiscus ready to shine.
📚 In This Guide
- What you need
- Instructions
- Tips and common mistakes
- Wrapping up and next steps
What you need
- ● Bypass pruners – Sharp, clean, and disinfected (70% isopropyl alcohol or bleach solution). Size: 6-8 inches for medium branches.
- ● Loppers – For thicker branches (½–1½ inches). Quantity: 1 pair, with long handles for leverage.
- ● Pruning saw – Only if needed for branches >1½ inches. Type: Curved-tooth for clean cuts.
- ● Gloves – Heavy-duty, cut-resistant (e.g., 12–14 gauge) to protect from thorns.
- ● Disinfectant – 1 part bleach to 9 parts water (or 70% rubbing alcohol) to sterilize tools between cuts.
- ● Rags or paper towels – For wiping tools and hands.
- ● Trash bags or bucket – To collect pruned branches (for compost or disposal).
- ● Ladder (if needed) – Sturdy, 3-sided for tall trees (max height: 20–24 ft). Safety tip: Secure with stabilizers!
- ● Hand pruners – For delicate trimming of small branches or shaping.
- ● Sealing wax – To coat large cuts and prevent disease (e.g., Tanglefoot Tree Wound Pruning Sealant).
- ● Marking spray – Non-toxic (e.g., white spray paint) to tag branches for removal.
- ● Pruning shears with ratchet mechanism – For easier cutting of stubborn branches.
- ● Work gloves with grip – If your tree has extra-thorny varieties.
How to prune a dormant hibiscus tree for stronger growth
Late winter is the perfect time to refresh your Pacific Northwest hibiscus and set it up for vibrant summer blooms.
Gather Tools and Assess the Tree
Start by collecting your tools: a pair of sharp, clean pruning shears, rubbing alcohol for sterilizing cuts, and thick gardening gloves to protect your hands. I always wipe my shears with rubbing alcohol before and after each cut—this prevents spreading disease between branches.
Stand back and examine your hibiscus tree. Look for dead, crossing, or diseased branches first. These are your priority cuts. You'll also want to identify any branches growing inward toward the center of the tree, as these compete for sunlight and air circulation with healthier growth.
Remove Dead and Problematic Branches
Begin by cutting out any branches that are completely dead or diseased. Make your cuts just outside the branch collar—the swollen area where the branch meets the trunk. This ensures the tree can heal properly. For branches larger than 1 inch in diameter, use your pruning saw for cleaner cuts.
Next, remove any branches that are crossing or rubbing against each other. These often create wounds that invite pests and disease. When cutting, make your cut at a slight angle just outside the branch collar. Avoid leaving stubs—these can rot and attract pests. If you're unsure about a branch, I like to use the "thinning out" method: cut it back to a healthy bud or branch.
Shape the Tree and Encourage Airflow
Now it's time to shape your hibiscus for better airflow and sunlight penetration. Step back frequently to visualize the tree's natural form. Remove any branches that are growing straight inward toward the center. Aim to create an open, vase-like shape that allows light to reach all parts of the tree.
For each cut, make sure to leave at least three healthy buds or branches below the cut. This encourages new growth in the right direction. If a branch is too long, you can also shorten it back to a healthy bud or lateral branch. Remember, hibiscus trees bloom on new wood, so pruning encourages more flowers in the coming season.
Clean Up and Apply Mulch
After pruning, gather all the clippings and dispose of them properly. You can either bag them for yard waste pickup or use them as mulch in other areas of your garden. Avoid leaving clippings on the ground around your hibiscus, as this can harbor pests and diseases.
Spread a 2- to 3-inch layer of mulch around the base of your hibiscus tree, keeping it a few inches away from the trunk. This helps retain moisture, regulate soil temperature, and suppress weeds. I like to use shredded bark mulch because it breaks down slowly and improves soil structure over time.
Tips & tricks for pruning a dormant hibiscus tree
Here's what nobody tells you about pruning your Pacific Northwest hibiscus—these tricks make all the difference for a healthier, more vibrant tree.
Sterilize Your Tools: Beyond just wiping your pruning shears with rubbing alcohol, I like to dip the blades in a 10% bleach solution (1 part bleach to 9 parts water) for 30 seconds between major cuts. This extra step prevents spreading fungal spores between branches, especially important when dealing with diseased wood. Always rinse and dry thoroughly after sterilizing.
Branch Collar Technique: When making cuts in Step 2, focus on the branch collar—the swollen area where the branch meets the trunk. Cutting just outside this collar ensures the tree can seal the wound properly. I've seen too many pruning jobs where cuts were made too close to the trunk, leaving ugly stubs that never heal right. Use a sharp saw for branches over 1 inch thick to avoid tearing the bark.
Visualize the Vase Shape: In Step 3, the open vase shape isn't just about looks—it's about creating an umbrella that protects the center from too much sun exposure while letting light reach all branches. I like to hold my hand up to visualize where sunlight would hit. If you can see light through the center when standing 3 feet away, you're on the right track. This airflow also dramatically reduces fungal diseases common in Pacific Northwest winters.
Mulch Application Strategy: When applying that 2- to 3-inch layer of mulch in Step 4, create a slight depression around the trunk first. This helps water flow toward the roots rather than pooling against the bark. I also avoid piling mulch directly against the trunk—keep it 2-3 inches away to prevent rot. Shredded bark mulch breaks down slowly, which is perfect for our wet winters.
Pro Tips for Dormant Hibiscus Tree
- Here's what nobody tells you about pruning your Pacific Northwest hibiscus—these tricks make all the difference for a healthier, more vibrant tree.
- Sterilize Your Tools: Beyond just wiping your pruning shears with rubbing alcohol, I like to dip the blades in a 10% bleach solution (1 part bleach to 9 parts water) for 30 seconds between major cuts.
- Branch Collar Technique: When making cuts in Step 2, focus on the branch collar—the swollen area where the branch meets the trunk.
Frequently asked questions
Got questions about reviving your dormant hibiscus tree? You’re not alone! Here are answers to the most common concerns—from timing to troubleshooting—so you can prune with confidence in the Pacific Northwest’s chilly late-winter climate.
When is the best time to prune a dormant hibiscus tree in the PNW?
The ideal window is late winter to early spring (February–March), after the last frost but before new growth sprouts. In the PNW’s mild but unpredictable climate, aim for mid-February—this balances frost risk and bud dormancy. Avoid pruning in fall or early winter, as cold snaps can stress the tree.
What if my hibiscus tree looks dead after winter—should I prune it?
Don’t panic! Hibiscus trees often look dormant (not dead) in winter. Before pruning, check for brown but pliable stems (alive) vs. brittle, blackened branches (dead). Prune only the dead wood—healthy stems will regrow with new leaves in spring. If all branches are crispy, it may be beyond revival, but wait until late winter to confirm.
How much can I cut back a dormant hibiscus tree?
You can safely remove up to 30–50% of the tree’s height, focusing on:
- Dead or diseased branches (cut to the base).
- Crossing or rubbing branches (thin them out).
- Overly long stems (shorten by ⅓ to encourage bushiness).
Do I need to fertilize or water after pruning a dormant hibiscus?
Skip fertilizer right after pruning—wait until early spring (March) to apply a balanced 10-10-10 or hibiscus-specific fertilizer. For watering:
- Give a deep soak after pruning if the soil is dry.
- Avoid soggy roots—hibiscus prefers well-draining soil.
- Resume regular watering (1–2 inches per week) once new growth appears.
What if my hibiscus tree doesn’t bloom after pruning?
Blooming depends on light, nutrients, and variety:
- Ensure it gets 6+ hours of sunlight daily (PNW’s shorter days can limit blooms).
- Check for nutrient deficiencies (yellow leaves = nitrogen; poor blooms = phosphorus).
- Some hibiscus (like Hibiscus syriacus) bloom on old wood—avoid heavy pruning if you want summer flowers.
Wrapping up and next steps
Reviving your dormant hibiscus tree in late winter isn’t just about pruning—it’s about setting the stage for a vibrant, resilient comeback. With the right tools, timing, and technique, you can transform bare branches into a lush, Pacific Northwest-friendly beauty. Remember, patience and precision are your best friends here! 🌱
Now that you’re armed with knowledge, grab those shears and get pruning! Start small if you’re new, and don’t forget to celebrate every healthy new bud. Your hibiscus will thank you with stunning blooms all season long. Happy gardening! 🌸