Pruning
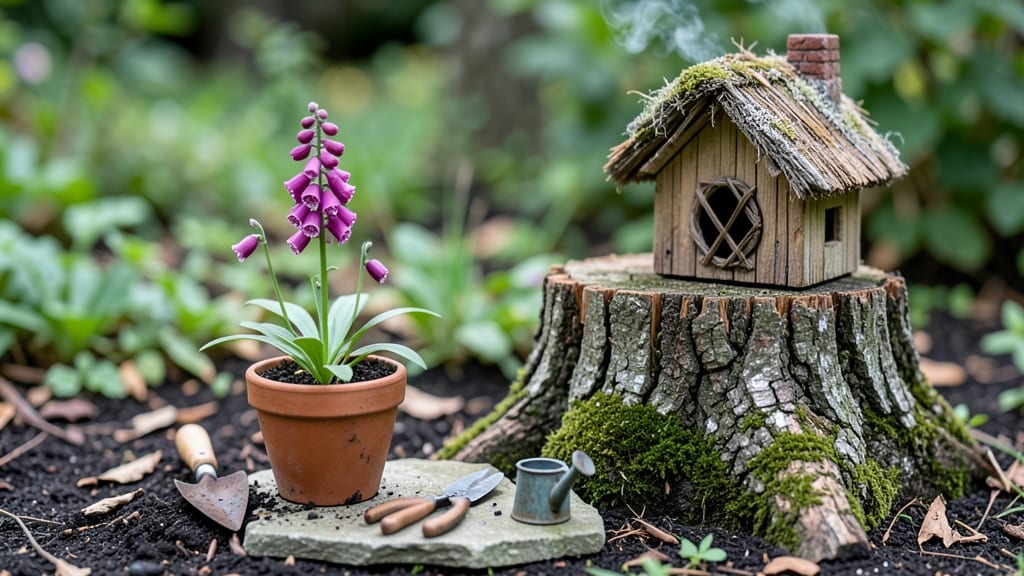
Turn a leftover tree stump into a magical gnome home with these whimsical kits—perfect for sparking kids' imaginations or adding enchanting charm to your garden. ✨ The kits transform ordinary stumps into tiny, functional fairy houses with just a few simple tools and a little creativity.
These kits aren’t just decorative—they’re practical too. Use them as hidden storage for garden tools, a display spot for fairy garden accessories, or even a playhouse for little ones.
The pre-cut designs make assembly a breeze, so you can focus on arranging moss, pebbles, and tiny furniture to bring your woodland vision to life.
Imagine a sun-dappled glade where gnome families live among toadstools, or a playful corner where kids can "visit" their fairy friends. The possibilities are endless, and the best part? Every stump tells a story—whether it’s a cozy cottage or a castle fit for a tiny king.
Works in fairy gardens, woodland landscapes, or even as a quirky patio centerpiece. Once assembled, these gnome houses become instant conversation starters and the heart of your garden’s magic. Let’s build something memorable!
📚 In This Guide
- What you need
- Instructions
- Tips and common mistakes
- Wrapping up and next steps
What you need
- ● Tree stump gnome house kit (1–2 kits, depending on size; check for pre-cut wood, roofing, and decorative pieces).
- ● Wood glue (1 small bottle, waterproof formula recommended).
- ● Screws or nails (10–20 small, rust-resistant, 1–1.5" long).
- ● Sandpaper (medium- and fine-grit, 80/120 and 220 grit).
- ● Paint or wood stain (acrylic or outdoor-safe; 1 small container).
- ● Paintbrushes (1–2 fine-tip brushes for details).
- ● Measuring tape (1 small tape, 6–12").
- ● Hammer or drill (cordless preferred for ease).
- ● Safety glasses (1 pair, non-negotiable!).
- ● Decorative elements: Moss, pebbles, twigs, or tiny mushrooms (for fairy garden ambiance).
- ● LED tea lights (battery-operated, for a magical glow).
- ● Weatherproof sealant (1 can, to extend lifespan).
- ● Stencils or decals (for custom designs).
- ● Child-safe tools (if kids are helping—think mini hammers or glue sticks!).
How to build a whimsical gnome house from a tree stump kit
Transform a simple stump into a charming fairy garden centerpiece with these creative steps.
🪴 Step 1: Prepare the Stump Base
Start by cleaning the tree stump thoroughly with a wire brush to remove loose bark, dirt, and any remaining wood fibers. A freshly exposed surface ensures better adhesion for paint and decorations. I like to use a stiff-bristle brush to scrub away debris—this step is critical because leftover bark can peel later.
Next, sand the entire surface lightly with 80-grit sandpaper to create a smooth canvas for painting. Focus on rough spots and edges where the gnome house kit will attach. Wipe away dust with a damp cloth afterward. Here’s the thing—skipping sanding means your paint won’t stick well, and decorations will look uneven.
🎨 Step 2: Paint the Stump with Fairy Colors
Use acrylic paint designed for outdoor use to create a vibrant, weather-resistant finish. Most kits include a color scheme, but feel free to customize—think pastel blues, mossy greens, or even a rustic brown with white trim. Apply a thin base coat first, letting it dry completely before adding details.
For texture, lightly brush on a second coat while the first is still slightly tacky. This creates depth and hides any imperfections. Pro tip: Use a small foam brush for intricate designs like windows or doors. Once dry, seal the paint with an outdoor varnish to protect it from rain and sun—this ensures your gnome house stays bright for years.
🏠 Step 3: Assemble the Gnome House Kit
Follow the kit instructions to attach the pre-cut wooden or plastic pieces that form the gnome house roof, door, and windows. Most kits use screws or adhesive, so read the manufacturer’s guidelines carefully. I always pre-drill holes for screws to prevent wood splitting—especially important if your stump is still slightly damp.
Position the house centered on the stump, using a level to ensure it sits straight. Secure all pieces firmly, then add any decorative trim or trim pieces included in the kit. This is the moment that matters: A crooked house ruins the whimsy, so take your time aligning everything perfectly.
🌿 Step 4: Add Fairy Garden Elements
Surround the gnome house with moss, pebbles, and miniature plants to bring your fairy garden to life. Press sphagnum moss into crevices for a natural look, then arrange small rocks or pebbles around the base. For extra charm, tuck in tiny flowers or succulents—just ensure they’re drought-tolerant if the stump sits in full sun.
Don’t forget the finishing touches: Add a tiny bench, a winding path of pebbles, or even a miniature bridge nearby. Real talk: The details make the difference between a cute decoration and a magical fairy scene. Water lightly after planting to help everything settle in.
☀️ Step 5: Maintain and Refresh
Place your gnome house in a shaded or partially shaded spot to protect paint and decorations from fading. Check the stump monthly for signs of wear—touch up paint as needed, and replace any moss or plants that dry out. A quick wipe with a damp cloth keeps it looking fresh.
If rain washes away decorations, simply reapply them. The beauty of a gnome house is that it’s meant to evolve with time. Over time, the moss will grow thicker, and the garden will feel even more alive—just like a real fairy’s home.
Tips & tricks for building whimsical gnome houses
Creating a magical gnome house from a tree stump kit is all about the details—here's how to elevate your project from charming to enchanting.
Surface Prep is Everything: In Step 1, don't rush the cleaning—take your time scrubbing the stump with that wire brush. I've seen paint peel within weeks when people skip this step. Focus especially on the top surface where your house will sit, as this gets the most wear. A damp cloth after sanding removes all dust, which prevents paint bubbles that can ruin your fairy-tale aesthetic.
Paint Application Secrets: When applying your second coat in Step 2, work quickly but deliberately. The goal is to create that "wet-look" finish while the first coat is still slightly tacky—this builds texture without needing extra paint. For intricate details like window frames, use a small foam brush or even a toothpick for crisp edges. And here's what nobody tells you: Let your paint dry completely between coats, even if it feels dry to the touch. Rushing this leads to smudges that look like muddy fingerprints on your gnome's home.
Assembly Precision: Step 3 is where most people rush, but this is your chance to create a perfectly centered masterpiece. Before attaching anything, use a level to check the stump's flatness—you might need to sand down high spots. When pre-drilling holes for screws, go slightly smaller than your screw size (about 60% of the screw's diameter) to prevent splitting, especially with damp wood. And here's my game-changer: Place a small piece of masking tape over screw heads before tightening—it hides them completely when you paint over it later.
Fairy Garden Realism: In Step 4, the secret to that "lived-in" fairy garden look is subtle imperfection. Don't arrange your moss in perfect rows—let some pieces overlap naturally. For that "worn path" effect, use different-sized pebbles and place them slightly unevenly. And for plants, choose varieties that grow at different rates—some fast-growing succulents and some slower mosses create that magical "growing" effect over time.
Pro Tips for Tree Stump Gnome House Kits
- Creating a magical gnome house from a tree stump kit is all about the details—here's how to elevate your project from...
- Surface Prep is Everything: In Step 1, don't rush the cleaning—take your time scrubbing the stump with that wire brus...
- Paint Application Secrets: When applying your second coat in Step 2, work quickly but deliberately. The goal is to cr...
Frequently asked questions
about tree stump gnome house kits—because every builder deserves a little clarity!What’s the best time of year to build a gnome house?
Spring or early summer is ideal! The weather’s mild, stumps are fresh after pruning, and you’ll avoid winter frost or summer pests. If you’re using a kit, check the included materials for any seasonal limitations (like paint drying times).
Can I customize my kit with different colors or decorations?
Most kits include paint or wood stains, but you can swap them for eco-friendly dyes or metallic accents. Add moss, pebbles, or tiny garden flags for extra charm. Just seal everything with outdoor-safe varnish to protect your creations from rain.
Do I need power tools, or can I build this by hand?
Hand tools (saws, drills, sandpaper) work perfectly for kits designed for DIYers. If your stump is large or the kit includes pre-cut pieces, a handsaw or coping saw will suffice. Pro tip: Wear gloves—gnome houses are fun, but splinters aren’t!
What if my stump is rotten or unstable?
Skip the stump and use a sturdy wooden base (like a tree slice or pallet) instead. For rot-prone stumps, treat them with wood preservative first. If stability is an issue, anchor the base to the ground with rebar or heavy rocks—safety first!
Are these kits safe for young kids to help with?
Yes, but with supervision! Opt for kits with large, pre-cut pieces and non-toxic paints. Teach kids to use tools safely (like kid-sized scissors or sandpaper) and focus on decorating rather than heavy-duty assembly. Bonus: It’s a great way to spark their creativity!
How long will my gnome house last outdoors?
With proper sealing (varnish or outdoor paint), your gnome house can last 2–5 years. Check annually for wear, especially after harsh winters. Store delicate decorations indoors during storms, and your tiny abode will stay magical for seasons to come.
Wrapping up and next steps
Transforming a simple tree stump into a magical gnome home is more than just a craft—it’s a chance to spark creativity, connect with nature, and make memories with kids (or your inner child!).
With the right tree stump gnome house kits, you’ll unlock endless possibilities for fairy gardens, storytelling adventures, or even a quirky garden decoration. The best part? Every stump becomes a blank canvas for imagination.
Ready to dive in? Grab your kit, gather your crew, and start building! Whether you’re a DIY newbie or a seasoned crafter, this project is the perfect way to turn outdoor spaces into enchanting playgrounds. 🌿✨