
Pruning
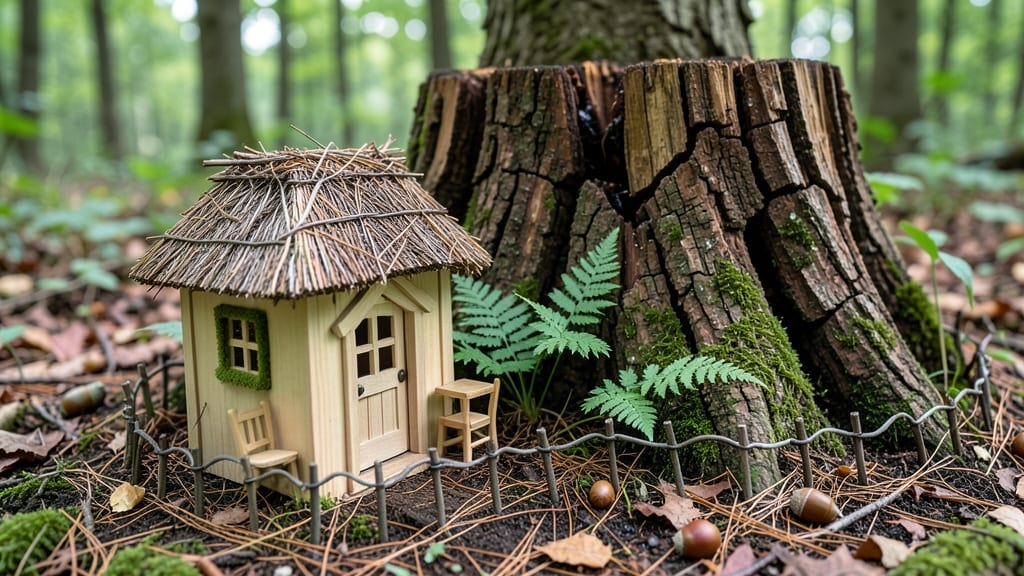
A tree stump fairy house turns garden leftovers into enchanting hideaways that spark joy for kids and adults alike.
I stumbled onto this project after clearing an old oak stump and realized its natural curves could become a tiny home with just a little creativity—and a handful of supplies from the craft drawer.
The magic happens with simple materials: a stump (any size works), wood glue, small nails or screws, paint, and tiny decorations like moss, pebbles, or even thrifted mini furniture.
You’ll spend less than $15 and a few hours transforming something ordinary into a focal point that feels like it’s been there forever. The best part? It’s a zero-waste project that repurposes what would otherwise be firewood.
Imagine twilight visits from fairies or gnomes, or a hidden reading nook for kids—your stump becomes a storybook character overnight. Place it near a garden path, under a tree, or beside shrubs for instant charm.
The possibilities are endless, from rustic cottages to enchanted castles, all while keeping your garden’s natural beauty intact.
Perfect for family projects, nature lovers, or anyone who enjoys whimsical garden decor. Let’s get creative—your garden’s new secret hideaway awaits!
📚 In This Guide
- What you need
- Instructions
- Tips and common mistakes
- Wrapping up and next steps
What you need
- ● Tree stump: A clean, dry stump (4–12 inches in diameter). Smaller stumps work for tiny houses, while larger ones can be grander!
- ● Wooden planks or slices: 3–5 thin slices (½–1 inch thick) to create walls/floors (cedar or pine work well).
- ● Small nails or screws: 10–15 (1-inch galvanized or rust-resistant).
- ● Hammer or drill: For securing wood pieces.
- ● Sandpaper (medium-grit): To smooth rough edges.
- ● Acrylic paint or wood stain: 1–2 colors (pastels or earthy tones for a magical look).
- ● Paintbrushes: 1–2 (thin for details, wider for base coats).
- ○ Clear sealant (optional but recommended): To protect your masterpiece from weather.
- ● Miniature furniture: Tiny chairs, tables, or a mushroom stool (check craft stores or Etsy!).
- ● Fairy lights or LED tea lights: For a magical glow at night.
- ● Moss or faux greenery: To add texture and a forest feel.
- ● Glitter or metallic paint: For a touch of sparkle.
- ● Small pebbles or shells: To create pathways or decorate the base.
- ● Hot glue gun: For lightweight decorations (like twigs or fabric scraps).
Step-by-step instructions for building a tree stump fairy house
Transform an old stump into a magical hideaway with these simple steps.
Prepare the Stump Surface
Start by cleaning the stump thoroughly with a stiff brush and warm, soapy water. Remove any loose bark, dirt, or debris that might interfere with your design. Let it dry completely in the sun—this ensures your materials will stick properly and prevents mold from forming later.
If the stump has deep cracks or rough edges, lightly sand them down with medium-grit sandpaper. This creates a smoother surface for painting or attaching decorations. Wipe away any dust afterward. A clean, dry stump is your blank canvas for fairy magic.
Paint and Decorate the Base
Use outdoor-safe acrylic paint to create a whimsical base. I like to start with a light color, like pale blue or soft gray, for the main body of the stump. Let the first coat dry completely—usually about 2-3 hours—before adding details. A second coat ensures vibrant colors that won’t fade quickly in the elements.
Once the paint is dry, add texture with a small brush. Paint tiny doors, windows, or swirls to mimic a fairy door or tiny house. Use a toothpick to create fine details like moss, vines, or tiny flower beds around the edges. Let everything dry fully before moving to the next step—rushing here can smudge your hard work.
Assemble Fairy House Elements
Gather small, lightweight materials like twigs, pebbles, and moss to build the fairy house structure. For the roof, use flat stones or bark slices to create an overhanging effect. Arrange these carefully around the painted stump, securing them with a dab of outdoor-friendly glue or by tucking them into crevices.
Add tiny furniture like acorn chairs, pinecone tables, or even bottle-cap lanterns. Place them near the "door" to give the illusion of a cozy fairy dwelling. If you’re using natural materials, let them settle for a day to ensure everything stays in place—wind or rain can shift loose items quickly.
Add Finishing Touches and Lighting
For extra charm, sprinkle fairy lights or solar-powered LED lights around the base of the stump. These create a magical glow at night and make the fairy house visible after dark. Wrap the lights around the stump or tuck them into the moss and twigs for a hidden effect.
Finally, place a few decorative accents like tiny mushrooms, flower petals, or even a miniature garden around the stump. These details bring the scene to life and make it feel like a real fairy retreat. Step back and admire your work—your tree stump is now a whimsical garden centerpiece!
Tips & tricks for perfect tree stump fairy houses
Here's what I learned the hard way after transforming three stumps myself—these tricks make all the difference between a charming fairy retreat and a sad pile of twigs.
Surface Prep is Everything: I used to skip the sanding step, but trust me on this—those rough edges will snag your paintbrush and make decorations look uneven. Focus especially on any deep cracks or protruding bark. After sanding, wipe away every last bit of dust with a damp cloth. This ensures your paint adheres perfectly and your fairy house stays put through rain and wind.
Paint Like a Pro: Those 2-3 hours between coats might feel like forever, but they're critical. I learned this after my first attempt—second coat before the first dried completely, and the colors ran together. Pro tip: Use a fan on low to speed up drying in humid weather, but keep it away from direct airflow that could blow dust onto your wet paint. A second coat isn't just for color—it creates that durable finish that lasts through seasons.
Glue Strategy for Wind Resistance: When attaching your twig furniture or moss roof, use outdoor glue sparingly—just a tiny dab at the base. Too much glue will make everything look messy, and too little won't hold up. For extra security, tuck larger pieces into natural crevices in the stump first, then add glue. This creates a hidden anchor that won't show but will keep your fairy house standing firm through breezes.
Lighting Placement: The fairy lights aren't just decoration—they're the magic that makes your house come alive at night. Wrap them around the stump's base first, then weave the remaining lights through your moss and twig structures. This creates layers of light that make the fairy house appear to glow from within. For extra whimsy, tuck a few lights inside "windows" you painted earlier.
Pro Tips for Tree Stump Fairy House
- Here's what I learned the hard way after transforming three stumps myself—these tricks make all the difference between a charming fairy retreat and a sad pile of twigs.
- Surface Prep is Everything: I used to skip the sanding step, but trust me on this—those rough edges will snag your paintbrush and make decorations look uneven.
- Paint Like a Pro: Those 2-3 hours between coats might feel like forever, but they're critical.
Frequently asked questions
Got questions about crafting your own tree stump fairy house? You’re not alone! Here are some of the most common queries—and their answers—to help you bring your magical garden vision to life with ease.
How do I prepare a tree stump for a fairy house?
Start by cleaning the stump thoroughly with a stiff brush or sandpaper to remove dirt, moss, or debris. If the surface is rough, smooth it lightly with sandpaper or a file for a safer, more stable base. For extra charm, seal it with non-toxic wood stain or paint (let it dry completely before decorating!).
How long does it take to build a tree stump fairy house?
Most DIY fairy houses take 10–30 minutes to assemble, depending on the complexity. If you’re using pre-cut materials (like tiny furniture or moss), you could finish in under 15 minutes! Plan for extra time if you’re hand-sculpting details (like toadstools or tiny bridges) or waiting for paint/sealant to dry.
What are some easy, budget-friendly materials to use?
Skip the fancy supplies—thrift stores, nature, and dollar stores are goldmines! Use:
- Natural elements: Pinecones, acorns, twigs, and moss for texture.
- Upcycled items: Old buttons, bottle caps, or broken jewelry as decor.
- Affordable craft supplies: Acrylic paint, glue guns, and burlap for roofs.
How do I keep pests away from my fairy house?
Fairy houses are not pest-proof, but you can deter critters with these tricks:
- Use non-toxic cedar mulch or citrus peels around the base (animals dislike the scent!).
- Avoid placing it near food sources (like compost piles or fruit trees).
- Elevate the house slightly with pebbles or a small platform to discourage burrowing.
Will rain or snow damage my fairy house?
Most fairy houses are weather-resistant if sealed properly! Use a waterproof glue (like E6000) and seal wood with outdoor-safe varnish or Mod Podge. For extra durability:
- Add a tiny roof (bark, slate, or a cut-in-half coconut shell).
- Store delicate decor (like paper flowers) indoors during storms.
What if my stump is too big or small?
No stump? No problem! Use:
- Large stumps: Carve a “fairy door” into the side or build a mini village around it.
- Small stumps/logs: Turn it into a bridge or table for fairy tea parties.
No stump? Stack rocks, bricks, or even a terracotta pot as a base!
Get creative—fairy houses thrive on imagination, not perfection!Wrapping up and next steps
Transforming a tree stump into a tree stump fairy house is more than just a craft—it’s a chance to spark joy, creativity, and a little garden magic! 🌿✨ Whether you’re a seasoned DIYer or a beginner, this project proves that even the smallest spaces can become enchanting hideaways with just a few supplies and a dash of imagination.
Ready to bring your fairy garden to life? Grab your tools, gather your materials, and let your creativity take flight! Next, share your masterpiece on social media with #TreeStumpFairyHouse—we’d love to see your whimsical designs! 📸💖