Pruning
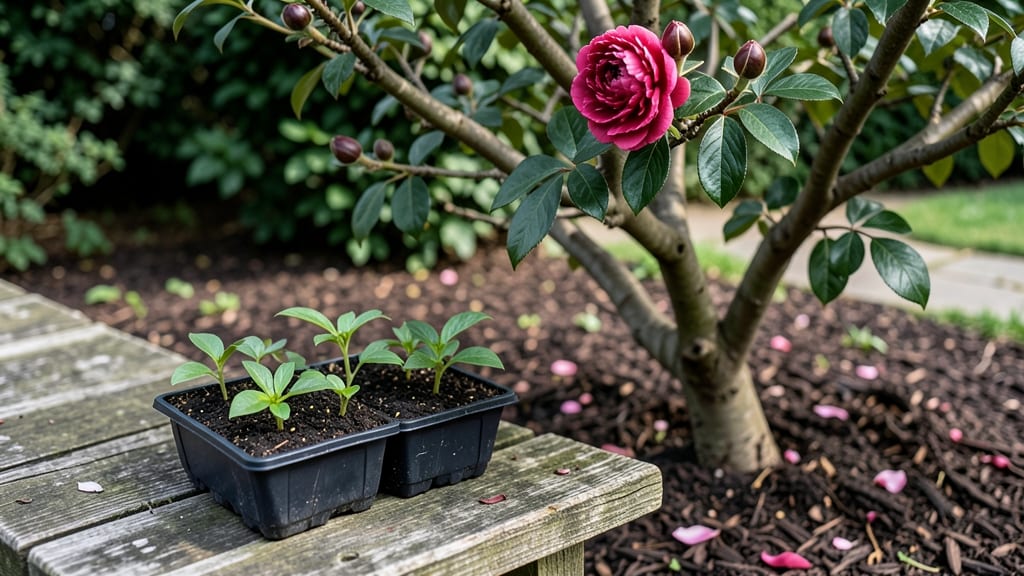
Growing tree peonies from seeds in the Pacific Northwest means waiting for the right moment—usually after the first frost when soil temperatures drop below 40°F. I’ve struggled with germination rates before, but these hardy seeds reward patience with stunning, fragrant blooms that outshine store-bought plants.
The trick isn’t just timing; it’s mimicking their natural dormancy cycle to break through stubborn seed coats.
You’ll need just a few supplies: fresh seeds (or those soaked overnight), a shallow tray with dampened paper towels, and a plastic bag to create humidity.
Most gardeners overlook the cold stratification step—keeping seeds in the fridge for 6-8 weeks before sowing—but this mimics winter conditions and dramatically improves germination rates. Even in our damp climate, this step makes the difference between waiting years and seeing sprouts in 4-6 weeks.
The payoff comes when those first dark green leaves push through the soil, signaling success. Tree peony seedlings grow slowly at first, but with consistent moisture and partial shade during their early months, they’ll establish strong roots.
By their second year, you’ll watch them transform into lush, woody stems capable of 10-foot heights—and those blooms? Worth every minute of waiting.
For Pacific Northwest gardeners, timing is everything: sow seeds in late fall or early spring, transplant outdoors after the last frost, and give them space to spread. The key to success isn’t luck—it’s understanding their unique needs. Let’s get those seeds sprouting!
📚 In This Guide
- What you need
- Instructions
- Tips and common mistakes
- Wrapping up and next steps
What you need
- ● Tree peony seeds: Fresh, high-quality seeds (10–20 seeds per batch for best results). Look for seeds from Paeonia ostii or Paeonia rockii varieties.
- ● Well-draining potting mix: A blend of 50% peat moss or coconut coir, 30% perlite or coarse sand, and 20% compost (sterilized to prevent mold). Aim for a 5–6 inch deep tray or pot.
- ● Seed-starting containers: 3–4 inch diameter pots or seed trays with drainage holes (biodegradable pots are eco-friendly!).
- ● Plastic wrap or humidity dome: To maintain moisture and warmth during germination.
- ● Grow lights or sunny windowsill: Tree peony seeds thrive with 12–16 hours of light daily (LED grow lights work best for indoor setups).
- ● Misting bottle or spray nozzle: For gentle, even watering (avoid soaking the soil).
- ○ Fertilizer (optional but helpful): A balanced, water-soluble fertilizer (5-5-5 or 10-10-10) diluted to half-strength for young seedlings.
- ● Pruning shears or scissors: For trimming seed trays or pots if needed.
- ○ Thermometer (optional): To monitor soil temperature (65–75°F is ideal for germination).
- ○ Heat mat (optional): For indoor growers in cooler climates to maintain warmth.
- ● Hardening-off tray (for later): A shaded outdoor area or cold frame to acclimate seedlings before transplanting.
- ● PNW-specific prep: If starting outdoors, wait until late spring (after last frost) or use a greenhouse for earlier starts.
How to germinate tree peony seeds in the Pacific Northwest
Cold-stratification is your secret weapon for breaking tree peony dormancy and coaxing those prized blooms.
Harvest and Prepare the Seeds
Collect ripe tree peony seeds from healthy, mature pods—they should turn brown and split open naturally in late summer or early fall. Remove the seeds and clean off any remaining pulp, but don’t wash them thoroughly. The natural oils on the seed coat help protect against rot during stratification.
Here’s the thing—tree peony seeds are notoriously slow to germinate, so patience is key. After cleaning, place them in a paper towel or breathable cloth and store in a sealed container with a small amount of moistened sphagnum moss or peat moss. The goal is dampness, not sogginess; the seeds should feel slightly damp but not dripping.
Stratify for 3-6 Months in Cold Conditions
Tree peony seeds need a long cold period to break dormancy—this mimics their natural winter cycle. Place the container in your refrigerator’s crisper drawer, where temperatures hover around 35-45°F. Check the seeds monthly to ensure the moss stays consistently moist; if it dries out, germination fails.
Real talk: Some seeds may sprout within 3 months, while others take up to 6 months. Don’t rush this process—premature removal from cold will leave seeds dormant indefinitely. If you’re impatient, you can extend stratification to 8 months for better success rates, especially in the Pacific Northwest’s cooler climates.
Sow Stratified Seeds in Well-Draining Soil
Once the seeds show signs of swelling or tiny root hairs, they’re ready for planting. Use a lightweight, well-draining mix—50% peat moss and 50% perlite or coarse sand works well. Fill small pots or seed trays, leaving about ½ inch from the rim, and press the soil down gently to eliminate air pockets.
Plant the seeds ¼ inch deep, spacing them 2 inches apart to allow room for growth. Water lightly with a spray bottle to avoid displacing the seeds. Place the trays in a shaded area—indirect light is best until germination begins. Overhead watering can cause soil crusting, which smothers emerging seedlings.
Provide Warmth and Light for Germination
Tree peony seedlings need warmth to sprout after stratification. Move the trays to a spot with 60-70°F daytime temperatures, such as a sunny windowsill or under a grow light. Keep the soil consistently moist—not soggy, not dry—by watering at the base when the top inch feels dry to the touch.
Germination can take 2-4 weeks after sowing, depending on seed viability and growing conditions. You’ll see the first true leaves appear as small, deep green foliage—this is your signal to provide bright, indirect light for the next 4-6 weeks. Avoid direct sun at this stage; tender seedlings can scorch easily.
Transplant Seedlings to Permanent Locations
Once seedlings develop 3-4 sets of true leaves and reach about 4-6 inches tall, they’re ready for transplanting. Harden them off by gradually exposing them to outdoor conditions over 7-10 days, starting with 1-2 hours of shade and increasing exposure daily.
Choose a permanent spot with full sun to partial shade and well-draining soil. In the Pacific Northwest, where summers are mild, tree peonies thrive in slightly acidic to neutral soil with a pH of 6.0-7.0. Dig a hole twice as wide as the root ball but only as deep as the container. Amend the soil with compost to improve fertility and drainage before planting.
Tips & tricks for perfect tree peony seed germination
Mastering tree peony seed germination takes patience and precision—here’s how to maximize your success with these hard-to-grow beauties.
Seed Selection: Choose seeds from the largest, healthiest pods you can find, as they’ll have the best germination potential. Look for pods that have naturally split open—they’ll be brown and dry to the touch. If you’re harvesting from wild plants, collect seeds from multiple pods to increase your chances of success, since not all seeds may be viable.
Stratification Environment: The refrigerator’s crisper drawer is ideal for maintaining the 35-45°F range, but if your fridge runs cooler, consider using a dedicated seed stratification fridge or even a cool basement. Place a small thermometer in the container to monitor temperatures—consistency is key. If you notice condensation forming on the container walls, open it briefly to allow excess moisture to escape.
Soil Mix Precision: When creating your 50% peat moss and 50% perlite or coarse sand mix, sift the ingredients to eliminate large clumps. This ensures even moisture distribution and prevents compaction around delicate seedlings. After planting, gently press the soil around each seed rather than packing it down—tree peony seeds need just enough contact to stay in place without being buried too deeply.
Germination Timing: The 2-4 week germination window after sowing can feel agonizingly slow, but resist the urge to check daily. Instead, set a reminder to monitor moisture levels weekly. If you notice the soil surface drying out between waterings, it’s likely too coarse—consider adding a thin layer of sphagnum moss on top to help retain moisture without suffocating the seeds.
Pro Tips for Tree Peony Seeds
- Mastering tree peony seed germination takes patience and precision—here’s how to maximize your success with these hard-to-grow beauties.
- Seed Selection: Choose seeds from the largest, healthiest pods you can find, as they’ll have the best germination potential.
- Stratification Environment: The refrigerator’s crisper drawer is ideal for maintaining the 35-45°F range, but if your fridge runs cooler, consider using a dedicated seed stratification fridge or even a cool basement.
Frequently asked questions
Got questions about growing tree peony seeds? You’re not alone! Here are some of the most common concerns Pacific Northwest gardeners have—and the answers to help you succeed.
Can tree peony seeds grow true to the parent plant?
Unfortunately, no! Tree peonies (Paeonia ostii) grown from seed rarely produce flowers identical to the parent. Seed-grown plants often take 5–7 years to bloom and may have different colors or forms. For consistent results, consider grafting or purchasing established plants.
How long does it take for tree peony seeds to germinate?
Patience is key—tree peony seeds can take 30–90 days (or even longer!) to sprout. Cold stratification (chilling moist seeds in the fridge for 3–6 months) mimics winter and speeds up germination. Keep soil consistently moist but not soggy during this time.
Are tree peony seeds hard to grow in the Pacific Northwest’s wet climate?
Yes, but not impossible! The PNW’s damp winters can lead to rot or fungal issues. Start seeds indoors in well-draining mixes (add perlite or sand) and avoid overwatering. Once seedlings emerge, transplant to raised beds or slopes for better drainage.
What’s the best alternative if my seeds won’t sprout?
If germination fails, try these backups:
- Layering: Bend a low branch to the ground, cover with soil, and wait for roots to form.
- Division: Split established clumps in early spring (though tree peonies are slower to divide than herbaceous types).
- Grafting: A more advanced method but guarantees the exact variety you love.
Why are my seedlings wilting or turning yellow?
Common culprits in the PNW:
- Overwatering: Tree peony roots hate soggy soil. Let the top inch dry between waterings.
- Fungal diseases: Yellow leaves + mold? Reduce humidity with better airflow or a fungicide spray.
- Nutrient deficiency: Feed with low-nitrogen fertilizer (like 5-10-10) once seedlings have 2–3 sets of leaves.
Wrapping up and next steps
Growing tree peony seeds in the Pacific Northwest is a rewarding journey that blends patience with the joy of nurturing something truly special. 🌱 With the right soil, timing, and care, you can transform tiny seeds into stunning, fragrant blooms that brighten your garden for years.
Whether you're a seasoned gardener or just starting out, every step—from stratification to transplanting—brings you closer to success.
Ready to take the next step? Start by gathering your seeds and supplies, then follow the germination tricks shared here. Before you know it, your garden will be alive with the beauty and resilience of tree peonies! Happy planting! 🌸