
Pruning
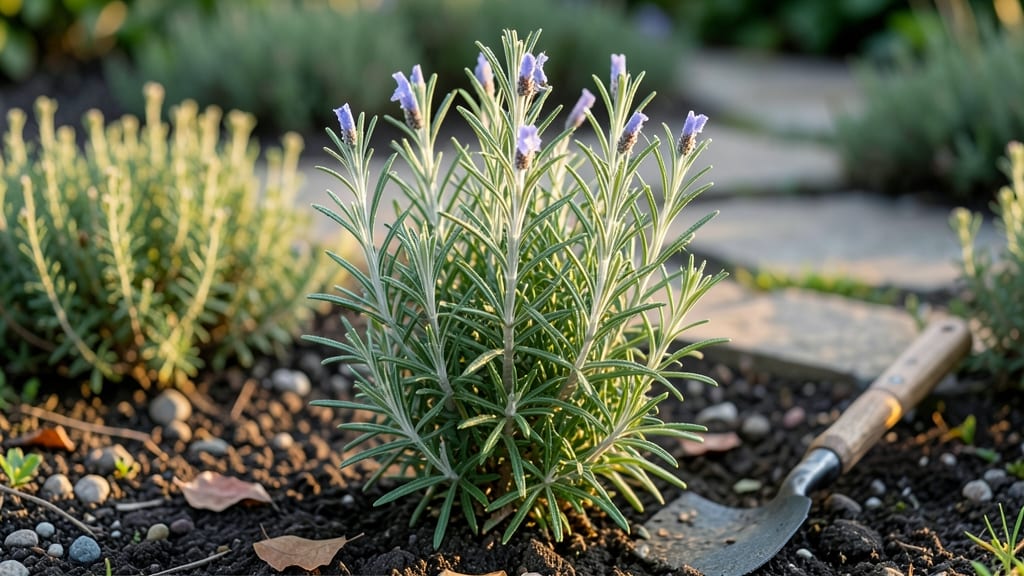
Creating a rosemary cone tree that thrives in the Pacific Northwest’s chill starts with one key move: pruning for structure before winter sets in. ✂️ I’ve shaped mine into a dense, frost-hardy tree by training it upward during its first year—something that works even when temperatures dip below 20°F. The trick isn’t just cutting; it’s understanding how rosemary’s woody stems respond to cold and how to keep it compact without stunting growth.
You’ll need sharp pruners, a sunny spot with at least 6 hours of direct light daily, and well-draining soil mixed with sand or gravel. Water deeply but infrequently—rosemary hates soggy roots—and mulch heavily in winter to protect the base.
The goal is a 3-4 foot tall tree with a trunk-like center and layered branches fanning out like a cone. Most people over-prune, leaving bare spots; I learned to cut back only one-third of the plant each season to maintain density.
By spring, you’ll see new growth shooting upward from the base, forming that signature cone shape. The foliage stays fragrant and vibrant even after frost, and the plant becomes resistant to common pests like spider mites.
The best part? Once established, it needs minimal care—just an annual trim to maintain the form. Think of it as a living centerpiece that doubles as a kitchen herb.
This method works for both Upright rosemary and Arp varieties, though Arp handles colder climates better. If you’re in a wetter PNW microclimate, elevate the pot slightly to prevent root rot.
The key to long-term success is patience—it takes 2-3 years to perfect the shape, but the results are worth every snip.
📚 In This Guide
- What you need
- Instructions
- Tips and common mistakes
- Wrapping up and next steps
What you need
- ● Rosemary plants: 3–5 healthy, mature rosemary bushes (choose Rosmarinus officinalis varieties like 'Arp' or 'Hill Hardy' for frost resistance).
- ● Pruning shears: Sharp, clean bypass pruners (avoid anvil pruners to prevent crushing stems).
- ● Gloves: Heavy-duty gardening gloves (rosemary can be prickly!).
- ● Stakes or trellis: 3–4 sturdy wooden or metal stakes (4–6 ft tall) or a small trellis for support.
- ● Twine or soft ties: 1–2 rolls of garden twine or flexible plant ties.
- ● Potting soil: Well-draining cactus/succulent mix (or amend regular potting soil with perlite/sand for drainage).
- ● Large container or in-ground space: Container option: A wide, deep pot (18+ inches in diameter) with drainage holes.
- ● In-ground option: A sunny, sheltered spot with loose, well-draining soil (amend with compost if needed).
- ● Watering can or hose: With a gentle spray nozzle for post-pruning hydration.
- ● Rooting hormone: To encourage faster growth when trimming cuttings.
- ● Mulch: Gravel or pine bark to improve drainage and retain moisture.
- ● Fertilizer: Balanced organic fertilizer (5-5-5 or similar) for post-planting care.
- ● Pruning sealant: To protect larger cuts (though rosemary typically heals well without it).
- ● Spray bottle: For misting cuttings if propagating from trimmings.
Step-by-Step instructions for crafting a frost-resistant rosemary cone tree
Here's how to transform hardy rosemary into a striking architectural centerpiece that thrives in Pacific Northwest winters.
🌿 Step 1: Select and Prepare Your Rosemary Starter Plants
Choose four upright rosemary varieties like 'Arp' or 'Hill Hardy'—these handle cold best. Look for plants with sturdy, woody stems at least 18-24 inches tall and multiple lateral branches. I always inspect the base for any signs of rot or soft stems, which won't survive the shaping process.
Remove the plants from their pots and gently tease apart any root-bound clusters. Trim back any leggy growth to encourage bushier branching. The key here is selecting plants with natural structural integrity—you're working with what nature gives you, not forcing unnatural shapes.
🪴 Step 2: Create the Foundation Structure
Plant your four selected rosemary stems in a square formation, spacing them 12-15 inches apart in a large container or directly in the ground. Use well-draining soil amended with 20% perlite to prevent waterlogging during winter. The square base creates stability for the cone shape we're building.
After planting, water deeply to settle the roots. I like to use a slow-release fertilizer at planting time to give the plants a nutrient boost as they establish. The first few weeks are critical—keep soil consistently moist but never soggy as the plants adapt to their new formation.
✂️ Step 3: Shape the Cone Framework
Begin shaping after 4-6 weeks when new growth appears. Using sharp pruning shears, cut back the top third of each stem to encourage branching. This is where the magic happens—the plants will respond by sending out multiple side shoots, creating the cone's natural layers.
I work in stages, making small cuts rather than drastic pruning. After each cut, step back and visualize the cone shape. You want the outer branches to be slightly longer than the inner ones, creating that classic cone silhouette. The goal is gradual shaping—don't rush this process or you'll shock the plants.
☀️ Step 4: Refine and Maintain Year-Round Structure
During the growing season, continue shaping by trimming back any branches that grow beyond the desired cone outline. In late summer, give the plants a light haircut to promote dense foliage before winter. This is particularly important in the Pacific Northwest where winter rains can weigh down unstructured growth.
Winter care is minimal but crucial. In our climate, I protect the base with a thick layer of 3-4 inches of mulch to insulate roots. The cone shape actually helps snow slide off naturally, reducing winter damage. Prune lightly in early spring to remove any winter-damaged growth before new flushes emerge.
⏰ Step 5: Annual Renewal for Long-Term Health
Every spring, assess your rosemary cone tree's structure. Remove any dead wood from the center where light can't penetrate. I like to do this in early March before new growth begins. The cone shape should naturally thin out over time—this is normal, but you can encourage denser growth by trimming back some of the outer branches slightly each year.
Fertilize lightly in early spring with a balanced organic fertilizer. The cone tree's beauty comes from its natural structure—avoid heavy feeding which promotes soft, weak growth. With proper care, your rosemary cone tree will develop a mature, woody structure that can last for decades in our challenging climate.
Tips & tricks for crafting a frost-resistant rosemary cone tree
Creating a rosemary cone tree that stands up to Pacific Northwest winters takes patience and precision—but these insights will help you avoid common pitfalls and achieve that perfect architectural silhouette.
Selection is Everything: When choosing your four starter plants in Step 1, prioritize those with the thickest stems at the base—these will develop the sturdy foundation your cone needs. I've seen many gardeners pick plants with slender stems that snap under winter snow loads. Look for stems at least ½-inch thick at the base, and avoid any with hollow centers or mushy spots when gently squeezed.
Timing Your First Pruning: The 4-6 week wait in Step 3 is non-negotiable for healthy branching. This period allows the plants to recover from transplant shock and develop new growth that will respond to pruning. I've learned the hard way that rushing this step leads to weak regrowth. If you're in a cooler microclimate, extend the wait to 7-8 weeks—your plants will thank you with stronger structure.
Winter Protection Secrets: That 3-4 inch mulch layer in Step 4 isn't just about insulation—it's about creating a microclimate that prevents soil heaving during freeze-thaw cycles. I've found that adding a layer of straw mulch on top of the regular mulch provides extra wind protection. In particularly harsh winters, I've even wrapped the lower trunks with burlap for the first two winters until the plants establish their woody structure.
Spring Pruning Strategy: When you do your early March assessment in Step 5, focus on removing dead wood from the center first—this improves airflow and prevents fungal issues. Then work outward, trimming branches that grow at sharp angles as these are more prone to winter breakage. I've noticed that branches growing at 45-degree angles or less handle our winds better and maintain their shape longer.
Pro Tips for Rosemary Cone Tree
- Creating a rosemary cone tree that stands up to Pacific Northwest winters takes patience and precision—but these insights will help you avoid common pitfalls and achieve that perfect architectural silhouette.
- Selection is Everything: When choosing your four starter plants in Step 1, prioritize those with the thickest stems at the base—these will develop the sturdy foundation your cone needs.
- Timing Your First Pruning: The 4-6 week wait in Step 3 is non-negotiable for healthy branching.
Frequently asked questions
Got questions about growing a rosemary cone tree in the Pacific Northwest? You’re not alone!
Here are some of the most common queries—plus straightforward answers to help you prune, protect, and perfect your frost-resistant rosemary.
Can rosemary survive winter in the Pacific Northwest?
Yes—but with careful planning! While rosemary is technically hardy to USDA Zone 8, PNW winters (especially in Zones 7-6) can be brutal. Opt for Rosmarinus officinalis 'Prostratus' or 'Hill Hardy' varieties, mulch heavily, and consider a microclimate (e.g., near a south-facing wall). Prune back in late winter to reduce frost damage.
How do I protect rosemary from frost without killing it?
Use a frost cloth (like Agribon) or a mini greenhouse for young plants. Avoid plastic sheets—rosemary hates humidity. For established plants, mulch with straw (not wood chips) and water deeply before the first freeze to boost cold tolerance. Pro tip: Prune one-third of the plant in early spring to encourage new, frost-resistant growth.
When’s the best time to prune a rosemary cone tree?
Prune twice a year:
- Late winter/early spring (before new growth starts) to shape and remove dead wood.
- Mid-summer to encourage bushiness and harvest leaves.
What if my rosemary turns brown and crispy?
Brown, brittle leaves usually mean over-pruning, underwatering, or frost damage. Check the soil—rosemary hates soggy roots (amend with gravel or sand). If frost is the culprit, trim back to healthy green growth and protect next winter. Pro tip: If your PNW winters drop below 15°F, grow rosemary in containers and move it indoors.
Are there frost-resistant rosemary alternatives?
Yes! Try these PNW-friendly options:
For a rosemary-like look, creeping thyme or sage are great substitutes!
Wrapping up and next steps
Growing a thriving rosemary cone tree in the Pacific Northwest is totally doable—even with frost! 🌿 With the right pruning techniques, soil prep, and a little patience, you’ll enjoy its fragrant foliage and unique shape for years.
Remember, consistency is key: regular pruning keeps it healthy, and winter protection ensures it survives cold snaps.
Ready to take the next step? Start small—pick a sunny spot, grab your shears, and give your rosemary tree the love it deserves. Before you know it, you’ll be harvesting fresh sprigs for cooking or admiring its lush, woody beauty! 🌟