Pruning
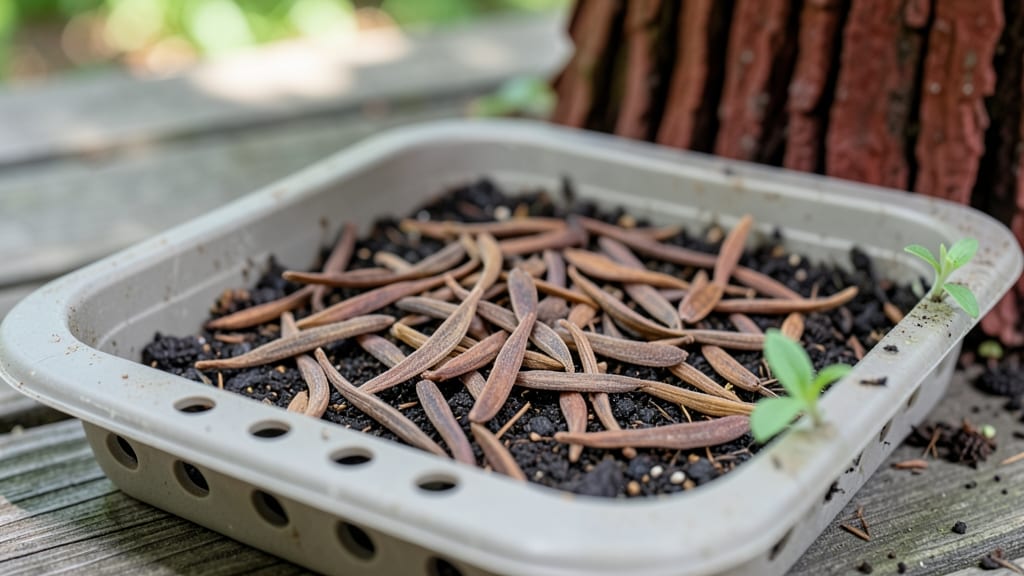
Growing redwood trees from seeds is like nurturing a tiny piece of ancient forest in your backyard. 🌲 The key to success starts with fresh, viable seeds—those tiny winged nuts that look more like maple seeds but hold the potential for towering giants.
My first attempt failed because I didn’t realize how picky redwood seeds are about moisture and timing, but once I cracked the code, the results were worth the patience.
You’ll need a few simple supplies: a shallow tray with damp sphagnum moss, plastic wrap to create a humid environment, and a spot with 60-70°F temperatures—consistent warmth is non-negotiable. The real magic happens in the first 4-6 weeks, when those seeds either wake up or give up forever.
Many gardeners skip the stratification step (cold treatment), but I’ve found it doubles germination rates when done right.
What you’ll end up with are delicate seedlings that grow less than an inch per year at first, but with proper care, they’ll develop into sturdy young trees in 5-10 years.
The payoff? A living monument to your long-term commitment—imagine the shade and majesty a mature redwood brings to your landscape. Patience is the only requirement, and the wait is worth every moment.
This method works best in USDA Zones 7-10, where redwoods thrive naturally, but with extra winter protection, you can push the limits. The biggest challenge? Avoiding impatience—these aren’t fast-growing annuals, but the journey makes the destination unforgettable. Let’s get those seeds sprouting!
📚 In This Guide
- What you need
- Instructions
- Tips and common mistakes
- Wrapping up and next steps
What you need
- ● Redwood tree seeds: 10–20 fresh, viable seeds (preferably from Sequoia sempervirens or Sequoiadendron giganteum).
- ● Sterilized seed-starting mix: 1–2 gallons of well-draining, peat-based or coco coir blend (avoid garden soil—it’s too dense!).
- ● Seed trays or small pots: 4–6 biodegradable or plastic trays (3–4" deep) with drainage holes.
- ● Plastic wrap or humidity dome: To maintain moisture and warmth during germination.
- ● Spray bottle (fine mist): For gentle watering—redwood seeds hate soggy soil!
- ● Grow lights or sunny windowsill: A south-facing window or LED grow lights (12–16 hours/day) for optimal light.
- ○ Thermometer & heat mat (optional but helpful): Redwood seeds germinate best at 65–75°F (18–24°C).
- ● Label markers & tags: To track seed varieties and planting dates.
- ● Stratification supplies: If seeds are dormant, a mix of moist sand + peat in a sealed bag (refrigerate for 30–60 days).
- ● Fungicide (like hydrogen peroxide 3%): A few drops in water to prevent mold.
- ● Transplanting tools: Small trowel, tweezers, and a humidity tent for delicate seedlings.
- ● Outdoor nursery space: A shaded, sheltered area (if transplanting outdoors after 6–12 months).
Step-by-step guide to germinating redwood tree seeds
Growing redwoods from seed is a long-term commitment, but these steps make it manageable.
🌱 Step 1: Stratify Seeds for Maximum Germination
Redwood seeds require cold stratification to break dormancy—this mimics winter conditions in their natural habitat. Place seeds in a moistened paper towel inside a sealed plastic bag, then refrigerate for 90-120 days. Check monthly to ensure the towel stays damp but not soggy.
I like to label the bag with the date and variety (if known) to avoid confusion later. The cold treatment tricks the seed into thinking winter has passed, signaling it’s time to sprout. If you forget to refrigerate, germination rates will plummet—this step is non-negotiable for redwoods.
💧 Step 2: Prepare the Germination Medium
After stratification, fill a sterile seedling tray with a 50/50 mix of peat moss and perlite—this ensures drainage while retaining moisture. Moisten the mix until it feels like a wrung-out sponge: damp but not dripping. Redwoods hate soggy roots, so avoid overwatering at this stage.
Sow seeds ¼ inch deep in small clusters (2-3 seeds per spot) since germination rates are unpredictable. Lightly cover with the same mix and mist the surface with a spray bottle. The goal is to keep the medium consistently moist—never waterlogged—during the 4-8 weeks it may take for sprouts to appear.
☀️ Step 3: Provide Warmth and Indirect Light
Move the tray to a warm, bright location (around 65-75°F) but avoid direct sunlight, which can overheat the tray. A grow light on a 12-hour cycle works best—redwood seedlings are sensitive to heat stress. Watch for condensation on the tray cover (if using one) and remove it once sprouts emerge to prevent fungal growth.
Here’s the thing—redwood seedlings grow extremely slowly at first. Don’t rush them. You’ll see tiny green cotyledons (the first leaves) in 4-6 weeks, but true leaves (the second set) may take another 6-12 months. Patience is key; these giants aren’t called redwoods for nothing.
🪴 Step 4: Transplant to Individual Pots
Once seedlings reach 3-4 inches tall (usually after 6-12 months), carefully transplant them into 4-inch pots filled with a well-draining potting mix. Redwoods dislike root disturbance, so use a spoon or small trowel to lift seedlings by the roots, not the stem. Gently firm the soil around the base to eliminate air pockets.
Place pots in a shaded outdoor area (or under 50% shade cloth) to acclimate them to natural light. Water deeply but infrequently—redwoods in the wild experience dry summers, so mimic that by letting the top 1 inch of soil dry out between waterings. Overwatering at this stage will stunt growth or cause root rot.
⏰ Step 5: Gradually Increase Sun Exposure
After 2-3 months in pots, slowly introduce seedlings to morning sun (2-3 hours daily) before moving them to full sun over 4-6 weeks. Redwoods need bright, indirect light for years before they tolerate direct sun. Watch for yellowing leaves—a sign of too much sun—and adjust shading as needed.
This is the moment that matters: redwoods grow less than 1 inch per year in their first decade. Don’t expect rapid results. With consistent care, your seedlings will eventually reach tree size, but it’s a marathon, not a sprint. Keep records of watering, light changes, and growth spurts to track progress.
Tips & tricks for perfect redwood seed germination
These insider secrets will help you navigate the patience game of growing redwoods from seed.
Cold Stratification Precision: The 90-120 day refrigeration period is critical—don't cut corners! Use a small paper towel folded into quarters to hold 3-5 seeds, then place it in a sealed plastic bag with a tiny hole for airflow. I've found that placing the bag on the middle shelf of your fridge (around 35-40°F) provides the most consistent cold treatment. The seeds need this dormancy-breaking period to simulate natural winter conditions, so avoid temperature fluctuations that could disrupt the process.
Medium Consistency Check: When preparing your 50/50 peat moss and perlite mix in Step 2, squeeze a handful—it should hold its shape when pressed but crumble easily. This texture prevents both waterlogging and drying out during the 4-8 week germination window. I recommend using a spray bottle with a fine mist setting to maintain consistent moisture without oversaturating the mix. Too much water creates anaerobic conditions that can lead to rot, while too little causes seeds to dry out before sprouting.
Lighting Strategy: For the 65-75°F warm, bright location in Step 3, I've had the most success with a simple LED grow light placed 6-8 inches above the tray on a timer. The 12-hour cycle mimics natural daylight patterns, which redwood seedlings respond to better than constant light. Watch for condensation on the tray cover—if you see heavy droplets forming, it's time to remove the cover to prevent fungal growth. Remember, these seedlings are delicate; they need gentle light exposure to avoid heat stress.
Transplanting Technique: When your seedlings reach 3-4 inches (typically after 6-12 months), use a spoon to gently loosen the soil around the roots before lifting. This minimizes root damage during transplantation to 4-inch pots. I've found that redwood seedlings handle stress better when transplanted on a cloudy day, as the reduced light intensity helps them recover more quickly. After transplanting, water deeply but let the top inch of soil dry out before watering again—this mimics their natural drought-resistant adaptations.
Pro Tips for Redwood Tree Seeds
- These insider secrets will help you navigate the patience game of growing redwoods from seed.
- Cold Stratification Precision: The 90-120 day refrigeration period is critical—don't cut corners!
- Medium Consistency Check: When preparing your 50/50 peat moss and perlite mix in Step 2, squeeze a handful—it should hold its shape when pressed but crumble easily.
Frequently asked questions
Got questions about growing redwood tree seeds?
You’re not alone! These ancient giants have unique needs—here’s what you need to know before planting.
How long does it take for redwood seeds to germinate?
Redwood seeds (Sequoia sempervirens or Sequoiadendron giganteum) can take 4–12 weeks to sprout, depending on conditions. Cold stratification (40–50°F for 30–90 days) speeds this up. Keep soil consistently moist but well-drained—patience is key!
Do redwood seeds need light to germinate?
Nope! Redwood seeds thrive in darkness during germination. Plant them ½ inch deep in moist, sterile potting mix (like peat/perlite) and keep them shaded until sprouts appear. Direct sunlight can dry them out too fast.
Can I grow redwood trees from seeds in my climate?
Redwoods prefer USDA Zones 5–9 (coastal redwoods) or 6–8 (giant sequoias). If you’re outside this range, opt for container growing and move seedlings indoors in winter. Young trees are frost-sensitive—protect them until established!
Why aren’t my redwood seeds sprouting?
Common culprits:
- Dormancy: Try cold stratification (mix seeds with damp sand, refrigerate 30–90 days).
- Poor soil: Use sterile, well-draining mix (redwoods hate soggy roots!).
- Old seeds: Redwood seeds lose viability after 1–2 years—source fresh ones!
Still stuck? Test a few seeds in a damp paper towel—if they rot, they’re likely dead.
What’s a faster alternative to growing redwoods from seeds?
If you want a redwood now, consider:
- Young nursery-grown seedlings (pricier but faster).
- Grafted redwoods (for dwarf varieties like Sequoia ‘Pendula’).
- Layering cuttings (advanced, but possible with semi-hardwood stems).
Seeds are rewarding but slow—plan ahead!
Wrapping up and next steps
Growing a redwood tree from seed is a rewarding journey that connects you to nature’s giants—literally! 🌲 With patience, the right conditions, and a touch of care, you can nurture these majestic seeds into towering forest sentinels.
Whether you’re a seasoned gardener or a curious beginner, every small step brings you closer to witnessing their incredible growth.
Ready to take the next step? Start by gathering your supplies, following the germination guide, and keeping a journal to track progress. Share your redwood adventure with fellow plant enthusiasts—your story might inspire others to grow their own forest legacy! 🌱