Pruning
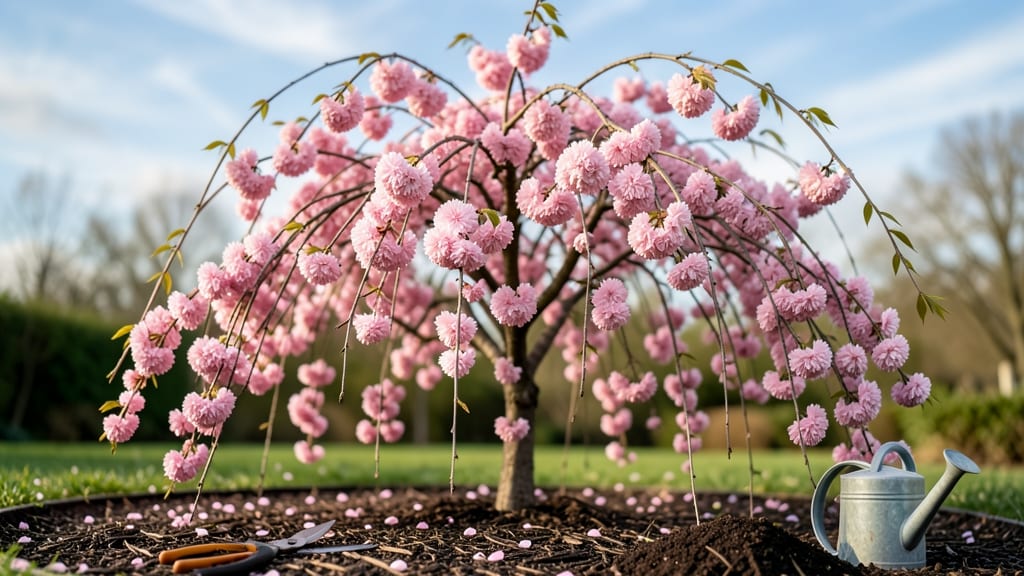
Your Pacific Northwest garden deserves a pink shower weeping cherry tree—that cascading canopy of fragrant blossoms is pure magic in spring. 🌸 I planted mine near the patio last year, and the way the pink flowers spill over the edge like liquid silk has become our family’s favorite spot.
The best part? It thrives in containers, so you don’t need a yard to enjoy this showstopper.
This tree isn’t just pretty—it’s frost-proof for our damp climate, with branches that arch gracefully for years. Place it as a focal point near seating areas, pair it with hostas or ferns for contrast, or tuck it into a corner where its weeping habit creates natural privacy.
The fragrance alone makes it worth growing, but the seasonal interest—from spring blooms to summer foliage—keeps it stunning all year.
You’ll love how it transforms even small spaces into a romantic retreat. Imagine morning coffee under that pink cascade or evening drinks as fireflies dance through the branches. With the right container and placement, this tree becomes the heart of your outdoor living area—no technical skills required, just great design.
Works beautifully in 5-gallon containers for young trees or larger half-barrels as they mature. The key is choosing a spot with 6+ hours of sun and well-draining soil—whether that’s a balcony, courtyard, or garden corner. Let’s make your space unforgettable with this living masterpiece.
📚 In This Guide
- What you need
- Instructions
- Tips and common mistakes
- Wrapping up and next steps
What you need
- ● Pruning shears: Sharp, bypass-style shears (for clean cuts on smaller branches). Size: 6–8 inches.
- ● Loppers: For thicker branches (½–1½ inches in diameter). Look for: Ratcheting or bypass blades for precision.
- ● Hand pruners: For fine-tuning and delicate cuts (e.g., removing suckers or dead buds). Size: 5–6 inches.
- ○ Saw (optional but helpful): For branches over 1½ inches thick. Type: Pruning saw with a curved blade.
- ● Disinfectant (70% isopropyl alcohol or pruning sealant): To sterilize tools between cuts and prevent disease spread.
- ● Garden gloves: Heavy-duty, cut-resistant gloves to protect your hands from thorns and rough bark.
- ● Bucket or bag: For collecting pruned branches (1–2 gallon size, depending on debris volume).
- ● Rubbing alcohol wipes: For quick tool sanitization mid-pruning.
- ● Pruning paint/sealant: To coat larger cuts and prevent moisture loss (e.g., Tree Seal or Pruning Wax).
- ● Extension pole: For hard-to-reach branches (especially in containers). Tip: Look for a 3–4 ft. telescoping pole with a hook.
- ● Container-specific tools: If your tree is in a pot, grab a small hand trowel to check root health post-pruning.
- ● Camera or sketchpad: To document the tree’s structure before/after pruning (great for reference!).
Step-by-Step guide for planting and caring for a pink shower weeping cherry tree in containers
Here's how to create a stunning, frost-resistant canopy that thrives in Pacific Northwest conditions.
🌱 Step 1: Choose the Right Container and Soil Mix
Select a large, sturdy container with a minimum 18-inch diameter and deep drainage holes—this tree needs room for its roots to spread. I recommend a fiberglass or heavy plastic pot because they won’t crack under winter weight. The soil mix is critical: blend equal parts high-quality potting mix, compost, and perlite to ensure drainage while retaining moisture.
Fill the container one-third full with the mix, then tap the sides gently to settle it. Here’s the thing—this tree hates soggy roots, so never skip the perlite. It keeps the soil loose and prevents root rot, especially in our rainy winters. Add a slow-release fertilizer (like a 10-10-10 blend) mixed into the soil—this gives your tree a steady nutrient supply without overloading it.
🪴 Step 2: Plant the Tree with Proper Support
Remove the young tree from its nursery pot and loosen the roots if they’re circling. Place it in the container so the top of the root ball sits 1 inch below the rim—this prevents erosion and gives you room to add mulch later. Backfill with the remaining soil mix, pressing lightly around the edges to eliminate air pockets.
Weeping cherries need sturdy support to keep their branches from bending under snow or wind. Install a metal tree stake or bamboo tripod near the trunk and secure the main branches with soft ties. Don’t cut into the bark—wrap the ties around the branch and stake gently. Water the tree deeply right after planting to help the soil settle and remove any air gaps.
☀️ Step 3: Position for Sunlight and Wind Protection
Place your container in a spot that gets full sun (6+ hours daily)—this tree needs bright light to produce its signature pink blooms. In the Pacific Northwest, a south- or west-facing location works best, but avoid harsh afternoon sun in summer if your area gets intense heat. If your patio or balcony doesn’t get enough light, supplement with a grow light during winter months when days are short.
Wind can stress young trees, so position it near a wall or fence for natural protection. If you’re on a balcony, avoid open, exposed areas. Here’s a pro tip: Rotate the container a quarter turn every few weeks so the tree grows evenly. You’ll notice branches leaning toward the light—this is normal, but consistent rotation keeps the canopy balanced.
💧 Step 4: Water and Mulch for Winter Hardiness
Water deeply once a week during the growing season, letting the soil dry out slightly between waterings. In summer, you’ll know it’s time to water when the top 2 inches of soil feel dry. Overwatering is the biggest mistake—this tree’s roots need oxygen, and soggy soil suffocates them. Reduce watering in fall and winter, but never let the soil dry completely—even in dormancy, roots need moisture.
Spread a 2-inch layer of mulch (like bark chips) over the soil surface, keeping it 3 inches away from the trunk. This insulates roots in winter and retains moisture in summer. In the PNW, winter protection is key—wrap the container in burlap or frost cloth once temperatures drop below 20°F and add a thick layer of straw mulch around the base. This mimics the tree’s natural frost tolerance while keeping roots safe.
✂️ Step 5: Prune and Maintain for Long-Term Health
Prune in late winter or early spring before new growth begins. Remove any dead, crossing, or weak branches with clean cuts just above a bud. Weeping cherries bloom on old wood, so avoid heavy pruning—just shape the canopy to encourage airflow. You’ll see new growth emerge in spring, and those pink blossoms will be your reward for careful pruning.
Fertilize once in early spring with a balanced, slow-release fertilizer to support blooming. Avoid high-nitrogen fertilizers—they promote leafy growth at the expense of flowers. Watch for aphids or scale insects on new growth, and treat with neem oil if needed. With the right care, your weeping cherry will thrive in containers for years, giving you that dreamy Pacific Northwest canopy without the frost worries.
Tips & tricks for perfect pink shower weeping cherry tree care
Here's what I wish I knew before planting my own weeping cherry—these details make all the difference for PNW winters.
Container Selection: While fiberglass or heavy plastic pots are ideal for winter weight, consider adding wheel casters to your container if you plan to move it frequently. This makes winter protection easier when temperatures drop below 20°F—you can simply roll the tree to a sheltered spot. For extra stability, place a sandbag or bricks in the bottom before adding soil to prevent tipping during windstorms.
The Root Ball Placement Trick: When positioning your tree in Step 2, press the soil mix firmly around the edges to create a slight depression around the root ball. This helps direct water straight to the roots during the crucial first week after planting. I've seen many trees fail because water pooled away from the roots—this simple technique prevents that.
Sunlight Supplement Strategy: If your balcony only gets partial sun, position your grow light 12-18 inches above the tree during winter months. Use a timer for 14 hours of light daily to compensate for short days. I've found that even with supplemental light, rotating the container every few weeks helps prevent the tree from growing lopsided toward the light source.
Winter Protection Upgrade: For containers in exposed areas, add an extra layer of defense by placing a clear plastic dome or large plastic bag over the tree before wrapping in burlap. This creates a mini greenhouse effect that can raise temperatures by 5-10°F during cold snaps. Just make sure to remove it during daylight hours to prevent overheating—condensation buildup can harm the leaves.
Pro Tips for Pink Shower Weeping Cherry Tree
- Here's what I wish I knew before planting my own weeping cherry—these details make all the difference for PNW winters.
- Container Selection: While fiberglass or heavy plastic pots are ideal for winter weight, consider adding wheel casters to your container if you plan to move it frequently.
- The Root Ball Placement Trick: When positioning your tree in Step 2, press the soil mix firmly around the edges to create a slight depression around the root ball.
Frequently asked questions
Got questions about your Pink Shower Weeping Cherry Tree? You’re not alone! Here are some of the most common concerns—plus expert tips to keep your tree thriving in containers, especially in the Pacific Northwest’s frosty climate.
When is the best time to prune a Pink Shower Weeping Cherry Tree?
Prune your tree late winter or early spring (February–March in the PNW) while it’s still dormant but before buds swell. Avoid heavy pruning in fall—it can stimulate late growth vulnerable to frost. Light shaping in summer is fine, but skip major cuts then to prevent stress.
How do I protect my container-grown Pink Shower Weeping Cherry from frost?
Move containers to a sheltered spot (like against a south-facing wall) before hard frosts. Use burlap wraps or frost blankets to shield the canopy. Add extra mulch around the base and consider a tree guard if temps drop below 15°F. Drainage is key—empty saucers after rain to prevent root rot.
Can I grow a Pink Shower Weeping Cherry in a pot long-term?
Yes! Choose a large container (at least 24” wide) with drainage holes and use a well-draining potting mix. Repot every 2–3 years to refresh soil and roots. Root-bound trees may need pruning roots during repotting. Just know: container trees grow slower than in-ground and may need winter protection.
Why isn’t my Pink Shower Weeping Cherry blooming?
Blooms thrive with full sun (6+ hours daily) and proper pruning. If your tree isn’t flowering, check for:
- Age: Young trees (under 3 years) may not bloom yet.
- Nutrition: Fertilize in early spring with acidic, balanced fertilizer (10-10-10).
- Stress: Overwatering, poor drainage, or root-bound conditions can delay blooms.
How do I shape a weeping cherry tree without harming it?
Use clean, sharp pruners to make cuts at a 45° angle just above a bud or branch collar. Avoid topping (cutting back to stubs)—it weakens the tree. Focus on:
- Removing dead, crossing, or inward-growing branches first.
- Lightly thinning to improve airflow (aim for an open vase shape).
- Never remove more than 25% of the canopy in one season.
Pro Tip:
For container-grown weeping cherries, mulch heavily in winter (3–4 inches of straw or bark) to insulate roots. And if your tree gets cherry leaf spot (black spots on leaves), prune infected foliage and apply fungicide in early spring to prevent spread.
Wrapping up and next steps
The Pink Shower Weeping Cherry Tree is a stunning, frost-proof addition to your Pacific Northwest garden—even in containers! With the right pruning techniques, you’ll keep it lush, healthy, and blooming beautifully for years. Now’s the perfect time to roll up your sleeves and give it the care it deserves!
Ready to transform your space? Start by gathering your tools, following the pruning steps, and scheduling regular maintenance. Your tree—and your garden—will thank you! 🌸✂️