Trees
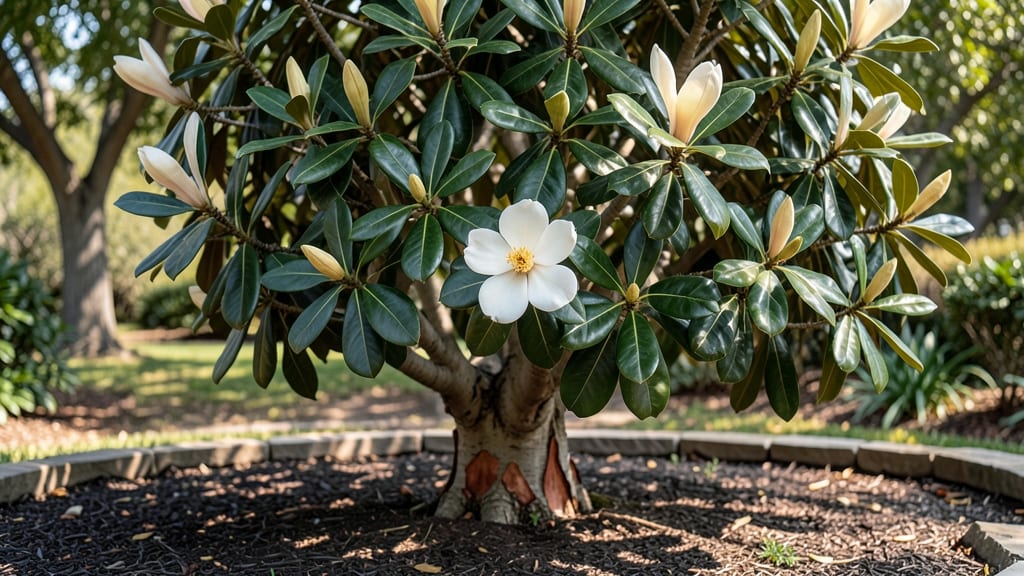
Ornamental tree care in the Pacific Northwest means working with the climate—not against it. The right pruning schedule keeps your magnolias, maples, and dogwoods thriving through wet winters and mild summers, while avoiding the common mistake of late-season cuts that invite frost damage.
I’ve pruned my 20-year-old Japanese maple every year since moving here, and this calendar-based approach saved it from winter dieback twice. The key is timing: prune when the tree is dormant but before the worst frosts hit, and you’ll see stronger growth by spring.
You’ll need just three tools: sharp pruning shears for small branches, loppers for thicker limbs, and a clean saw for anything over an inch in diameter. I keep a bottle of 70% rubbing alcohol handy to disinfect tools between cuts—this stops diseases like anthracnose from spreading.
Most pruning happens in late winter (February-March), but summer cleanup for dead wood or shaping can wait until July, when the tree’s energy isn’t focused on new growth. Even beginners can master this with a little practice, and the payoff is trees that look healthier year-round.
By following this schedule, you’ll end up with trees that bloom earlier, produce more flowers, and resist pests better. My dogwood now bursts into color by mid-April instead of May, and the maple’s canopy fills in where it used to have bare spots.
The secret isn’t complicated—it’s about working with the tree’s natural rhythms, not fighting them. Ready to see your trees flourish like never before? Let’s get started with the first cut of the season.
This calendar works for most ornamental trees in zones 7-9, but watch for local frost dates—your last average frost might be a week earlier than mine. If you’re new to pruning, start with one tree and observe how it responds before tackling your whole yard.
The goal is progress, not perfection, and even a few strategic cuts make a difference. Your trees will thank you with stronger branches and more vibrant foliage all season long.
📚 In This Guide
- What you need
- Instructions
- Tips and common mistakes
- Wrapping up and next steps
What you need
- ● Pruning shears: Bypass-type (for small branches, ¼”–½” thick). Quantity: 1 pair.
- ● Loppers: Long-handled (30”–40”) for medium branches (½”–2” thick). Quantity: 1 pair.
- ● Pruning saw: Curved-tooth or folding saw for thick branches (2”+). Quantity: 1.
- ○ Extension pole saw: Adjustable (10’–20’ reach) for high branches. Quantity: 1 (optional but handy!).
- ● Gloves: Heavy-duty, cut-resistant (e.g., Mechanix or leather). Quantity: 1–2 pairs.
- ● Safety glasses: ANSI-rated to shield from debris. Quantity: 1 pair.
- ● Ladder: Sturdy, non-slip (24’+ for tall trees). Quantity: 1 (or hire a pro for heights >20’!).
- ● Pruning sealant: Tree wound dressing (e.g., Tanglefoot Tree Wound Pruning Sealer). Quantity: Small jar.
- ● Disinfectant: 70% isopropyl alcohol or bleach solution (1:10 ratio) to sterilize tools. Quantity: 1 bottle/spray.
- ● Trash bags: Heavy-duty (30+ gallon) for debris. Quantity: 2–3.
- ● Rake or tarp: To clear fallen branches/leaves. Quantity: 1 each.
- ○ Marking twine/paint: For tagging cuts (optional). Quantity: Small roll.
- ● Check local PNW frost dates (e.g., blank">WRCC or blank">NOAA) to prune after dormancy (late winter/early spring).
- ● Review your tree’s species-specific needs (e.g., maples bleed sap; avoid pruning in late winter).
- ● Ensure tools are sharp and clean to prevent disease spread. ⚠️
Instructions for pruning ornamental trees in the Pacific Northwest
This seasonal schedule keeps your trees healthy and frost-resistant year-round.
Late Winter Pruning (Before Bud Break)
Prune your ornamental trees in late winter, ideally between February and early March, before buds begin to swell. This timing prevents excessive bleeding from wounds and removes dead or diseased wood before new growth starts. Look for branches that are dry, brittle, or discolored—these are your first targets.
Use clean, sharp pruning shears to make cuts just outside the branch collar, the swollen area where the branch meets the trunk. Avoid cutting into the trunk itself, as this invites decay. For larger branches over 1 inch thick, use a pruning saw and make the cut on the underside of the branch to prevent bark from tearing.
Remove no more than 25% of the tree’s canopy in one session to avoid stressing the tree. Focus on branches that cross or rub against each other, as these create weak points. After pruning, apply wound dressing (like tree sealant) only if the cut is larger than 1.5 inches—smaller wounds heal better on their own.
Summer Light Pruning (June to Early July)
Light pruning in summer helps maintain shape and encourages airflow, reducing the risk of fungal diseases common in the Pacific Northwest’s damp climate. Wait until after the tree has finished flowering (if applicable) to avoid removing blooms that could set fruit or seeds.
Look for suckers, water sprouts, or overly vigorous shoots growing from the trunk or branches. These thin, fast-growing stems compete with the main structure for nutrients. Snip them off at their base with sharp shears. Also, thin out crowded branches to improve sunlight penetration to the inner canopy.
This is also the time to corrective-prune any branches that grew too aggressively after winter. Trim back by one-third to encourage bushier growth. Avoid heavy pruning in late summer, as new growth won’t have time to harden off before fall frosts.
Fall Cleanup (October to November)
Fall is for sanitation and shaping, not major structural pruning. Remove any dead, diseased, or storm-damaged branches immediately after they’re noticed. These branches can harbor pests or pathogens that overwinter and infect the tree the following spring.
Use this time to thin out dense foliage that could trap moisture and encourage fungal growth. Focus on branches that are crowded or growing inward, as these create shaded, humid microclimates perfect for mildew. Prune these back to a lateral branch or bud that faces outward.
Stop pruning by mid-November to allow the tree to enter dormancy with clean wounds. Avoid heavy pruning in fall, as new growth stimulated by late-season cuts won’t harden off before winter. Instead, focus on removing debris from the base of the tree to prevent rot and pests.
Winter Inspection (December to January)
Winter is for observation and planning. Walk around your trees in dry, calm weather (avoid icy or windy days) to assess any damage from storms or heavy snow. Look for broken branches, split trunks, or areas where bark has peeled back—these need immediate attention in late winter.
If you notice pests or signs of disease (like oozing sap, fungal growth, or unusual leaf drop), mark the affected branches for removal in the next pruning cycle. Avoid pruning in winter unless absolutely necessary, as cold temperatures can stress the tree further.
Use this time to sketch a rough pruning plan for late winter. Note which branches need removal, shaping, or thinning. This helps you stay organized and ensures you don’t miss critical cuts when the time comes.
Tips & tricks for perfect ornamental tree pruning
These practical insights will help you maintain your trees' health while avoiding common pruning mistakes.
Timing is Everything: The late winter window between February and early March is critical because it allows wounds to heal before new growth begins. I've seen trees bleed excessively when pruned too early—this timing prevents that. If you miss this window, wait until buds swell slightly before pruning again. The goal is always to prune when the tree is dormant but before active growth starts.
Tool Technique Matters: Using clean, sharp pruning shears makes all the difference. Dull tools crush rather than cut cleanly, which damages the tree's tissue. I recommend sterilizing your tools with rubbing alcohol between cuts, especially when dealing with diseased branches. For branches over 1 inch thick, the underside cut technique prevents bark tearing—this is a game-changer for larger branches that would otherwise create ragged wounds.
Seasonal Strategy: Summer pruning should focus on removing only suckers and water sprouts—never more than one-third of any branch's length. I've learned this the hard way by over-pruning in summer, which stresses trees just before they need to harden off for winter. The one-third rule applies to corrective pruning too—this encourages bushier growth while preventing shock to the tree's system.
Winter Planning Pays Off: Sketching a rough pruning plan during winter inspection saves time and ensures you don't miss critical cuts. I keep a simple notebook where I jot down which branches need removal, shaping, or thinning. This organized approach prevents that "I'll remember" moment that often leads to missed pruning opportunities when spring arrives.
Pro Tips for Ornamental Tree Care
- These practical insights will help you maintain your trees' health while avoiding common pruning mistakes.
- Timing is Everything: The late winter window between February and early March is critical because it allows wounds to heal before new growth begins.
- Tool Technique Matters: Using clean, sharp pruning shears makes all the difference.
Frequently asked questions
When is the absolute latest I can prune my ornamental tree before winter?
In the PNW, late winter (February–early March) is ideal for most trees, but frost-proof pruning can extend to mid-March—just avoid pruning when hard freezes are forecasted. Evergreens like pine or spruce tolerate pruning later, but deciduous trees (e.g., maple or dogwood) need time to heal before spring growth. Wait until buds swell but haven’t yet opened.
Can I prune my ornamental tree myself, or should I hire a pro?
Small trees (under 30 feet) with basic cuts are DIY-friendly! Use sharp bypass pruners, a ladder, and safety gear. For large, mature, or structurally complex trees (e.g., weeping willows or multi-trunk specimens), hire an ISA-certified arborist. Pro tip: Never remove more than 25% of foliage at once—this stresses trees and invites pests.
What’s the best way to clean up after pruning to avoid disease?
Dispose of all clippings immediately—don’t compost them near your tree. Sterilize tools with 70% isopropyl alcohol or a bleach solution (1 part bleach to 9 parts water) to prevent fungal spread (e.g., anthracnose). Seal cuts with pruning sealant only on large wounds (>½ inch), but skip it for small cuts—they heal faster without it!
Do I need to wrap my ornamental tree trunk for winter protection?
Only wrap young, thin-barked trees (e.g., birch, cherry, or newly planted specimens) in tree wrap to prevent sun scald and rodent damage. Mature trees with thick bark (oak, maple) don’t need it. Remove wrap in early spring to avoid trapping moisture. For extra protection, mulch around the base (3–4 inches deep) but keep it 6 inches away from the trunk.
What’s a good alternative if my ornamental tree isn’t recovering after pruning?
If your tree shows yellowing leaves, dieback, or oozing sap, it may be stressed or diseased. Try these fixes:
Wrapping up and next steps
Caring for your ornamental trees in the Pacific Northwest doesn’t have to be overwhelming—just follow the seasons!
By pruning at the right times and using the right tools, you’ll keep your trees healthy, vibrant, and frost-proof for years to come. 🌿 Whether you’re a beginner or a seasoned gardener, consistency is key, and your trees will thank you with stunning blooms and lush foliage.
Ready to take the next step? Grab your pruners, mark your calendar, and start planning your seasonal pruning schedule today! Your trees—and your landscape—will shine brighter than ever. 🌟