Pruning
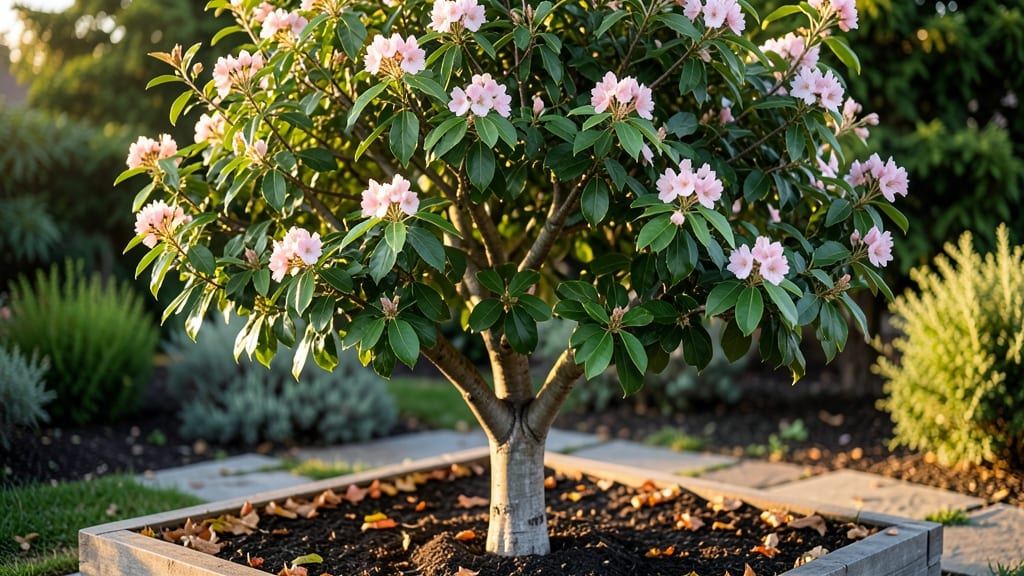
Your yard just got a year-round showstopper with ornamental flowering pear trees—those stunning white spring blooms, fiery fall foliage, and even winter interest. 🌸 I planted mine last spring, and neighbors now stop to ask what "magic" I used to keep it looking so good all season.
The secret isn’t complicated: three simple pruning cuts (done at the right time) keep the tree healthy, blooming, and shaped beautifully. You’ll need basic tools—a sharp pair of pruners, gloves, and maybe a ladder for taller branches—and just 15-20 minutes twice a year.
Most people overlook pruning, but it’s what turns a good tree into a showstopper.
By summer, you’ll have a canopy so dense it blocks summer heat while still letting light through. The blooms return year after year, and the fall colors outshine most maples.
Even in winter, the exfoliating bark adds texture. The best part? These trees thrive in full sun to partial shade and handle most soil types.
Works for urban yards, large landscapes, or even as a striking street tree. Let’s get those branches shaped right—your future self will thank you when the blooms arrive next spring.
📚 In This Guide
- What you need
- Instructions
- Tips and common mistakes
- Wrapping up and next steps
What you need
- ● Pruning shears: Sharp, bypass-style shears (for clean cuts on small branches). Example: Felco F-2 or Corona Tools 5030S.
- ● Loppers: 1 pair (for thicker branches, ½"–1" diameter). Example: Fiskars X27.
- ● Pruning saw: 1 handheld saw (for branches >1" thick). Example: Bahco Laplander.
- ● Gloves: Heavy-duty, cut-resistant gloves (to protect hands from thorns and rough bark). Example: Wagners Grip-Glo.
- ● Disinfectant: 70% isopropyl alcohol or pruning sealant (to prevent disease spread).
- ● Ladder: Extendable aluminum ladder (tall enough to reach the tree’s highest branches safely).
- ○ Tar or pruning paint: Optional but recommended for sealing large cuts (>½") to prevent decay.
- ● Weather check: Prune on a dry, calm day (avoid rain or high winds for 24 hours before/after).
- ● Safety glasses: 1 pair (to shield eyes from debris).
- ● Long sleeves/pants: Wear protective clothing to avoid scratches from thorns.
- ● Tree health assessment: Inspect the tree for diseased or dead branches before starting (remove these first!).
Step-by-step instructions for planting and pruning ornamental flowering pear trees
Here's how to establish your tree for stunning blooms and year-round interest.
🌱 Step 1: Plant in the Right Location and Soil
Choose a spot with full sun (at least 6-8 hours daily) and well-draining soil—flowering pears hate soggy roots. Dig a hole twice as wide as the root ball but only as deep. This ensures the tree sits at the same level it was in the nursery container.
Amend heavy clay soil with 2-3 inches of compost mixed into the bottom of the hole. The tree's shallow roots spread wide, so avoid compacted soil. Gently loosen any circling roots before placing the tree in the hole. Water deeply to settle the soil around the roots.
💧 Step 2: Water Deeply and Mulch Properly
After planting, water once a week for the first month (more if temperatures exceed 85°F) to encourage root establishment. You'll know it's enough when water drains 6-8 inches deep—stick your finger in the soil to check. Overwatering at this stage causes root rot.
Spread 2-3 inches of mulch (wood chips or shredded bark) over the root zone, keeping it 6 inches away from the trunk. This preserves moisture, regulates soil temperature, and prevents weed competition. Replenish mulch annually as it breaks down.
✂️ Step 3: First Pruning for Structure and Health
Wait 6-12 months before pruning—this gives the tree time to establish its framework. In late winter or early spring, remove dead, crossing, or inward-growing branches first. Cut just outside the branch collar (the swollen area where the branch meets the trunk) to prevent wounds.
Open the canopy slightly by thinning out 10-20% of the smallest branches to improve airflow. This reduces disease risk and encourages stronger blooms. Use clean, sharp pruners and make cuts at a 45-degree angle for larger branches to prevent water pooling.
☀️ Step 4: Seasonal Maintenance for Continuous Beauty
After flowering (typically spring), prune again to shape the tree and remove any suckers at the base. Summer is for light maintenance—just remove any damaged or diseased branches immediately. The tree's exfoliating bark becomes a winter feature, so avoid heavy pruning then.
Fertilize lightly in early spring with a balanced, slow-release fertilizer (10-10-10). You'll see new growth within 4-6 weeks—this is your cue that the tree is thriving. Avoid heavy fertilization, which promotes leafy growth over flowers.
Tips & tricks for perfect ornamental flowering pear trees
Took me a while to figure these out, so here's how to avoid common pitfalls with your flowering pear tree.
Location and Soil Prep: The 6-8 hours of daily sun is non-negotiable—these trees won't thrive in shade. If your yard has partial shade, plant it where it gets the most sun possible. For soil, I can't stress enough how important that 2-3 inches of compost is—it's the difference between a struggling tree and one that blooms beautifully every spring.
Watering Wisdom: When you're watering that first month, don't just pour water randomly. Use a trowel to check how deep the moisture goes—it should reach 6-8 inches. If you're in a heatwave (above 85°F), you might need to water twice a week instead of once. The key is keeping the roots consistently moist without waterlogging.
Pruning Precision: That 6-12 month waiting period before first pruning is crucial. I made the mistake of pruning too early on my first tree, and it took years to recover. When you do prune, focus on removing those crossing branches first—they compete for sunlight and nutrients. And remember, those 45-degree angle cuts only apply to branches thicker than a pencil.
Seasonal Care: The spring fertilization is your chance to give your tree a boost, but timing matters. Apply that 10-10-10 fertilizer right when you see new growth starting—usually in early spring. If you fertilize too early, you might encourage leafy growth at the expense of those stunning spring blooms we all love.
Pro Tips for Ornamental Flowering Pear Tree
- Took me a while to figure these out, so here's how to avoid common pitfalls with your flowering pear tree.
- Location and Soil Prep: The 6-8 hours of daily sun is non-negotiable—these trees won't thrive in shade.
- Watering Wisdom: When you're watering that first month, don't just pour water randomly.
Frequently asked questions
Got questions about keeping your ornamental flowering pear tree stunning year-round? We’ve got answers! Whether you’re troubleshooting, planning, or just curious, here’s what you need to know:
When is the best time to prune my flowering pear tree for maximum blooms?
The ideal window is late winter or early spring (just before buds swell) or immediately after flowering (May–June). Avoid heavy pruning in late summer—it can reduce next year’s blooms! Light shaping in fall is fine, but skip major cuts. Pro tip: Use sharp tools to prevent tearing bark, which invites disease.
Why aren’t my flowering pears blooming as much as last year?
Bloom shortages often stem from over-pruning, poor nutrition, or stress. Check for:
- Thinning out too many branches (leave 3–5 main scaffolds).
- Compacted soil or drought (water deeply 1–2x/week in dry spells).
- Fungal issues (like fire blight—look for blackened branches).
Can I grow an ornamental flowering pear in a container or small yard?
Yes! Dwarf varieties like ‘Aristocrat’ or ‘Capital’ thrive in containers (choose a 20+ gallon pot). For small yards, opt for pollard-pruned trees (shaped like a candelabra) or espalier them against fences. Just ensure:
- Full sun (6+ hours daily).
- Well-draining soil (add perlite if potted).
- Regular pruning to control size.
How do I stop my flowering pear from dropping messy fruit?
Those pearl-like fruits are actually inedible and messy! To minimize them:
- Prune seed-bearing flowers (male blooms) in late winter—keep only female flowers (they produce fruit).
- Apply fruit thinners (like hydrogen peroxide spray) post-bloom.
- Collect fallen fruit weekly with a rake or tarp.
Are flowering pear trees cold-hardy? What zones do they tolerate?
Most varieties handle USDA Zones 5–9, but young trees need winter protection (burlap wraps or anti-desiccant spray) in Zone 5. ‘Bradford’ (classic) is hardy to -20°F, while ‘Chanticleer’ (disease-resistant) thrives to -15°F. For extreme cold (Zone 4), choose ‘Aristocrat’ or plant in a sheltered spot.
Wrapping up and next steps
The ornamental flowering pear tree is a stunning addition to any landscape, offering year-round beauty with its fragrant blooms and lush foliage. By mastering the three pruning secrets—timing, technique, and maintenance—you’ll keep your tree thriving and picture-perfect.
Now that you’re armed with the right tools and knowledge, roll up your sleeves and give your tree the care it deserves!
Ready to transform your yard? Start pruning today and watch your flowering pear tree shine brighter than ever! 🌸✂️