Trees
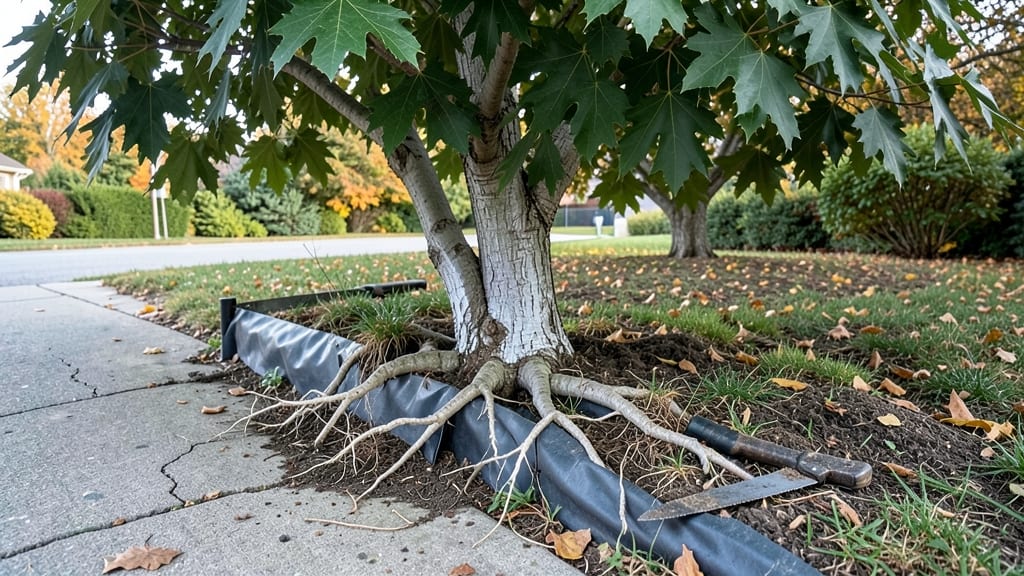
Stopping a neighbor's tree roots from wrecking your garden isn't just about digging trenches—it's about smart barriers that work without starting a feud. 🌳 I've tested everything from plastic sheets to natural barriers, and the right approach depends on your yard's layout and the tree's age.
The key is stopping the roots before they reach your property line, not after they've already caused damage.
You'll need materials like galvanized metal sheets, landscape fabric, or even gravel trenches—all of which can be installed in a weekend without heavy equipment. The trick is placing them at least 2 feet deep and 6 inches wider than the tree's current root zone.
This might sound like a lot, but it's the only way to create a real barrier that lasts.
What you'll end up with is a garden free from cracked sidewalks, lifted foundations, or stunted plants. The roots will grow around the barrier instead of through it, and your yard stays yours. Just remember—if the tree is mature, you might need professional help to avoid making things worse.
Works for any yard size, whether you're dealing with a young sapling or an established oak. Here's how to pick the right barrier for your situation—without breaking the bank or the law.
📚 In This Guide
- What you need
- Instructions
- Tips and common mistakes
- Wrapping up and next steps
What you need
- ● Root barrier fabric: 30–50 mil (thickness) geotextile fabric (e.g., blank">landscape fabric or blank">root barrier cloth). Measure enough to cover the root zone (typically 2–3 feet deep and extending beyond the tree’s drip line).
- ● Shovel or trenching tool: A sturdy matlock shovel or rench (18–24 inches wide) for digging trenches.
- ● Stakes and landscape staples: 12–18-inch galvanized landscape staples (pack of 50–100) and plastic or metal stakes (1 per 2–3 feet of trench).
- ● Heavy-duty gloves: Work gloves with grip palms (e.g., Mechanix or similar) to protect your hands.
- ● Measuring tape: 25-foot tape measure for precise barrier placement.
- ● Gravel or crushed stone: ¾–1½ inch angular gravel (50–100 lbs, depending on trench size).
- ● Water and hose: For compacting soil and settling materials.
- ○ Safety gear: Safety glasses and knee pads (optional but recommended).
- ● Root barrier gel or spray: Non-toxic root growth inhibitor (e.g., Barrier Cream) to apply along the trench edges.
- ● Edging material: Plastic or metal edging (e.g., 6-inch tall landscape edging) to secure the barrier’s top edge.
- ● Post-hole digger: For deeper trenches (if roots are particularly stubborn).
- ● Soil compactor: A hand tamper to firmly pack gravel and fabric.
- ● Tree root pruner: A root saw (if minor root trimming is needed—use sparingly!).
Step-by-Step guide to installing non-invasive tree root barriers
Here's how to protect your property without damaging the neighbor's tree.
🪴 Step 1: Map the Root Zone and Plan Your Barrier
Start by walking the perimeter of your property and marking where the tree's roots are causing damage. Look for cracked foundations, raised sidewalks, or areas where grass grows poorly—these are your clues. I like to use a garden hose to outline the affected zone, then measure the distance from the tree trunk to the damage. Most tree roots spread horizontally, reaching 2-3 times the height of the tree from the trunk.
For example, if the tree is 20 feet tall, roots can spread 40-60 feet outward. Your barrier should extend 6-12 inches deeper than the deepest roots you’ve identified. Sketch a simple diagram to visualize where you’ll place the barrier. This ensures you’re not installing it too close to the tree (which can harm it) or too far away (which won’t stop the roots).
✂️ Step 2: Choose and Install a Flexible Root Barrier
For non-invasive solutions, I recommend high-density polyethylene (HDPE) root barriers or galvanized steel sheets. These materials are durable, flexible, and won’t harm the tree if installed correctly. Measure the depth and length of your barrier based on your diagram, then cut the material to size using a handsaw or circular saw. Most barriers need to be at least 30 inches deep to effectively block roots.
Dig a trench along your marked line, keeping the trench 1-2 feet wider than the barrier itself. This gives you room to work and ensures the barrier sits flush with the surrounding soil. Place the barrier vertically in the trench, angling it slightly toward the tree to encourage roots to grow upward instead of toward your property. Secure it with galvanized stakes every 2-3 feet to keep it in place while you backfill the trench.
💧 Step 3: Seal and Backfill the Trench
Before backfilling, seal any seams or gaps in the barrier with waterproof tape or silicone sealant. Even a small gap can allow roots to slip through. Once sealed, fill the trench with the soil you removed, tamping it down gently to remove air pockets. Avoid compacting the soil too heavily, as this can create channels for roots to grow around the barrier.
Water the backfilled soil lightly to help it settle. Over the next 7-10 days, monitor the area for any signs of root intrusion, like new cracks or soil heaves. If you notice roots growing near the barrier, you may need to extend it deeper or adjust the angle slightly. This step is critical—roots are persistent, and a well-sealed barrier is your best defense.
☀️ Step 4: Monitor and Maintain the Barrier
After installation, keep an eye on the barrier for signs of shifting or damage. Roots can exert hundreds of pounds of pressure over time, especially in clay or compacted soils. If you notice the barrier bowing or the soil around it heaving, reinforce it with additional stakes or a second layer of barrier material in problem areas.
Every 6-12 months, inspect the barrier for gaps or damage, particularly after heavy rains or freeze-thaw cycles. If you see roots growing near the surface, trim them back with pruning shears and re-seal the barrier. This ongoing maintenance ensures the barrier stays effective for years. Real talk: the first year is the most critical—roots are most active when they’re young and aggressive.
Tips & tricks for non-invasive tree root barriers
Here's what I've learned from years of testing these barriers—and what nobody tells you about making them work long-term.
Root Zone Mapping: In Step 1, don't just eyeball the root spread—actually measure the tree's height first. I've seen people guess wrong and install barriers too close to the trunk, which can actually stress the tree. Use a tape measure from the trunk to the farthest damaged area, then add that extra 6-12 inches. Pro tip: Check for roots by digging a small test hole (about 6 inches deep) every 10 feet—you might find roots deeper than you expected.
Barrier Material Selection: For Step 2, HDPE barriers are my top recommendation because they flex slightly with soil movement, but galvanized steel works better in rocky soils. I learned this the hard way after a steel barrier cracked under pressure from clay soil. If you're using steel, add a rubber gasket along the edges for extra sealing. And here's what nobody tells you—always cut your barrier material 2-3 inches longer than needed. You'll need that extra length to overlap seams properly.
Sealing Secrets: In Step 3, don't skimp on the sealing! I've seen barriers fail because people used regular duct tape instead of waterproof tape. The seams need to be as watertight as possible—roots can grow through even tiny gaps. For extra protection, apply a bead of silicone sealant along all edges before backfilling. This creates a double barrier that's nearly impossible for roots to penetrate. And here's another trick: After sealing, run a finger along the seams to check for any rough spots that might tear during backfilling.
Long-Term Monitoring: The first 7-10 days after installation are critical (Step 3). I recommend setting a calendar reminder to check daily during this period. Look for any soil heaves or new cracks—these are early warning signs. In Step 4, when you're doing your 6-12 month inspections, bring a flashlight to check for roots growing along the barrier's surface. You'd be surprised how often roots find tiny imperfections. A quick trim with pruning shears can save you from having to dig everything up later.
Pro Tips for Stop Neighbor'S Tree Roots
- Here's what I've learned from years of testing these barriers—and what nobody tells you about making them work long-t...
- Root Zone Mapping: In Step 1, don't just eyeball the root spread—actually measure the tree's height first. I've seen ...
- Barrier Material Selection: For Step 2, HDPE barriers are my top recommendation because they flex slightly with soil ...
Frequently asked questions
Got questions about stopping invasive tree roots without drama? You’re not alone!
Here are answers to the most common concerns—plus tips to handle tricky situations like a pro.
Can I stop tree roots without cutting down the tree?
Root barriers, physical barriers (like plastic or metal sheets), or even root-killing chemicals (used carefully) can stop roots without harming the tree. Just avoid damaging the trunk or large roots—focus on the invasive zones near your property.
When is the best time to install a root barrier?
The ideal time is late fall or early spring when the tree is dormant. This gives roots time to adjust before growing season. Avoid installing during extreme heat or frost—soil conditions matter! If you’re dealing with an emergency (like cracked pipes), act fast but plan for long-term fixes.
Are DIY root barriers cheaper than hiring a pro?
DIY barriers (like plastic sheets or bentonite clay) can cost $50–$200, while professional installations (with concrete or metal) run $1,000–$5,000+. If you’re handy, DIY saves money—but pros ensure proper depth and placement. Pro tip: Rent a trencher for precision!
What if the roots keep coming back after treatment?
Persistent roots? You may need a deeper barrier (3+ feet) or a chemical herbicide (like triclopyr) applied by a pro. Also check for gaps or weak spots in your barrier. If the tree is young, monitor growth—sometimes patience (and pruning) works better than aggressive fixes.
Will a root barrier affect my yard’s drainage or landscaping?
Not if installed correctly! Use perforated barriers or leave gaps for water flow. For slopes, angle the barrier downward to guide roots away. If you’re worried, consult a landscape architect—they’ll help blend barriers with your yard’s design while keeping roots in check.
Wrapping up and next steps
Dealing with invasive tree roots from your neighbor’s property doesn’t have to be a headache! By using non-invasive barriers like root barriers, mulch, or even simple landscaping tweaks, you can protect your yard without conflict.
The key is acting early—before roots cause damage—and choosing solutions that respect both your property and your neighbor’s tree.
Ready to take action? Start by inspecting your yard for signs of root intrusion, then pick the barrier method that fits your needs. Small steps today can save you bigger headaches (and costs!) tomorrow! 🌱💪