
Orchid Care
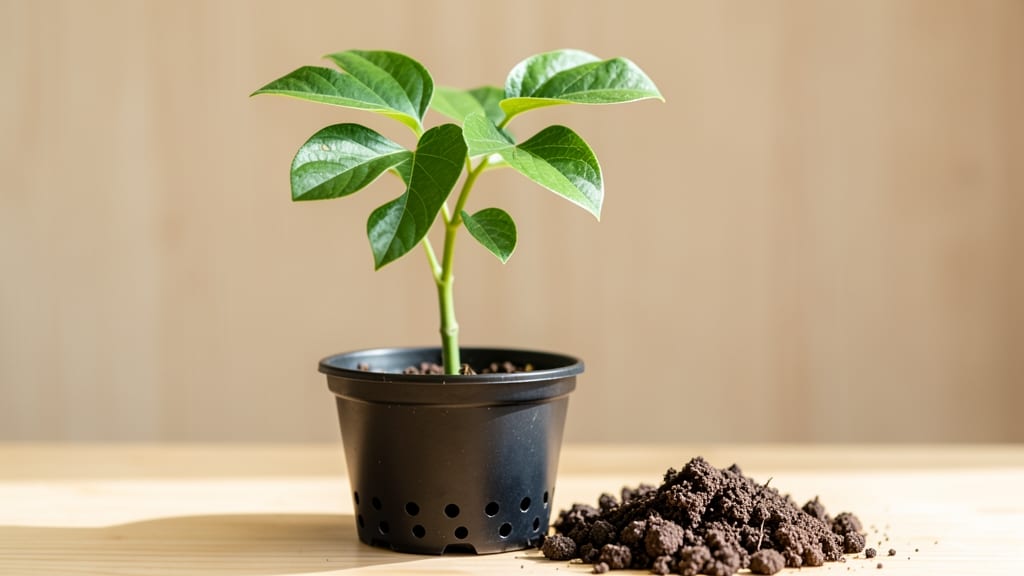
Growing an orchid tree (Bauhinia) from seedling feels like nurturing a tiny, delicate promise—one that rewards patience with striking, butterfly-attracting blooms. 🌱 The key to success starts before you even plant: soil that drains like a desert but holds just enough moisture, warmth that mimics its tropical roots, and light that’s bright but never scorching.
I’ve watched these seedlings go from fragile sprouts to sturdy young trees by following a few simple rules that beginners often overlook.
The trickiest part? Getting those first roots to establish without rotting or drying out. You’ll need a mix that’s 60% perlite or coarse sand to keep things airy, plus a clear container so you can monitor root growth without disturbing it.
Water lightly—just enough to dampen the top inch—then wait until the soil feels dry before repeating. Too much water is the #1 killer of young orchid trees, but too little stunts their growth before they even get started.
Within 4-6 weeks, you’ll see tiny leaves unfurl and roots begin their downward journey. That’s when the real magic happens: place your seedling under bright, indirect light (a south-facing window works, but avoid harsh afternoon sun) and watch as it stretches toward the glow.
The moment you notice new growth, it’s time to introduce a balanced fertilizer—just a quarter-strength dose every two weeks—to give it the nutrients it needs to bulk up.
Common challenges like slow growth or yellowing leaves usually come from one of three things: overwatering, insufficient light, or poor drainage.
But when you nail these basics, you’ll end up with a seedling that’s strong enough to transplant in about 3-4 months—and ready to become the showstopper of your garden. Here’s how to keep it thriving through that first critical year.
📚 In This Guide
- What you need
- Instructions
- Tips and common mistakes
- Wrapping up and next steps
What you need
- ● Orchid tree seeds: Fresh or stored seeds (preferably from a reliable source). Quantity: 10–20 seeds (for better germination odds).
- ● Seed-starting mix: Well-draining, sterile mix (e.g., 50% perlite + 50% coco coir). Avoid garden soil!
- ● Small pots or seed trays: 2–3 inch pots with drainage holes (or a tray with individual cells). Quantity: 1 per seedling.
- ● Clear plastic dome or ziplock bag: To create a humid microenvironment.
- ● Spray bottle: With water (preferably room-temperature, distilled, or rainwater).
- ○ Heat mat (optional but helpful): Set to 75–85°F (24–29°C) for faster germination.
- ● Grow lights or sunny windowsill: 12–16 hours of light daily (south-facing window or LED grow lights work best).
- ● Fertilizer (after germination): Diluted orchid fertilizer (20-20-20 or 10-10-10) at ¼ strength.
- ● Seed scarification tools: Sandpaper (fine-grit) or a knife to nick seeds if they’re hard-coated.
- ● Humidity tray: A shallow tray with pebbles and water to boost moisture levels.
- ● pH testing kit: To ensure your mix is slightly acidic (pH 5.5–6.5).
- ● Fungicide (preventative): Like hydrogen peroxide (3%) to sterilize water or mix.
Step-by-Step guide to germinating orchid tree seedlings
Here's how to coax those tiny seeds into thriving young trees.
🌱 Step 1: Prepare the Germination Medium
Orchid tree seedlings demand a sterile, airy environment—think 50% peat moss and 50% perlite by volume. I mix these in a clean container, ensuring no clumps remain. The goal is a medium that holds moisture but never stays soggy, as rot will kill seeds before they sprout. Add 1 teaspoon of cinnamon per quart of mix—this natural fungicide prevents damping-off while seeds germinate.
Moisten the medium with lukewarm distilled water until it feels like a wrung-out sponge. Too much water drowns seeds; too little prevents root development. Place the mix in a shallow tray lined with a sterile paper towel to catch any excess moisture. Here's the thing—sterility is critical. I sterilize my tools by wiping them with rubbing alcohol before handling the mix.
💧 Step 2: Sow Seeds and Create Humidity
Scatter the orchid tree seeds evenly across the surface—no need to bury them. Their tiny size means they require light to germinate, so pressing them gently into the top layer is all that's needed. I use a fine mist spray bottle to dampen the surface again, ensuring seeds stay moist but not waterlogged. Cover the tray with clear plastic wrap, securing it tightly to create a greenhouse effect.
Place the tray in a location with 70-75°F temperatures and indirect light. A seedling heat mat beneath the tray can help maintain warmth if your home runs cooler. Check daily for condensation on the plastic—this is your sign the humidity is perfect. If you see water droplets, leave the setup undisturbed. If the plastic fogs up completely, lift it briefly to allow excess moisture to escape.
☀️ Step 3: Monitor for Germination and Light
Germination can take 4-12 weeks, depending on seed freshness and temperature consistency. Watch for the first signs of tiny green sprouts breaking through the surface—that's your cue to move the tray to brighter conditions. I gradually introduce 12 hours of indirect light daily, increasing exposure by 1 hour every 3 days to avoid shocking the seedlings.
Once seedlings reach 1 inch tall, remove the plastic wrap completely. This prevents fungal growth as they grow stronger. You'll notice their leaves are delicate and translucent at first—that's normal. Strong seedlings will develop deeper green color and more defined veins within 2-3 weeks of germination. Real talk: If seedlings look pale or stretch toward the light, they need more intensity. A grow light on a 16-hour cycle solves this instantly.
✂️ Step 4: Thin and Transplant Seedlings
When seedlings reach 2-3 inches tall and have developed 2-3 true leaves, it's time to thin. Use sterilized tweezers to carefully remove weaker seedlings, leaving only the strongest one per cell if you're using a seed tray. Gently tease apart roots if seedlings are crowded, ensuring each has space to grow. Here's where it gets fun—watch the cotyledons pop through the soil after a few days.
Transplant into individual 2-inch pots filled with the same peat-perlite mix. Handle seedlings by their leaves, never the stems, to avoid damage. Water lightly after transplanting to settle the roots. Keep them in the same warm, humid conditions for 2 more weeks before introducing them to slightly drier air. You've got this—these little trees are tougher than they look.
Tips & tricks for perfect orchid tree seedling germination
A few strategic moves will transform your germination success rate from guesswork to science-backed results. These are the details that separate thriving seedlings from lost efforts.
Sterility is Non-Negotiable: In Step 1, when preparing your peat-perlite mix, go beyond just wiping tools with rubbing alcohol. I sterilize my containers by running them through a dishwasher cycle on high heat before mixing ingredients. This eliminates any hidden spores that could outcompete your seeds. The cinnamon you're adding acts as insurance, but prevention is always better than cure when dealing with such delicate seedlings.
The Humidity Balance: During Step 2's greenhouse phase, condensation on the plastic isn't just a sign—it's your humidity report card. Aim for droplets that form but don't run down the sides. If you notice water pooling at the bottom of your tray, that's your cue to lift the plastic for 10-15 minutes to let excess moisture escape. The goal is 80-90% humidity without creating a swamp environment that encourages fungal growth.
Light Transition Strategy: When you reach Step 3 and start increasing light exposure, think of it like acclimating a human to sunlight—gradual is key. I recommend placing your tray near an east-facing window first, where morning light is bright but not intense. This mimics natural forest conditions where orchid trees originally thrived. The gradual 1-hour increments every 3 days prevent what I call "light shock," where seedlings stretch unnaturally toward any sudden brightness.
Transplant Timing Secret: In Step 4, when transplanting those 2-3 inch seedlings, don't rush the 2-week acclimation period. This is where many growers make their biggest mistake. I've seen seedlings that looked perfect in their starter pots wilt dramatically when moved to drier conditions too soon. Start by removing the plastic cover for just 30 minutes daily during this period, then gradually increase exposure. Think of it as seedling boot camp—building resilience before graduation day.
Pro Tips for Orchid Tree Seedling
- A few strategic moves will transform your germination success rate from guesswork to science-backed results.
- Sterility is Non-Negotiable: In Step 1, when preparing your peat-perlite mix, go beyond just wiping tools with rubbing alcohol.
- The Humidity Balance: During Step 2's greenhouse phase, condensation on the plastic isn't just a sign—it's your humidity report card.
Frequently asked questions
How long does it take for orchid tree seeds to germinate?
Patience is key! Orchid tree (Bauhinia spp.) seeds can take anywhere from 2 to 6 weeks to germinate, depending on conditions like warmth (70–80°F) and moisture. Some stubborn seeds may take months—don’t give up! Keep the soil consistently damp (not soggy) and monitor for tiny sprouts.
Can I germinate orchid tree seeds indoors without sunlight?
Yes, but with a twist! Orchid tree seeds need light to germinate, so place your tray near a bright window or under grow lights (12–14 hours/day). If natural light is weak, supplement with a LED bulb. Avoid direct midday sun, which can overheat the soil.
Why aren’t my orchid tree seeds sprouting? Troubleshooting tips
No sprouts yet? Check these fixes:
- Cold soil: Use a seedling heat mat (75–80°F) to mimic tropical conditions.
- Dry soil: Mist daily and cover the tray with plastic wrap to retain humidity.
- Old seeds: Orchid tree seeds lose viability after 1–2 years—test freshness first!
- Fungal risk: If mold appears, discard the batch and sterilize your setup.
Should I transplant orchid tree seedlings right after germination?
Wait until seedlings have 2–3 true leaves (not just cotyledons) and are about 2–3 inches tall. Transplanting too soon stresses them. Use well-draining potting mix (cactus/succulent blend works) and a pot with drainage holes to prevent root rot.
Are there faster-growing orchid tree alternatives for beginners?
If orchid tree seeds feel too slow, try these easier-to-grow tropical trees:
- Money Tree (Pachira aquatica) – Germinates in 1–2 weeks.
- Jade Plant (Crassula ovata) – Fast from cuttings.
- Umbrella Tree (Schefflera) – Propagates easily from stem cuttings.
Wrapping up and next steps
Growing an orchid tree seedling is a rewarding journey that blends patience, care, and a touch of green-thumb magic! 🌱 By following the right steps—from selecting quality seeds to nurturing your seedling with the perfect balance of light, moisture, and warmth—you’re well on your way to cultivating a stunning, thriving plant.
Remember, every expert gardener started with their first seed, so don’t hesitate to experiment and learn along the way.
Ready to take the next step? Start small—whether it’s expanding your orchid collection, sharing your newfound knowledge with fellow plant lovers, or even gifting a seedling to a friend! 🌟 With each seed you plant, you’re not just growing a tree; you’re cultivating confidence and a deeper connection to nature.