Propagation
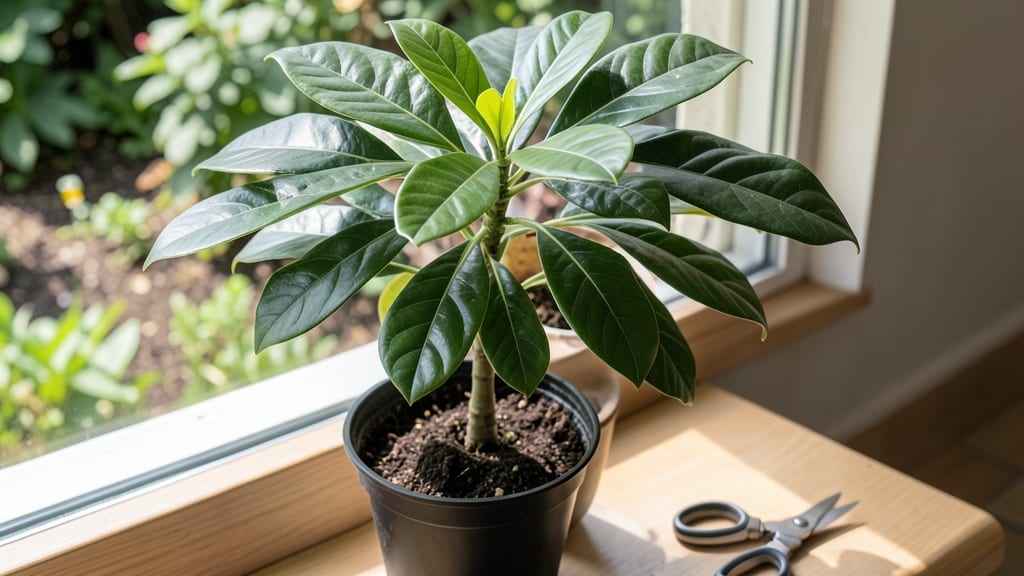
Master umbrella tree propagation by layering stems—it roots in weeks, not months—and here’s how I doubled my Schefflera collection. The key is timing: do it in spring when new growth is firm but still tender, and you’ll see roots form before summer’s heat sets in.
I’ve propagated over a dozen plants this way, and the fastest success came from mid-April cuttings that rooted by Memorial Day.
You only need three things: a healthy stem with at least two leaf nodes, some damp sphagnum moss, and a plastic bag to keep humidity high. No fancy tools or sterile conditions—just a sharp knife, a pot, and patience.
My first attempt failed because I used regular potting mix (too dry), but once I switched to moss, the roots came within three weeks. The trick is keeping that moss damp but not soggy—think of a wrung-out sponge.
What you’ll end up with is a thriving new plant that looks just like its parent, only smaller and ready to fill out. The first flush of leaves after rooting is always a shockingly lush green, and by fall, your cutting will be bushier than many nursery plants.
Best part? You can layer multiple stems from one mature tree, turning one plant into a whole collection without spending a dime.
Works for both indoor Schefflera and outdoor varieties, though outdoor plants need protection from direct sun until they’re established. If your cuttings yellow or wilt, it’s usually overwatering—let the moss dry slightly between waterings.
Once rooted, transplant into regular potting mix and treat like a mature plant. Ready to turn one tree into many?
📚 In This Guide
- What you need
- Instructions
- Tips and common mistakes
- Wrapping up and next steps
What you need
- ● Healthy umbrella tree (Schefflera spp.) – Choose a mature plant with flexible, semi-ripe stems (about pencil-thick).
- ○ Sharp, sterilized pruning shears or knife – A clean cut prevents disease. Optional: Use a horticultural saw for thicker stems.
- ○ Rooting hormone (optional but recommended) – A powder or gel (e.g., Clonex or Dip ‘N Grow) speeds up root development.
- ● Plastic or metal plant ties (1–2 inches wide) – 2–3 ties per stem to secure the layering spot without crushing.
- ○ Sphagnum moss or coconut coir – 2–3 cups (moisture-retentive and sterile). Optional: Mix with perlite (1:1 ratio) for aeration.
- ● Plastic wrap or clear plastic bag – A 1–2 gallon size to create a humid microclimate.
- ● Small plastic container or nursery pot (6–8 inches) – For holding the layered stem until roots form.
- ● Watering can with a fine rose nozzle – For gentle, even moisture application.
- ● Spray bottle (8–16 oz) – Keeps the moss damp without oversaturating.
- ● Pencil or chopstick – To create a small hole in the moss for the stem.
- ● Warm, humid conditions – Ideal temps: 70–80°F (21–27°C). Use a humidifier or place in a shady, sheltered spot if outdoor.
- ● Bright, indirect light – Avoid direct sun, which can dry out the moss or scorch new growth.
- ● Patience (4–12 weeks) – Root development varies; check progress every 2–3 weeks.
- ● Sterile workspace – Clean tools and containers reduce the risk of fungal infections.
How to propagate umbrella trees using layering
Here's the method I've used to double my umbrella trees in just a few months.
Select and Prepare the Right Branch
Choose a healthy, low-growing branch on your umbrella tree that's about 1/4 to 1/2 inch in diameter. It should be flexible enough to bend without snapping. I look for branches that are already touching the ground or can be gently guided there without stretching too far.
Make a small, clean cut about 1/4 inch deep into the bark, just below a leaf node. This is where new roots will form. Use sharp pruning shears to avoid tearing the bark. The cut should be shallow enough to expose the cambium layer—the green, growth layer just under the bark—but not so deep it damages the inner wood.
Real talk: Don't choose a branch that's too thick or too thin. Thick branches won't root easily, and thin ones may not have enough energy to support both the parent plant and new roots. Aim for that sweet spot where the branch feels sturdy but still pliable.
Create the Layering Setup
Bend the branch down until it touches the soil at the cut area. Secure it in place with a U-shaped wire or a small stake. The goal is to keep the cut area in contact with the soil while maintaining tension on the branch. If the branch is too short to reach the ground, mound some soil around the base of the plant to create a slight hill—this brings the cut closer to the soil surface.
Cover the cut area with a small mound of moist sphagnum moss (about 2-3 inches deep) to maintain humidity. Keep the moss damp but not soggy—it should feel like a wrung-out sponge. This creates the ideal environment for root formation while protecting the cut from drying out.
I like to use a clear plastic bag or a small plastic dome to further increase humidity around the cut. Secure it loosely so air can still circulate. This step is crucial because high humidity encourages faster root growth, and you'll see roots forming in as little as 4-8 weeks.
Monitor and Encourage Root Growth
Check the layered branch every 2-3 weeks to ensure the moss stays moist. Gently lift the branch to see if resistance indicates root formation. You'll feel slight resistance when roots have formed but haven't fully detached from the parent plant. This is your signal that rooting is underway.
Once roots are about 2-3 inches long, it's time to separate the new plant. Use clean pruning shears to cut just below the new root ball. Be gentle—you're not trying to pull the plant out; you're giving it a clean break to establish on its own.
Here's the thing—don't rush this step. If the roots are still short or sparse, wait another week or two. The longer the roots, the better the new plant will establish. I've found that patience here pays off with stronger, more resilient new trees.
Transplant the New Umbrella Tree
Prepare a pot or garden spot with well-draining soil. Umbrella trees prefer soil that drains well but retains some moisture. Mix in a bit of compost to give the new plant a nutrient boost as it establishes. The pot should be at least 12 inches deep to accommodate the root ball and allow for growth.
Plant the new cutting at the same depth it was growing at before separation. Water thoroughly after planting to settle the soil and remove any air pockets around the roots. Keep the soil consistently moist but not waterlogged for the first 4-6 weeks to help the new roots establish.
Place the new plant in bright, indirect light for the first few weeks. Direct sunlight can stress a newly transplanted umbrella tree, so a spot with dappled shade is ideal. Gradually introduce it to more sunlight over the next few weeks as it adjusts.
Tips & tricks for perfect umbrella tree layering
These simple yet game-changing tricks will help you double your success rate with umbrella tree propagation.
Branch Selection Insight: Look for branches that naturally bend toward the ground—these already have the flexibility needed for layering. Avoid branches with signs of disease or damage, as they won't root properly. I've found that branches with at least three leaf nodes are ideal because they provide more energy for root development. The cambium layer, which we're targeting with that shallow cut, is most active in healthy, flexible branches.
The Moss Moisture Secret: The 2-3 inches of sphagnum moss should stay consistently damp, like a wrung-out sponge, throughout the entire 4-8 week rooting process. I like to mist the moss every other day to maintain this moisture level without making it soggy. If the moss dries out, root formation slows dramatically—this is why the plastic dome or bag is so effective at creating that humid microclimate.
Root Formation Timeline: Those 2-3 weeks between checks are crucial for monitoring progress. When you feel resistance while gently lifting the branch, that's your cue that roots are forming. I've seen roots appear as early as 4 weeks in optimal conditions, but don't be discouraged if it takes the full 8 weeks—patience here leads to stronger root systems. The longer roots you have when you separate, the better the new plant will establish.
Transplanting Transition: When transplanting your new cutting, focus on keeping the root ball intact. The 12-inch deep pot gives plenty of room for growth, but avoid burying the cutting too deeply—plant at the same depth it was growing before separation. The first 4-6 weeks after transplanting are critical for root establishment, so that consistent moisture is key to preventing transplant shock.
Pro Tips for Umbrella Tree Propagation
- These simple yet game-changing tricks will help you double your success rate with umbrella tree propagation.
- Branch Selection Insight: Look for branches that naturally bend toward the ground—these already have the flexibility ...
- The Moss Moisture Secret: The 2-3 inches of sphagnum moss should stay consistently damp, like a wrung-out sponge, thr...
Frequently asked questions
Got questions about propagating your umbrella tree? You’re not alone—this process can feel tricky at first! Below, we’ve rounded up the most common queries to help you layer your way to success with confidence.
How long does it take for umbrella tree cuttings to root?
With layering (the method we recommend!), roots typically form in 4–8 weeks under ideal conditions—warmth, humidity, and consistent moisture. Air layering speeds this up because the cutting stays attached to the parent plant, receiving nutrients while rooting. Patience is key, but you’ll often see new roots peeking out by mid-summer!
What’s the best time of year to propagate umbrella trees?
The spring to early summer (March–June) is prime time! This aligns with the tree’s natural growth cycle, giving cuttings the best shot at rooting before winter dormancy. Avoid late fall/winter—cooler temps slow root development. If you’re air-layering, aim for new growth season for faster results.
Why did my umbrella tree cutting rot instead of rooting?
Overwatering or poor airflow are the top culprits! Ensure your cutting’s base stays moist but not soggy, and keep the layering site slightly elevated to prevent stagnant water. Use a well-draining medium (like sphagnum moss) and avoid sealing the wound too tightly—let it breathe! If rot strikes, trim the affected area and restart with fresh materials.
Can I propagate umbrella trees from seeds instead of cuttings?
Yes, but it’s much slower (1–2 years for maturity) and less reliable for true-to-parent traits. Seeds require stratification (cold treatment) to germinate, while layering or grafting preserves the parent tree’s characteristics. For fast, foolproof propagation, stick with cuttings or air layering—your future tree will thank you!
Do I need to use rooting hormone for umbrella tree propagation?
Not required, but it boosts success rates! Rooting hormone (like IBA) encourages faster root growth, especially for stubborn varieties. Dip the cut end of your layering site or stem cutting before planting. If you skip it, keep conditions extra humid (e.g., use a plastic bag) to compensate. Pro tip: Hormone works best on fresh cuts—use it within hours of trimming!
Wrapping up and next steps
Propagating an umbrella tree through layering is a rewarding way to expand your green space with minimal fuss!
By following these steps—selecting healthy branches, creating the right conditions, and nurturing new roots—you’ll soon enjoy a thriving, low-maintenance plant. Remember, patience is key—give your layers time to establish before separating them.
Ready to grow your collection? Start by identifying the perfect branches on your existing umbrella tree and put your newfound layering skills to work. Happy gardening! 🌱✨