
Pruning
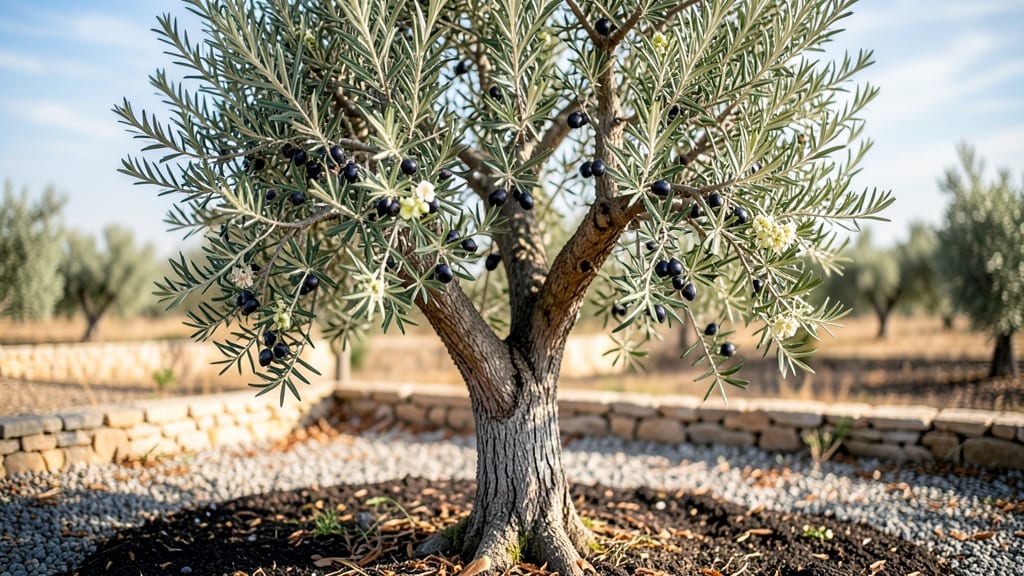
Growing olives on a tree means turning your yard into a Mediterranean paradise with glossy leaves and silvery fruit. 🌿 I planted mine three years ago, and now I’m harvesting more than I can eat—with the right pruning timing, you can too.
The secret lies in understanding when to shape the tree for both fruit production and winter survival, especially if you’re not in a frost-free zone.
Olives thrive in full sun and well-draining soil, but they’re surprisingly adaptable—even in containers if you live in a cooler climate. My tree gets watered deeply once a week in summer, then barely at all in winter, and it’s stayed healthy through two unexpected freezes.
The key is pruning in late winter to encourage new growth before the heat of summer, while avoiding heavy cuts that stress the tree.
By mid-fall, you’ll see clusters of olives ripening from green to deep purple, ready for harvest. The first year takes patience, but with consistent pruning, your tree will reward you with years of harvests—and the satisfaction of growing something most gardeners only dream of.
Whether you’re in California or a container on a patio, this method works.
Fair warning: olives need time to mature, so don’t expect a full harvest until year three or four. But once they start producing, you’ll wonder why you didn’t try this sooner. Let’s get your tree on the right track from day one.
📚 In This Guide
- What you need
- Instructions
- Tips and common mistakes
- Wrapping up and next steps
What you need
- ● Olive tree (varieties like Arbequina, Manzanillo, or Frantoio for optimal harvests; ensure it’s at least 3–5 years old for pruning).
- ● Pruning shears (bypass pruners, sharp and disinfected, for clean cuts on branches up to ½ inch thick).
- ● Loppers (for branches ½–1½ inches thick; look for ratchet or bypass-style for precision).
- ● Pruning saw (for branches over 1½ inches thick; opt for a curved or folding blade for ease).
- ● Gloves (heavy-duty, cut-resistant to protect hands from thorns and rough bark).
- ● Disinfectant (70% isopropyl alcohol or copper-based spray to prevent disease spread between cuts).
- ○ Sealing wax or pruning paint (optional but recommended for large cuts > ½ inch to prevent infection).
- ● Ladder or step stool (ensure it’s stable and tall enough to reach the tree’s canopy safely).
- ● Bucket or tarp (to collect pruned branches and debris for composting or disposal).
- ● Watering can or hose (for post-pruning hydration, especially in dry climates).
- ● Handheld leaf blower (to clear debris from the tree after pruning).
- ● Tree pruning rope (for securing branches during heavy pruning sessions).
- ● Pole pruner (extendable shears for high branches without a ladder).
- ● Pruning map or sketch (to plan cuts before starting; use a notebook or digital app).
- ● Fertilizer (balanced 10-10-10 or olive-specific blend to apply post-pruning for recovery).
Step-by-Step guide to pruning olive trees for year-round harvests
Here's how to shape your tree for maximum fruit production—no guesswork, just proven timing.
🌿 Step 1: Prune for Structure in Late Winter
Wait until after the last frost when new growth is just starting to bud. This is typically February to early March in most climates. You'll see tiny swellings at the branch tips—those are your cue. The goal here is to open the canopy to sunlight and air, which prevents fungal diseases and boosts fruit set.
Start by removing dead, crossing, or diseased branches first. Use sharp pruning shears to make clean cuts just outside the branch collar. These branches won't produce fruit anyway, so you're clearing space for the good ones. Next, thin out any branches growing inward toward the center of the tree—these create shade and reduce airflow.
For young trees, focus on establishing a strong framework. Remove any suckers growing from the base or trunk, as they drain energy from fruit production. Here's the thing—olive trees are resilient, but they reward precision. Every cut should have a purpose: more light, better airflow, or shaping the tree for easier harvests.
☀️ Step 2: Light Summer Pruning After Harvest
Once you've harvested your olives—usually September to October—it's time for a second round of pruning. Wait until after the main harvest but before new growth flushes in late summer. You'll notice the tree looks tired, with some branches bearing fewer leaves. This is normal, and it's the perfect time to encourage next year's crop.
Trim back any overly vigorous shoots that grew during the season. These are the ones that shoot up straight and look leggy. Cut them back by about one-third to encourage bushier growth. Also, remove any water sprouts—those are the fast-growing, vertical shoots that appear along the trunk or branches. They're attractive but useless for fruit production.
This step is about balance. You don't want to prune too much, as olives produce fruit on current season's growth. Think of it as giving the tree a light haircut—just enough to shape it without stressing it. If you see any branches rubbing against each other, remove the weaker one to prevent future damage.
✂️ Step 3: Refine and Maintain Through the Off-Season
During the winter months, when the tree is dormant, do a quick inspection for any dead or broken branches that might have missed the first pruning. These can happen after storms or heavy fruit loads. Use this time to plan next year's shape—olive trees respond well to gradual changes, so avoid drastic cuts.
Pay special attention to the tree's growth pattern. If you notice branches growing too close together, thin them out to improve light penetration. You'll see this as areas where leaves look sparse or yellowed—this is a sign the center isn't getting enough sunlight. Olive trees produce their best fruit on the outer two-thirds of the canopy, so keep the interior open.
Here's a pro tip: Mark your pruning schedule on a calendar. Olive trees thrive on routine, and consistent pruning leads to consistent harvests. If you're unsure about a cut, err on the side of caution—you can always prune more next year, but you can't un-cut a branch. And remember, olives are drought-tolerant, so don't overwater after pruning. Give the tree a good drink, then let the soil dry out between waterings.
Tips & tricks for perfect olive tree pruning
Took me years to figure out these olive tree secrets—here's how to avoid common pruning mistakes.
Timing is Everything: The February-to-March window for Step 1 is non-negotiable for most climates. I learned this the hard way after pruning too early and seeing new growth get frost-nipped. Look for those tiny swellings at branch tips—they're your green light to start. In warmer zones, you might extend this to early April, but never before last frost.
The One-Third Rule: When trimming back vigorous shoots in Step 2, cutting by about one-third creates that perfect balance between encouraging bushier growth and maintaining the tree's energy. I've seen gardeners get overzealous and remove too much—this leads to sparse harvests. Think of it like a haircut: you want to shape, not shave.
Branch Collar Matters: That little swollen area where a branch meets the trunk is called the branch collar, and it's critical. Always cut just outside it in Step 1—never flush against the trunk. I've seen too many pruning mistakes where cuts were made too close, leading to infections. This small detail prevents disease and promotes faster healing.
Seasonal Watering Wisdom: After any major pruning, give your tree a deep watering but then let the soil dry out between waterings. Olive trees are drought-tolerant, but they need that initial drink to recover from cuts. I've seen pruned trees struggle when overwatered afterward—it's all about balance, just like the pruning itself.
Pro Tips for Olives On A Tree
- Took me years to figure out these olive tree secrets—here's how to avoid common pruning mistakes.
- Timing is Everything: The February-to-March window for Step 1 is non-negotiable for most climates.
- The One-Third Rule: When trimming back vigorous shoots in Step 2, cutting by about one-third creates that perfect balance between encouraging bushier growth and maintaining the tree's energy.
Frequently asked questions
Got questions about growing olives straight from the tree? We’ve got answers!
Whether you’re a newbie or a seasoned gardener, these FAQs will help you master the art of olive tree care and harvest.
When is the best time to prune an olive tree for maximum fruit?
The ideal time to prune is late winter or early spring (before buds break), but light pruning can also happen in summer after harvest. Avoid heavy pruning in fall—it can stress the tree before winter. For Mediterranean climates, prune in February-March for best results.
How long does it take for an olive tree to bear fruit after planting?
Patience is key! Most olive trees take 3–5 years to produce fruit, though some dwarf varieties may fruit sooner (1–2 years). Proper pruning, sunlight, and well-draining soil speed up the process. Pro tip: Young trees need full sun (6+ hours/day) and regular watering to encourage growth.
Can I eat olives directly off the tree, or do they need curing?
Fresh olives straight from the tree are bitter and inedible! They must be cured (fermented, brined, or dried) to remove oleuropein, the natural compound that causes bitterness. Try green olives (harvested early) or black olives (fully ripe) for curing—both need processing.
What should I do if my olive tree isn’t producing fruit?
Check these common issues:
- Age: Trees under 3 years old won’t fruit.
- Pruning mistakes: Over-pruning reduces fruit. Aim for open canopies to allow sunlight.
- Pollination: Most olives are self-pollinating, but a second tree nearby can boost yields.
- Nutrients: Test soil for low nitrogen or zinc deficiency—olives thrive in slightly alkaline soil (pH 6.0–8.0).
Are there olive tree alternatives for smaller spaces?
Yes! If space is limited, consider:
- Dwarf varieties: ‘Arbequina’ or ‘Little Ollie’ grow to 6–10 feet and fruit faster.
- Potted olives: Use large containers (15+ gallons) with well-draining soil and winterize pots in cold climates.
- Olive shrubs: Prune aggressively to keep them bushy and compact.
Pro tip: Dwarf trees need similar care as full-sized ones—just adjust pruning tools and harvest expectations!
Wrapping up and next steps
From understanding the best pruning seasons to mastering the art of selective trimming, you now hold the keys to a thriving olive tree—one that rewards you with bountiful harvests year after year! 🌿✨ The secret lies in patience, precision, and a little seasonal know-how.
Whether you're a seasoned gardener or just starting your olive-growing journey, every snip brings you closer to those juicy, flavorful olives you’ve dreamed of.
Ready to put your new skills to the test? Grab your pruners and schedule that first trim—your future olive harvests will thank you! 🍃💚