
Pruning
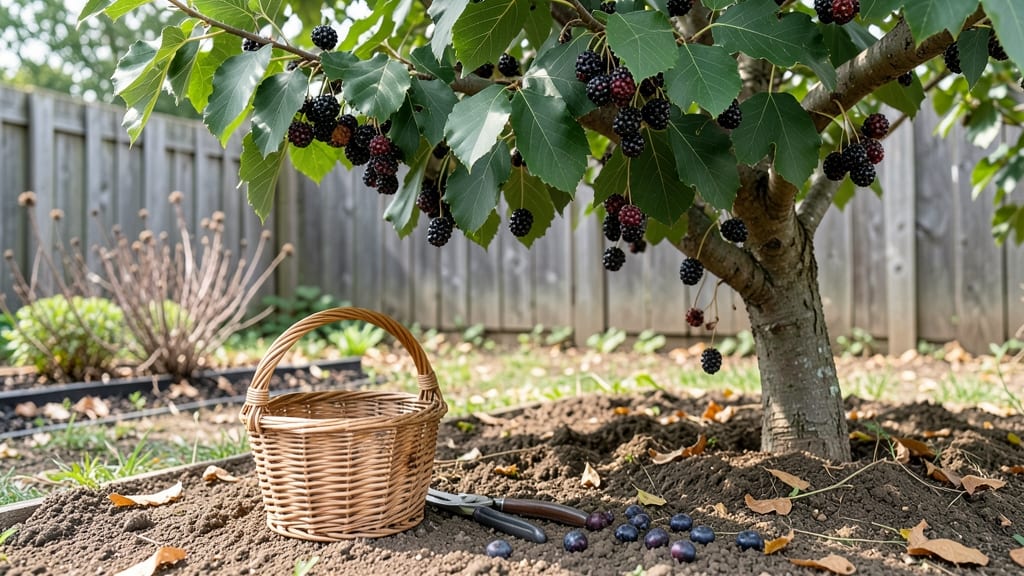
Mulberry fruit ripens faster than you think—three weeks after flowering—and the secret to a year-round harvest lies in when you prune. 🌱 I’ve watched my backyard morus tree go from a bare winter branch to a fruit-laden canopy by late spring, all thanks to a simple pruning schedule.
The key isn’t just cutting branches; it’s understanding how the tree responds to light, air, and timing.
You’ll need basic pruning tools—a sharp pair of shears, gloves, and a ladder if the branches are tall. Start in late winter before buds swell, then do light maintenance pruning after harvests to encourage new growth.
The goal is to open the canopy so sunlight reaches inner branches, where the sweetest fruit develops. Even in small spaces, a well-pruned morus tree produces enough fruit to share with neighbors.
By summer, you’ll be picking clusters of dark purple berries that burst with sweet-tart flavor, and with the right cuts, you’ll get a second flush in early fall. The tree thrives in full sun and tolerates poor soil, making it one of the easiest fruit trees to grow.
Just avoid over-pruning—too many cuts mean fewer fruits next season.
Works in zones 5-9, though northern growers may need winter protection. The same pruning rules apply whether you’re growing for shade, wildlife, or fresh fruit. Let’s get those branches trimmed right!
📚 In This Guide
- What you need
- Instructions
- Tips and common mistakes
- Wrapping up and next steps
What you need
- ● Pruning shears: Bypass pruners (sharp, 6-8 inch blades) for clean cuts on branches up to ½ inch thick. Quantity: 1 pair.
- ● Lopping shears: For thicker branches (½ to 1½ inches). Quantity: 1 pair.
- ● Pruning saw: Curved-tooth saw for branches over 1½ inches. Quantity: 1.
- ● Gloves: Heavy-duty, cut-resistant gloves (e.g., leather or synthetic mesh). Quantity: 1 pair.
- ● Disinfectant: 70% isopropyl alcohol or bleach solution (1 part bleach to 9 parts water) to sterilize tools. Quantity: Small spray bottle or wipe.
- ● Rope or twine: For temporary support of heavy branches. Quantity: 50+ feet.
- ○ Tree wound dressing (optional): Pruning sealant for large cuts (controversial—skip if you prefer natural healing). Quantity: Small tube.
- ● Safety gear: Safety glasses (to protect from debris) and long sleeves/pants (for sun/bug protection).
- ● Weather check: Prune on a dry, calm day (avoid frost or extreme heat).
- ● Tree health assessment: Inspect the morus tree for diseases (e.g., powdery mildew) or pests before pruning. 💡 Pro Tip: Healthy trees yield better fruit!
- ○ Ladder (optional): Extendable or step ladder (4-6 feet tall) for taller trees. Safety note: Always have a spotter if working high up.
How to maximize mulberry fruit production through smart pruning
Your mulberry tree can bear fruit year-round with the right cuts at the right time.
✂️ Step 1: Prune for Light Penetration in Late Winter
Start with a clean workspace—sterilize your pruning shears with rubbing alcohol. You'll want to remove 30-40% of the tree's oldest branches in late February or early March when the tree is still dormant. Focus on branches thicker than ½ inch that grow inward or cross each other, as these block sunlight and reduce fruit production.
Make cuts just outside the branch collar—the swollen area where the branch meets the trunk—at a 45-degree angle. This prevents water from pooling and rotting the wound. Here's the thing: mulberries fruit best on new growth, so you're not just cleaning up, you're encouraging next year's harvest.
☀️ Step 2: Thin Branches for Airflow in Early Spring
Once new leaves begin to swell but before they fully unfurl (mid-April), step back and evaluate your tree's structure. Remove any branches that grow straight upward—these create dense shade where fruit can't develop properly. Keep only the strongest, outward-growing branches that form a natural vase shape.
You'll notice some branches look like they're competing for sunlight. These are the ones to prune back to a strong lateral branch. Never remove more than one-third of the tree's foliage in a single season—this stresses the tree and can reduce fruit set. Thin branches should be about 6-8 inches apart along the trunk for optimal airflow and sunlight exposure.
🌿 Step 3: Summer Pruning to Encourage New Fruit Bearing Wood
After the first fruit harvest (late June), inspect the tree for branches that produced fruit but now look exhausted. These are your signal branches—cut them back by one-third to stimulate new growth. Mulberries produce fruit on 1-year-old wood, so this summer pruning ensures next year's crop.
Watch for any suckers growing from the base or roots. These compete with the main tree for nutrients. Remove them completely at the ground level. Here's where it gets fun: the new growth you encourage now will bear fruit next season, extending your harvest window.
⏰ Step 4: Light Winter Pruning to Maintain Shape
In December, do a final light pruning to remove any dead, diseased, or crossing branches. This keeps the tree healthy and open for maximum sunlight exposure. Limit cuts to 10% of the tree's total branches—you're not trying to drastically reshape, just maintain what you've built.
Look for branches that grew too vigorously last summer. Prune these back by one-quarter to balance the tree's energy. The goal is to keep the tree's center open so sunlight reaches all fruit-bearing branches. You'll see the difference in next year's more uniform fruit distribution.
Tips & tricks for perfect mulberry fruit production
Here's what nobody tells you about pruning mulberry trees—these tricks make all the difference between a modest harvest and a bountiful year-round supply.
Timing is Everything: The late February/March window for Step 1 is critical because dormant trees heal fastest during this period. If you miss it, wait until after leaf bud swell in mid-April—but never prune when the tree is actively growing. I learned this the hard way after pruning in May and seeing delayed fruit set the following season.
Branch Collar Technique: When making cuts in Step 1, don't just hack at the branch. Look for that swollen branch collar where the branch meets the trunk, then cut just outside it at a 45-degree angle. This prevents water from pooling and rotting the wound. I've seen too many pruning mistakes where people cut too close to the trunk and caused long-term damage.
Visual Pruning Guide: For Step 2, imagine your tree as an open vase shape when looking at it from above. Remove any branches that grow straight up like fingers pointing to the sky—these create shade where fruit can't develop. Keep only the branches that grow outward like the ribs of an umbrella. This open structure lets sunlight reach all fruit-bearing branches, which is why you'll see such uniform fruit distribution the following year.
Sucker Management: In Step 3, those suckers growing from the base might look harmless, but they're stealing nutrients from your main tree. Remove them completely at ground level—don't leave even a tiny stub. I've seen trees with dozens of suckers that completely drained the main trunk's energy, resulting in a poor harvest. Think of suckers as freeloaders that need to be evicted immediately.
Pro Tips for Morus Tree Fruit
- Here's what nobody tells you about pruning mulberry trees—these tricks make all the difference between a modest harvest and a bountiful year-round supply.
- Timing is Everything: The late February/March window for Step 1 is critical because dormant trees heal fastest during this period.
- Branch Collar Technique: When making cuts in Step 1, don't just hack at the branch.
Frequently asked questions
When is the best time to prune a morus tree for fruit production?
Prune your morus tree in late winter or early spring (before buds swell) to encourage robust fruit-bearing branches. Avoid heavy pruning in fall—it can stimulate late-season growth vulnerable to frost. Light shaping prunes can happen anytime, but timing matters most for maximizing yield!
How long does it take for a morus tree to bear fruit after planting?
Patience pays off! Most morus trees start producing fruit within 3–5 years of planting, though dwarf varieties may fruit sooner (1–2 years). Healthy soil, proper pruning, and consistent watering speed up the process. Pro tip: Young trees benefit from light pruning to redirect energy toward fruit production.
Can I eat morus tree fruit straight from the tree, or do I need to process it?
Fresh morus berries are edible and delicious—just wash them first. They’re sweet when ripe (deep purple/black) but tart when green. Try them raw, in smoothies, or dried for snacks. Warning: Unripe berries can cause mild stomach upset, so wait for full ripeness!
What should I do if my morus tree isn’t producing fruit?
Common culprits include over-pruning, poor nutrition, or lack of sunlight. Try these fixes:
- Prune strategically: Remove dead/diseased wood and thin branches to improve airflow.
- Fertilize: Use a balanced fertilizer (10-10-10) in early spring.
- Check sunlight: Morus trees need 6+ hours of sun daily.
- Water deeply: Drought stress reduces fruiting.
Are there alternative fruit trees with similar pruning needs?
Yes! If morus trees aren’t your style, consider these low-maintenance alternatives:
Tree
Pruning Window
Fruit Timeframe
Fig (Ficus carica)
Late winter/early spring
2–3 years
Pomegranate (Punica granatum)
Summer (post-harvest)
3–5 years
Persimmon (Diospyros spp.)
Winter (dormant season)
4–6 years
Wrapping up and next steps
Discovering the secrets of morus tree fruit harvests through strategic pruning unlocks a year-round bounty of delicious mulberries! By mastering the right techniques—timing, tools, and maintenance—you’re not just pruning; you’re investing in a thriving, productive tree. 🌿✨
Ready to transform your garden? Start small: observe your tree’s growth, gather your tools, and take the first cut with confidence. Your future harvests will thank you!
Next step: Grab your pruners and schedule your first pruning session—your mulberries are waiting! 🍇