
Pruning
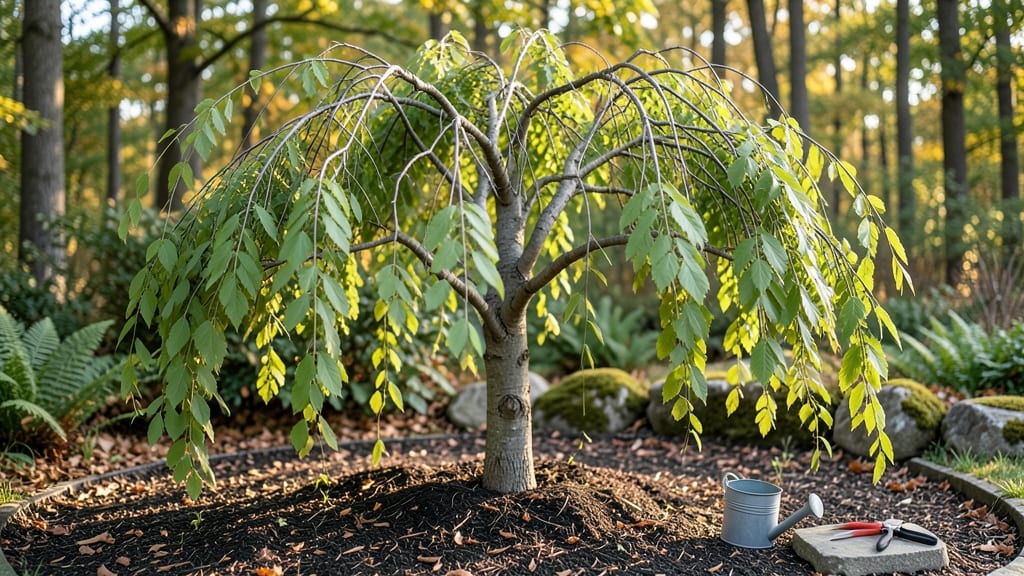
The Morioka weeping katsura tree’s cascading branches create a dreamy, year-round focal point in any garden. 🌿 I’ve pruned mine for five seasons now, and the secret to keeping those graceful branches lush and full lies in understanding its natural growth rhythm.
This tree doesn’t just survive—it thrives with minimal intervention, but timing and technique make all the difference.
What you’ll need is simple: sharp pruning shears, a ladder (for those higher branches), and a clear morning to work. The real trick is knowing when to prune—late winter or early spring, before new growth begins.
This tree responds beautifully to light shaping, but avoid heavy cuts; its weeping form is its signature, and you want to preserve that elegance.
By the end of a single pruning session, you’ll see a canopy that’s denser, more balanced, and ready to dazzle with its golden fall foliage or delicate spring blooms.
The branches will cascade more dramatically, and the tree’s natural resistance to pests and diseases will shine through. It’s the kind of transformation that makes gardening feel like magic.
Whether you’re working with a mature specimen or a young sapling, the same principles apply—just adjust the scale. This guide covers everything from basic shaping to advanced techniques for maximizing that weeping effect. Let’s get those branches looking their absolute best.
📚 In This Guide
- What you need
- Instructions
- Tips and common mistakes
- Wrapping up and next steps
What you need
- ● Pruning shears: Bypass pruners (sharp, 6-8" blades) for clean cuts on small branches. Quantity: 1 pair.
- ● Loppers: For thicker branches (up to 2" diameter). Quantity: 1 pair.
- ● Pruning saw: Curved-tooth saw for branches over 2" in diameter. Quantity: 1.
- ● Disinfectant: 70% isopropyl alcohol or pruning sealant to prevent disease. Quantity: Small bottle.
- ● Gloves: Heavy-duty gardening gloves (cut-resistant). Quantity: 1 pair.
- ○ Tarp or drop cloth: To collect debris (4’x6’ or larger). Optional but helpful!
- ● Measuring tape: For assessing branch thickness and spacing. Quantity: 1 (16’+ length).
- ● Notebook & pencil: To sketch your pruning plan or mark cuts. Quantity: 1.
- ● Step stool or ladder: For safe access to higher branches. Quantity: 1 (ensure stability!).
- ● Safety glasses: To protect against debris. Quantity: 1 pair.
- ● Knowledge: Familiarize yourself with the Morioka Weeping Katsura’s growth habits—it’s a deciduous tree with a naturally weeping form, but selective pruning enhances its grace.
- ● Timing: Prune in late winter or early spring (before new growth) for best results.
- ● Weather: Choose a dry, overcast day to minimize stress on the tree.
Step-by-step instructions for pruning your Morioka weeping katsura
Here's how to shape this elegant tree for that signature, cascading beauty all year long.
✂️ Step 1: Time Your Pruning for Best Results
Prune your Morioka Weeping Katsura in late winter or early spring, just as new growth begins to emerge. This timing ensures you shape the tree while it's still dormant but ready to respond to your cuts. Avoid pruning during fall or summer—late-season cuts can stimulate tender growth that won't survive winter, and summer pruning can stress the tree.
I like to schedule this task right after the last frost date in my zone, when the ground thaws but before buds swell. Watch for tiny green buds along the branches—those are your cue that it's time. If you miss this window, wait until early fall for a second pruning, but avoid heavy cuts then.
🌿 Step 2: Assess the Canopy and Plan Your Cuts
Step back and examine the tree's natural shape before making any cuts. The Morioka Weeping Katsura's beauty lies in its weeping, layered branches, so your goal is to enhance—not flatten—that cascading effect. Look for crossing branches or those growing straight up (they disrupt the graceful drape). These are your first targets.
Use sharp pruning shears to make clean cuts just above a bud or lateral branch (never leave stubs). For thicker branches over ½ inch, use loppers and cut at a 45-degree angle to prevent water pooling. I mark each cut with a piece of twine tied to the branch first—this helps me visualize the final shape before making permanent cuts.
🌱 Step 3: Thin Out and Shape for Airflow
Remove 20-30% of the total volume in one session to avoid shocking the tree. Focus on thinning from the center outward—this improves airflow and sunlight penetration, which prevents fungal issues. Start with the innermost branches first; these often get crowded and block light from reaching lower layers.
For the weeping effect, gently guide horizontal branches downward by tying them to stakes if needed (use soft plant ties). Avoid heavy pruning of the lower branches—these create the tree's signature "waterfall" look. If a branch is dead or diseased, cut it back to healthy wood immediately, then sterilize your tools with rubbing alcohol.
☀️ Step 4: Maintain Year-Round with Light Trims
After the main pruning, perform light maintenance trims twice a year: once in mid-summer to remove any aggressive vertical growth, and again in early fall to tidy up. Never remove more than 10% of the canopy in these sessions. Look for suckers (shoots growing from the base) and prune them back immediately—they drain energy from the main tree.
Here's the thing—this tree rewards patience. After pruning, water deeply to help it recover, then monitor for new growth within 4-6 weeks. If you see excessive leaf drop or wilting, you pruned too aggressively. Adjust next year's cuts accordingly. A well-pruned Morioka Weeping Katsura will reward you with lush foliage, vibrant fall colors, and that coveted weeping silhouette for decades.
Tips & tricks for pruning your Morioka weeping katsura
These little details make all the difference between a casually shaped tree and one that truly cascades with elegance.
Timing is Everything: The late winter/early spring window is critical because the tree is just waking up from dormancy. If you're unsure about your local last frost date, check your local cooperative extension service—they provide precise frost calendars by zip code. I once pruned too early in a mild winter and ended up with weak new growth that struggled through summer. Waiting for those tiny green buds to appear is your best guide.
Visual Planning Pays Off: Before making any cuts, take a series of photos from different angles. Print them out or display them on your phone—this helps you visualize the final shape without making impulsive cuts. I mark my photos with colored pens to indicate which branches I'll remove. This step alone prevents the "I cut too much" panic that many gardeners experience, especially with weeping varieties.
Tool Maintenance Matters: Sterilize your pruning shears and loppers with rubbing alcohol between cuts on diseased branches. I keep a small bottle of 70% isopropyl alcohol in my gardening toolbox for this purpose. Sharp, clean tools make precise cuts that heal faster, which is especially important for this delicate tree. Dull blades tear tissue, creating larger wounds that invite pests and disease.
Post-Pruning Care: After your main pruning, water deeply to help the tree recover. I like to add a layer of mulch around the base (but not touching the trunk) to retain moisture. Monitor for new growth in 4-6 weeks—this is your confirmation that the tree is responding well. If you notice excessive leaf drop or wilting, you've likely pruned too aggressively and should scale back next year.
Pro Tips for Morioka Weeping Katsura Tree
- These little details make all the difference between a casually shaped tree and one that truly cascades with elegance.
- Timing is Everything: The late winter/early spring window is critical because the tree is just waking up from dormancy.
- Visual Planning Pays Off: Before making any cuts, take a series of photos from different angles.
Frequently asked questions
When is the best time to prune a Morioka Weeping Katsura Tree?
The ideal time to prune is late winter or early spring (before new growth starts), but you can also do light shaping in summer. Avoid heavy pruning in fall—it can stimulate tender growth that won’t survive winter. Pro tip: If you must prune in summer, do it early to reduce stress on the tree.
How much can I trim back without harming the tree?
You can safely remove up to 25% of the tree’s foliage in a single pruning session. For weeping varieties like Morioka, focus on thinning out dense branches rather than cutting back to bare wood. Avoid "lion’s tailing" (cutting all branches to one spot)—this can weaken the tree’s structure and reduce its graceful form.
Why are my weeping branches losing their shape after pruning?
If your tree’s weeping branches look less graceful after pruning, you may have cut too aggressively or at the wrong angle. Always prune just above a bud or branch collar (the swollen area where the branch meets the trunk). For weeping katsuras, prioritize thinning over topping—remove entire branches rather than trimming individual twigs.
Does this tree need special care in winter?
Morioka Weeping Katsura Trees are hardy but benefit from light winter protection in colder climates (below 10°F). Wrap young trees with burlap or use anti-desiccant sprays to prevent branch drying. Avoid heavy snow buildup—gently brush off accumulation to prevent branch breakage. Mulch the base to insulate roots.
Are there alternatives if my tree isn’t thriving?
If your Morioka Weeping Katsura struggles with pests, disease, or poor growth, consider these similar weeping trees:
- Japanese Snowbell (Styrax japonica) – Fragrant white flowers, similar care.
- Weeping Cherry (Prunus subhirtella) – Cold-hardy, stunning spring blooms.
- Weeping Birch (Betula pendula) – Fast-growing, great for privacy.
All require similar pruning principles but may suit your climate or soil better.
Wrapping up and next steps
The Morioka Weeping Katsura Tree is a stunning addition to any landscape, offering year-round elegance with its cascading branches and delicate foliage. By following this pruning guide—using the right tools, timing, and techniques—you’ll keep your tree thriving and maintain its graceful, weeping form for seasons to come.
Ready to give your tree the care it deserves? Start by scheduling your first pruning session in early spring, and don’t forget to monitor its growth throughout the year. With patience and practice, you’ll master the art of shaping this breathtaking beauty! 🌿✨