
Pruning
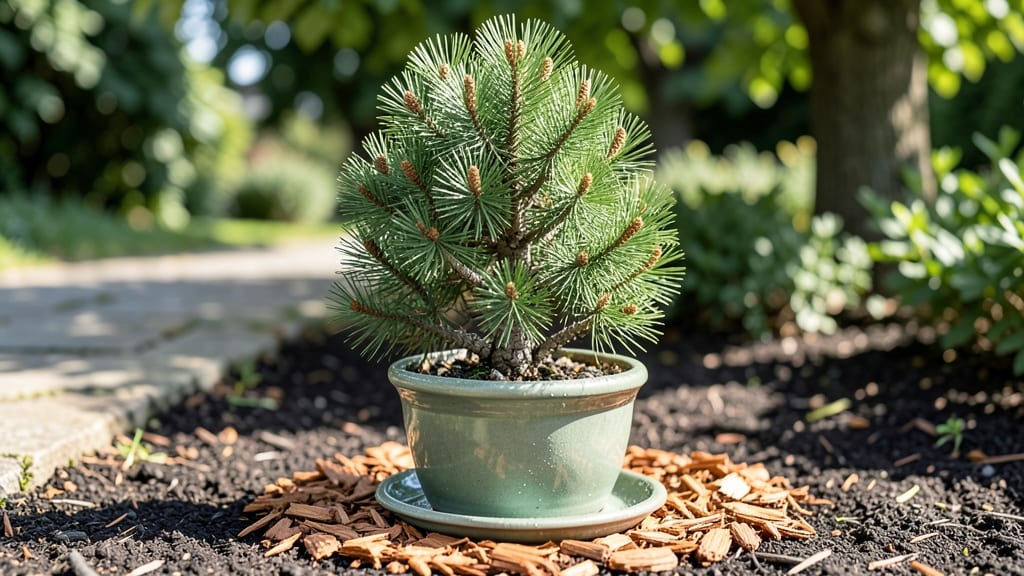
Growing a mini pine tree in containers lets you enjoy evergreen texture and privacy without the space of a full-sized tree. 🌲 I’ve filled my front porch with these compact beauties, and they’ve become my go-to for adding height and structure to small gardens.
The key is choosing the right variety—dwarf pines like Pinus mugo or Pinus thunbergii ‘Little Gem’ stay under 6 feet tall, making them perfect for patios, balconies, or even as living room centerpieces.
These little powerhouses thrive in well-draining soil and full sun, though they’ll tolerate partial shade if you’re in a hotter climate. I start with a container at least 12 inches deep—deeper for larger varieties—and use a mix of potting soil and perlite to keep roots happy.
Watering is where most people stumble: too much and roots rot, too little and needles brown. Aim for deep watering once a week, adjusting for your climate.
Pruning isn’t just about shaping—it’s about encouraging fullness. Snip back leggy branches in early spring, and you’ll see dense, bushy growth by summer. My Pinus thunbergii now has a natural, layered look that makes it the star of any arrangement.
Plus, they’re nearly pest-free compared to larger pines, though spider mites can be a nuisance in dry spells—just spray with water to deter them.
Whether you’re lining a walkway, adding height to a balcony, or creating a miniature forest in pots, these trees deliver year-round interest with almost no fuss. The best part? They keep their needles for years, so once established, they’re practically maintenance-free. Ready to grow your own? Let’s get started.
📚 In This Guide
- What you need
- Instructions
- Tips and common mistakes
- Wrapping up and next steps
What you need
- ● Mini pine tree seedling or cutting: Choose a dwarf variety like Pinus mugo (mugo pine) or Pinus sylvestris (Scots pine) for compact growth. Seedlings should be 1–3 years old.
- ● Container: A pot with drainage holes (5–10 gallons, depending on size). Terracotta or plastic works—just ensure it’s sturdy!
- ● Well-draining potting mix: Use a blend of 50% peat moss or coconut coir, 30% perlite or coarse sand, and 20% compost for aeration.
- ● Slow-release fertilizer: A balanced, 10-10-10 or 14-14-14 formula designed for evergreens (apply at planting and mid-season).
- ○ Mulch (optional but helpful): Pine bark fines or gravel to retain moisture and regulate soil temperature.
- ● Garden trowel or small shovel for planting.
- ● Pruning shears (sterilized with rubbing alcohol) for shaping and maintenance.
- ● Spray bottle for misting seedlings (especially in dry climates).
- ○ pH test kit (optional but recommended—pines thrive in acidic soil (pH 4.5–6.0)).
- ● Support stake or small cage (for young trees in windy areas).
Step-by-step guide to growing mini pine trees in containers
Here's how to cultivate these charming evergreens for year-round greenery and privacy.
🪴 Step 1: Select the Right Container and Drainage
Choose containers with drainage holes—pine roots despise soggy soil. For 4 mini pine trees, I recommend 12-15 inch diameter pots with 3-4 inches of drainage space below the holes. Terra cotta works best because it breathes, but plastic with holes will do in a pinch. Line the bottom with 1 inch of gravel to prevent clogging and improve aeration.
Here's the thing—size matters. A pot that's too small will stunt growth, while one that's too big holds excess moisture. Your 12-15 inch pots strike the perfect balance for the first 3-5 years of growth. If you're using decorative pots without holes, nestle them inside waterproof cache pots to catch excess water.
🌱 Step 2: Prepare the Soil Mix for Optimal Drainage
Pine trees thrive in acidic, well-draining soil with a pH between 4.5 and 6.0. Mix 60% peat moss or coconut coir, 30% pine bark fines, and 10% perlite or pumice for the perfect blend. This combination mimics their natural forest floor habitat while preventing compaction.
Fill each pot ¾ full with your mix, leaving room for the root ball. Tap the pot gently to settle the soil without compacting it. You want it light and airy—press too hard, and roots suffocate. Add a slow-release fertilizer (like 14-14-14) at ¼ cup per pot during planting to give them a nutrient boost without burning tender roots.
☀️ Step 3: Plant and Position for Full Sun Exposure
Remove your mini pine from its nursery pot and loosen the root ball gently with your fingers. Place it in the center of your container, ensuring the top of the root ball sits 1 inch below the rim. This prevents soil erosion and gives you room to add mulch later.
Backfill with your soil mix, pressing lightly around the edges to eliminate air pockets. Water deeply until it drains from the bottom holes—this ensures full root contact. Position your pines in full sun (6+ hours daily). They’ll tolerate partial shade, but their growth will be slower and less dense. Watch for needles turning yellow or dropping—this is your signal they’re not getting enough light.
💧 Step 4: Water and Maintain Proper Moisture Levels
Water your mini pines deeply once a week, allowing the top 2 inches of soil to dry out between waterings. Overwatering is the #1 killer of container pines—check the soil with your finger before watering. If it feels damp, wait another day. Use lukewarm water to avoid shocking the roots, and water at the base to keep needles dry.
In winter, reduce watering to every 10-14 days unless your home has dry indoor air. Pines in containers dry out faster than in-ground trees. A humidifier nearby helps mimic their natural environment. If needles turn brown at the tips, it’s usually a sign of low humidity or overwatering—adjust accordingly.
✂️ Step 5: Prune and Fertilize for Healthy Growth
Prune in late winter or early spring before new growth begins. Remove dead, broken, or crossing branches with clean, sharp pruners. Never cut more than ¼ of the tree’s foliage at once—this stresses the plant. For shaping, focus on thinning out the interior to improve airflow and light penetration.
Fertilize twice a year: once in early spring and again in mid-summer. Use a balanced, slow-release fertilizer (like 10-10-10) at half the recommended dose—pines are sensitive to excess nutrients. Avoid high-nitrogen fertilizers, which promote soft, weak growth. After fertilizing, water deeply to help distribute nutrients evenly.
Tips & tricks for growing mini pine trees in containers
These small but mighty evergreens need a little extra care to thrive in containers—here's how to give them the perfect growing conditions.
Container Selection: When choosing your 12-15 inch pots, prioritize terra cotta for its breathability, but ensure any plastic containers have adequate drainage holes. The 3-4 inches of drainage space below the holes is non-negotiable—this prevents root rot that can kill your pines within weeks. I've seen many gardeners make the mistake of using decorative pots without proper drainage, so if you're set on aesthetics, use a cache pot system to catch excess water while maintaining proper airflow at the roots.
Soil Mix Precision: The 60-30-10 ratio of peat moss/coconut coir, pine bark fines, and perlite/pumice creates the ideal airy foundation, but don't deviate from this blend. Too much perlite can dry out roots too quickly, while too much bark fines can compact over time. When adding your slow-release fertilizer (¼ cup per pot), mix it thoroughly into the bottom 2 inches of soil—this prevents fertilizer burn while ensuring roots get an immediate nutrient boost as they establish.
Light Positioning: The 6+ hours of daily sunlight requirement is strict, but there's a trick to maximize this in smaller spaces. Place your containers on a wheeled dolly or near a window you can rotate throughout the day. Watch for those yellowing needles—they're your early warning system. If you notice them after just a few days, your pines need more direct sunlight. South-facing windows or balconies are ideal, but supplement with grow lights if natural light falls short during winter months.
Watering Strategy: The once-weekly deep watering rule applies to summer conditions, but indoor environments change everything. Test soil moisture by sticking your finger 2 inches down—if it feels dry, water thoroughly until it drains from the bottom. In winter, reduce to every 10-14 days, but increase frequency if you have dry indoor air. Here's the thing: pine needles absorb moisture from the air, so if your home feels like a desert, your trees will dry out faster than expected. A simple humidifier nearby can make all the difference during heating season.
Pro Tips for Mini Pine Tree
- These small but mighty evergreens need a little extra care to thrive in containers—here's how to give them the perfect growing conditions.
- Container Selection: When choosing your 12-15 inch pots, prioritize terra cotta for its breathability, but ensure any plastic containers have adequate drainage holes.
- Soil Mix Precision: The 60-30-10 ratio of peat moss/coconut coir, pine bark fines, and perlite/pumice creates the ideal airy foundation, but don't deviate from this blend.
Frequently asked questions
about growing mini pine trees in containers—here’s what you need to know!How long does it take for a mini pine tree to grow in a container?
A mini pine tree grows slowly but steadily! In ideal conditions, expect 1–3 inches of growth per year. With proper care, a 3-foot-tall tree can reach maturity in 5–10 years in a container. Patience pays off for that lush, evergreen privacy screen!
Do mini pine trees need special watering in containers?
Yes! Containers dry out faster than ground soil. Water deeply when the top 1–2 inches are dry, but avoid soggy roots. In hot months, check moisture daily. Pro tip: Use a moisture meter or stick your finger in the soil to gauge needs—overwatering is a common killer!
Can mini pine trees survive winter in containers?
but they need protection! Move pots to a sheltered spot (like a garage or under eaves) when temps drop below 20°F (-7°C). Wrap the container in bubble wrap for extra insulation. Mulch the soil surface to retain warmth—no need to dig them out!
What’s the best alternative if I can’t grow a mini pine?
Consider dwarf spruce, junipers, or boxwoods—they thrive in containers and offer similar privacy. For faster growth, try bamboo (clumping types) or ornamental grasses. Just ensure your alternative matches your space’s light and climate needs!
Why are my mini pine tree’s needles turning brown?
Brown needles usually mean overwatering, underwatering, or pests. Check soil moisture first—needles should feel slightly dry before watering. If pests (like spider mites) are the culprit, spray with neem oil or rinse leaves with water. Pro tip: Prune dead branches to encourage new growth!
Wrapping up and next steps
Growing a mini pine tree in containers is a rewarding way to enjoy year-round greenery and privacy without the space demands of a full-sized tree.
Whether you're a beginner or a seasoned gardener, these tips will help you cultivate a thriving, healthy specimen that adds charm to any outdoor—or indoor—space. 🌲✨
Ready to take the next step? Start by selecting your favorite mini pine variety and gather your supplies. With patience and care, your little evergreen will become a stunning focal point in no time—so roll up your sleeves and get growing!