Pruning
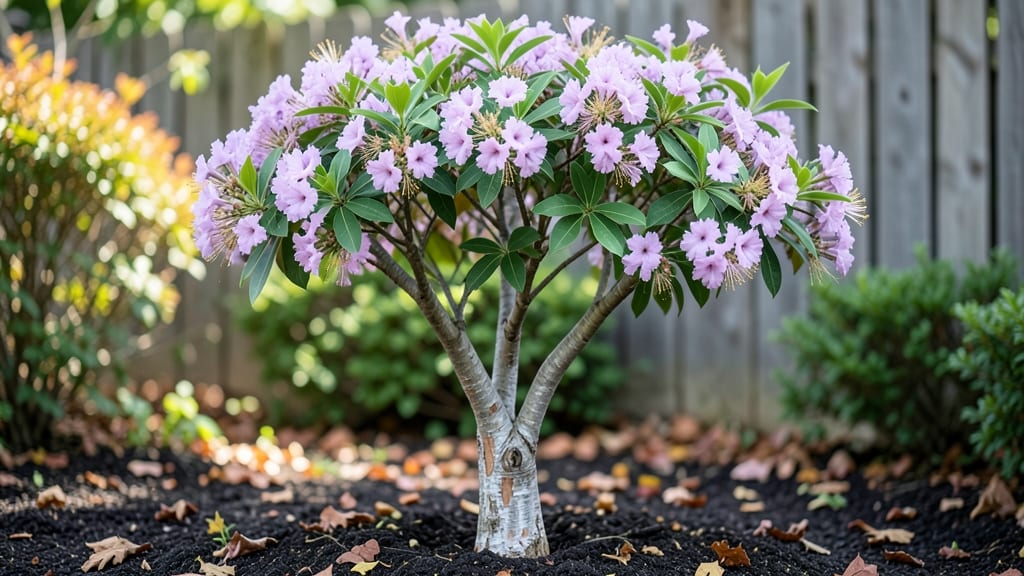
Your lavender tree care in the Pacific Northwest starts with one critical pruning secret—timing it after the first frost but before new growth. I learned this the hard way when my first lavender "tree" turned into a leggy mess after winter pruning too early.
The right timing keeps those silvery-blue branches compact and frost-hardy, while the wrong move invites rot or stunted growth.
Here’s the thing—lavender thrives on neglect, but not too much. Well-draining soil (mix in sand or gravel if yours is heavy) and full sun (6+ hours daily) are non-negotiable.
Water deeply but infrequently—think once every 2-3 weeks in summer, less in winter—because soggy roots are the fastest way to kill these drought-lovers. My PNW lavender "tree" now stands 6 feet tall with proper care, and it’s the first thing neighbors notice when they walk by.
What you’ll end up with is a fragrant, woody-stemmed lavender that looks like a mini Mediterranean escape in your yard. The flowers stay vibrant longer, the scent is stronger, and the structure holds up through winter storms.
The key is pruning just enough to shape it—never more than one-third of the plant at once—and using sharp shears to avoid tearing the stems.
This works for varieties like Lavandula angustifolia 'Hidcote' or Lavandula x intermedia 'Grosso,' which grow tall enough to be tree-like. For beginners, start with a 3-gallon container to practice before planting in the ground.
Once you nail the timing and technique, your lavender will outlive you—and still smell amazing when it does.
📚 In This Guide
- What you need
- Instructions
- Tips and common mistakes
- Wrapping up and next steps
What you need
- ● Pruning shears: Bypass pruners (for small stems, 4-6 inches) – 2 pairs (one for you, one backup!). Opt for sharp, stainless-steel blades to avoid crushing stems.
- ● Loppers: Bypass loppers (for thicker branches, 8-12 inches) – 1 pair with a ratchet mechanism for extended leverage.
- ● Pruning saw: Folding pruning saw (for branches thicker than 2 inches) – 1 with a fine-tooth blade for clean cuts.
- ● Gloves: Heavy-duty gardening gloves (cut-resistant, waterproof) – 1 pair to protect your hands from thorns and sap.
- ● Disinfectant: 70% isopropyl alcohol or rubbing alcohol – small bottle to sterilize tools between cuts and prevent disease spread.
- ● Sharpener: Pruner sharpening stone or file – 1 to keep blades razor-sharp.
- ● Container: Bucket or trash bag – 1 large to collect pruned branches and debris.
- ● Water: Hose or watering can – 1 for post-pruning hydration.
- ● Safety goggles – Protect your eyes from flying debris.
- ● Knee pads – For comfort during extended pruning sessions.
- ● Lavender-specific fertilizer (low-nitrogen, phosphorus-rich) – 1 small bag to replenish nutrients after pruning.
- ● Mulch (gravel or organic) – 1 bag to improve drainage and insulation around the base.
- ○ Pruning sealant – Small tube to coat larger cuts (optional for lavender, but useful in wet climates).
Step-by-step guide for pruning frost-resistant lavender trees
Here’s how to keep your Pacific Northwest lavender thriving through winter and beyond.
Time the Prune for Late Winter or Early Spring
Prune your lavender after the last frost date but before new growth begins—typically mid-February to early March in the PNW. This timing ensures you don’t stimulate tender new shoots that could be damaged by late frosts. Wait until daytime temperatures consistently stay above 40°F for at least a week.
Check the plant’s dormant buds—they’ll appear slightly swollen but not yet breaking open. Pruning too early risks exposing the plant to cold, while waiting too long encourages leggy growth. I always mark my calendar with the last frost date from my local extension office to avoid guessing.
Use Sharp Tools and Clean Cuts Only
Grab your sterilized pruning shears and make clean cuts at a 45-degree angle just above a set of healthy buds. Avoid tearing the stems—ravaged cuts invite disease, especially in damp PNW winters. Disinfect your tools with rubbing alcohol before and after pruning to prevent spreading fungal spores.
Focus on dead, diseased, or crossing branches first. Remove any wood that’s brown or mushy inside—lavender can’t recover from compromised stems. I like to step back every few cuts to assess the plant’s shape. The goal is to maintain an open, airy form that prevents moisture buildup.
Shape for Airflow and Sun Exposure
Lavender thrives on full sun and dry conditions, so prune to encourage even sunlight penetration. Cut back one-third of the oldest wood to stimulate new growth from the base. Avoid shearing into a tight, rounded shape—this promotes dense growth that traps moisture and invites rot.
For mature trees, I prune selectively rather than uniformly. Target the innermost branches first, then trim outward to create a natural, layered silhouette. This method mimics the plant’s native Mediterranean habitat, where it grows in rocky, well-drained soils with plenty of airflow.
Mulch and Water Strategically After Pruning
After pruning, apply 2-3 inches of gravel or coarse sand around the base to improve drainage—lavender hates soggy roots. Avoid organic mulch like wood chips, which can compact and retain too much moisture. Water deeply but infrequently—once every 2-3 weeks—unless the soil feels bone-dry.
Monitor the plant’s leaf color in the weeks following pruning. Healthy lavender leaves should be silvery-green and aromatic. If you see yellowing or wilting, it’s a sign of overwatering or poor drainage. In the PNW’s rainy season, I often skip watering entirely unless the ground is parched.
Plan for Winter Protection in Harsh Years
While PNW lavender varieties are more frost-tolerant than their Mediterranean cousins, extreme cold snaps below 10°F can still damage tender new growth. If your area experiences harsh winters, wrap young trees in burlap or apply a light layer of straw around the base for insulation.
Prune lightly in late winter if needed, but avoid heavy cuts—this stresses the plant when it’s already battling cold. I’ve found that mature lavender trees (3+ years old) handle PNW winters far better than young specimens. If your tree is struggling, consider planting it on a south-facing slope for added sun exposure.
Tips & tricks for pruning frost-resistant lavender trees
Mastering the art of lavender pruning in the Pacific Northwest takes more than just timing—it's about understanding the plant's natural rhythms and climate challenges. Here's what I've learned after years of working with PNW lavender varieties.
Timing is Everything: The mid-February to early March window isn't just arbitrary—it's when lavender naturally enters its active growth phase. I've found that waiting until daytime temperatures consistently stay above 40°F for a week ensures the plant has fully awakened from dormancy. This timing prevents the shock of new growth forming just before potential late frosts, which can be devastating. Check those dormant buds—they should be slightly swollen but not yet breaking open, indicating the perfect moment to prune.
Tool Preparation Matters: Sterilizing your pruning shears with rubbing alcohol before and after each use isn't just good practice—it's essential in the damp PNW climate. I've seen fungal infections spread rapidly through unsterilized tools, especially when pruning multiple plants. The 45-degree angle cut just above healthy buds creates clean wounds that heal properly, preventing the entry points for disease that torn stems provide. Remember, lavender can't recover from compromised stems, so take your time with each cut.
Shape with Purpose: The open, airy form we aim for isn't just aesthetic—it's crucial for preventing moisture buildup that leads to rot. When cutting back one-third of the oldest wood, think of it as creating a natural funnel that directs airflow through the plant. For mature trees, starting with the innermost branches first creates that beautiful layered silhouette while ensuring sunlight can penetrate to all parts of the plant. This mimics the Mediterranean conditions lavender evolved in, where it grows in rocky, well-drained soils with maximum airflow.
Post-Pruning Care: The 2-3 inches of gravel or coarse sand around the base serves a critical function—it mimics the rocky soils of lavender's native habitat while preventing moisture retention. In the PNW's rainy season, this becomes especially important. I've learned to monitor leaf color closely after pruning—healthy lavender should maintain its silvery-green hue. Any yellowing or wilting is a clear signal to adjust your watering habits immediately, as lavender truly hates soggy roots.
Pro Tips for Lavendar Tree Care
- Mastering the art of lavender pruning in the Pacific Northwest takes more than just timing—it's about understanding the plant's natural rhythms and climate challenges.
- Timing is Everything: The mid-February to early March window isn't just arbitrary—it's when lavender naturally enters its active growth phase.
- Tool Preparation Matters: Sterilizing your pruning shears with rubbing alcohol before and after each use isn't just good practice—it's essential in the damp PNW climate.
Frequently asked questions
Got questions about keeping your lavender tree thriving in the Pacific Northwest’s chilly climate? Here are some of the most common concerns—and their straightforward solutions!
How cold can lavender trees handle in the PNW?
Most Lavandula varieties (like L. x intermedia) tolerate brief dips to 15–20°F, but younger plants or tender hybrids may need winter protection. In the PNW’s wet winters, mulch heavily (3–4 inches) and group plants together to share warmth. Prune in late winter to remove dead growth before new shoots emerge.
When should I prune lavender trees for frost resistance?
Prune after the last frost (mid-to-late spring in the PNW) to avoid encouraging tender new growth that frost can damage. Focus on shaping in early summer (June–July) to harden wood before winter. Never prune in fall—this stresses the plant and reduces cold hardiness.
Can I prune lavender trees too much?
Yes! Over-pruning (cutting more than 1/3 of the plant) weakens lavender, making it vulnerable to frost and disease. Stick to light shaping—remove only dead, leggy, or overcrowded stems. Pro tip: Use sharp, sterilized shears to avoid tearing stems, which slows healing.
Why is my lavender tree dying after PNW winters?
Lavender often declines from overwatering, poor drainage, or late pruning. In the PNW’s wet climate, ensure pots have drainage holes and soil stays lightly moist but never soggy. If stems turn black or mushy, it’s root rot—trim affected areas and repot with gritty, fast-draining soil.
Are there frost-resistant lavender alternatives for the PNW?
Yes! Try these cold-hardy options:
- English Lavender (L. angustifolia): Handles 0°F with ease; compact and fragrant.
- Grosso Lavender (L. x intermedia ‘Grosso’): Thrives in zones 5–9; drought-tolerant and sturdy.
- Spanish Lavender (L. stoechas): Less frost-hardy (15°F) but blooms earlier in spring.
For extra protection, plant near south-facing walls or use burlap wraps in severe winters.
How do I revive an over-pruned lavender tree?
Don’t panic! Trim back healthy green stems to 6–8 inches from the base—new growth will sprout from the roots. Avoid fertilizing until new shoots appear (usually 4–6 weeks). Pro tip: Water deeply but infrequently to encourage root recovery.
Wrapping up and next steps
Caring for your lavender tree in the Pacific Northwest doesn’t have to be intimidating—just follow these frost-resistant pruning tips to keep it thriving! With the right tools, timing, and techniques, you’ll enjoy a fragrant, healthy plant year after year. 🌿✨
Now that you’re equipped with the knowledge, take action: grab your shears, mark your calendar for late winter or early spring, and give your lavender tree the TLC it deserves. Your future blooms—and your senses—will thank you!