Pruning
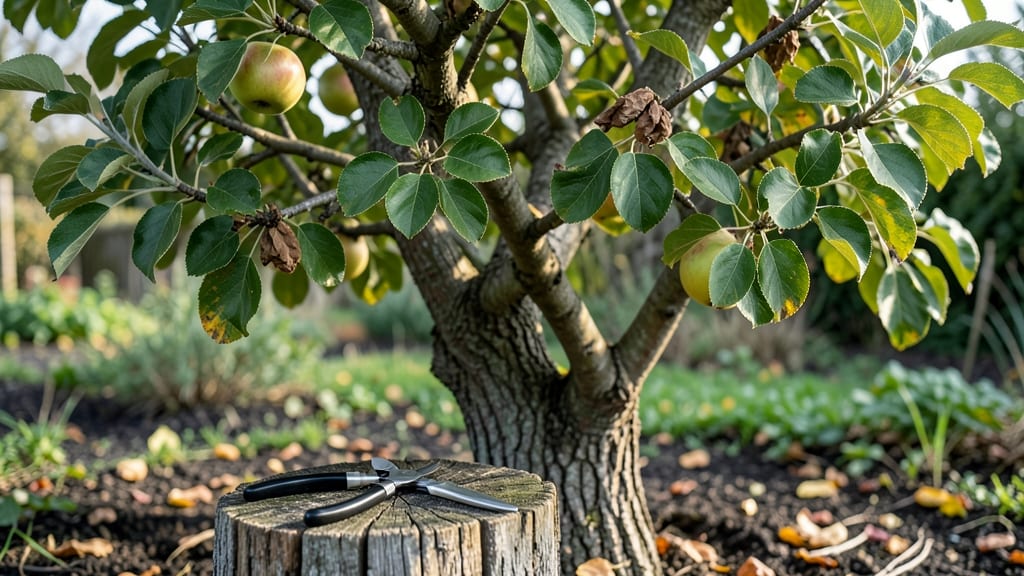
Trimming apple trees in the fall is the secret to healthy fruit production and strong branches for years to come—something I learned after my first tree grew lopsided and produced half the harvest.
The key is timing: prune just before winter dormancy, when the tree’s energy is stored in its roots and disease risks drop dramatically. This isn’t just about shaping the tree; it’s about setting it up for next year’s blossoms and fruit.
You’ll need just a few tools: sharp loppers for thicker branches, hand pruners for smaller cuts, and a disinfectant to wipe between cuts (trust me, this prevents spreading disease). Safety goggles are a must—apple branches can snap unexpectedly.
The goal is to remove dead, crossing, or weak wood first, then thin out the canopy to let sunlight reach the center. Think of it like giving your tree a haircut for better airflow and sunlight exposure.
After you’ve made your cuts, you’ll notice the tree’s structure becomes more open, with fewer crowded branches competing for resources. The result? More sunlight on the fruit, fewer apples lost to rot, and a tree that looks like it belongs in a postcard.
Plus, winter pruning means you won’t deal with sap bleeding or pest activity that comes with spring cuts. It’s the foolproof way to keep your apple tree thriving.
This method works for most apple varieties, whether you’re dealing with a young tree or a mature one that’s been neglected. Just avoid pruning too late in fall if your region gets late frosts—wait until the ground freezes or temperatures stay below 20°F for a few days.
Now grab your tools and let’s get that tree looking like a champion!
📚 In This Guide
- What you need
- Instructions
- Tips and common mistakes
- Wrapping up and next steps
What you need
- ● Bypass Pruners: A sharp, high-quality pair (e.g., Felco or Fiskars) for cutting branches up to ¾ inch in diameter.
- ● Loppers: For thicker branches (1–2 inches in diameter). Look for long handles (20–24 inches) for leverage.
- ● Pruning Saw: A curved-tooth saw for branches larger than 2 inches. A 16–20 inch blade works best.
- ● Gloves: Heavy-duty, cut-resistant gloves (e.g., Mechanix or pruning-specific gloves) to protect your hands.
- ● Disinfectant: A 10% bleach solution (1 part bleach to 9 parts water) or rubbing alcohol to sterilize tools between cuts and prevent disease spread.
- ● Rag or Paper Towels: For wiping tools clean before and after use.
- ● Ladder or Step Stool: A sturdy, extendable ladder (if your tree is taller than 6–8 feet) or a stable step stool for safety.
- ○ Pruning Sealant (Optional):strong> A high-quality sealant (like Tanglefoot Tree Wound Pruning Seal) to coat cuts larger than ½ inch in diameter.
- ● Trash Bags or Wheelbarrow: For hauling away pruned branches and debris.
- ● Safety Gear: Safety glasses (to shield from debris) and long sleeves/pants (to protect from thorns and scratches).
- ● Weather Check: Trim on a dry, calm day (avoid wind or rain to prevent tool rust and slippery conditions).
- ● Tree Health: Inspect the tree for signs of disease (e.g., cankers, fungal growth) or pests. Address these before pruning if possible.
- ● Safety First: Ensure the tree is stable and free of deadwood that could fall unexpectedly.
- ● Plan Ahead: Sketch a rough outline of your cuts (or take photos) if you’re unsure where to trim. Over-pruning can stress the tree!
Step-by-step guide for fall apple tree pruning
Here's how to shape your trees for next year's fruit while keeping them strong through winter.
Gather Your Tools and Inspect the Tree
Start by collecting your pruning tools: a sharp bypass pruner for branches under ½ inch thick, and a pruning saw for thicker limbs. Wipe blades with rubbing alcohol to prevent spreading disease. Look for dead, diseased, or crossing branches—these take priority. I always scan for signs of fire blight (blackened, oozing cankers) or fungal spots, which need immediate removal.
Check the tree's overall structure. Healthy branches have smooth bark and green leaves (if still present). Weak, brittle wood or branches growing inward will need cutting. This is the moment to plan your cuts—sketch a rough outline if needed. I find it helps to step back and visualize the tree's natural shape without interference.
Remove Dead, Diseased, and Crossing Branches
Begin with the easiest cuts: any dead wood (no green underneath the bark when scratched) or branches with signs of disease. Cut these back to the main trunk or a healthy lateral branch. Make your cuts at a 45-degree angle, about ¼ inch above a outward-facing bud—this encourages new growth in the right direction. For larger branches, use the pruning saw to avoid tearing the bark.
Next, remove branches that cross or rub against each other. Friction creates wounds that invite pests and disease. If two branches compete for space, keep the stronger one (thicker, more vigorous) and remove the weaker. I always check for "water sprouts"—fast-growing vertical shoots that steal energy from fruit production. These go first, cut back to a lateral branch or the main trunk.
Thin the Canopy for Better Airflow
Step back and assess the tree's density. Apple trees need sunlight and air circulation to prevent fungal issues. Aim to remove 20-30% of the foliage volume by thinning out crowded branches. Focus on the center of the tree first—this is where humidity builds and diseases thrive. Cut branches that grow straight inward, even if they look healthy. You'll see more light reaching the inner branches after these cuts.
For each cut, make sure the remaining branch can support itself. Never leave a stub—always cut back to a bud or lateral branch. If a branch is too large to cut all at once, make a 3-cut method: first undercut, then top cut, and finally remove the branch. This prevents bark from tearing. I like to work in sections, starting from the bottom and moving upward to avoid overloading the tree.
Shape the Tree for Next Year's Fruit
Now focus on training the tree's structure. Apple trees thrive with an open-center form, where branches spread outward rather than clustering. Remove any branches growing straight upward—these rarely bear fruit and create shade. Instead, encourage horizontal branches by cutting back vertical "suckers" to a lateral bud. You'll see the tree's natural shape emerge as you work.
Pay attention to the tree's "scaffold branches"—the main limbs that form the framework. These should be spaced 12-24 inches apart along the trunk. If a scaffold branch is too close to another, thin one out to avoid crowding. For young trees, you can also head back the leader (central stem) to encourage a bushier shape. This is where patience pays off—your cuts now determine next year's harvest.
Clean Up and Protect the Tree
After pruning, gather all cut branches and dispose of them in the trash (not your compost—diseased wood can spread pathogens). Wipe down your tools again with rubbing alcohol to prevent cross-contamination. If you notice any large wounds (over ½ inch wide), apply a thin layer of pruning sealant to protect against pests and disease. For smaller cuts, no sealant is needed—the tree's natural healing response is usually sufficient.
Finally, check the tree's overall health. Healthy apple trees should have a balanced shape with branches evenly distributed. If the tree is young, consider wrapping the trunk with tree guard to protect it from rodents and sunscald. Water deeply after pruning to help the tree recover, especially if fall has been dry. You'll see fresh growth buds forming by spring—that's your sign the pruning worked.
Tips & tricks for perfect fall apple tree trimming
Fall pruning sets the stage for next year's harvest—here's how to avoid common mistakes and maximize your tree's health.
Tool Preparation: Always sterilize your pruning tools with rubbing alcohol before and after use. I learned this the hard way after accidentally spreading fire blight between trees. For stubborn branches over ½ inch thick, pre-cut the underside with your pruning saw to prevent bark tearing when you make the final cut. This simple step keeps wounds clean and promotes faster healing.
Visualizing the Tree's Shape: Step back frequently to assess your progress. The goal is an open-center form with branches spaced 12-24 inches apart. I find it helpful to sketch a rough outline on paper first—this keeps me from over-thinning in one area while leaving too much foliage elsewhere. Remember, you're aiming to remove 20-30% of the foliage volume, not more.
Bud Selection Matters: When making cuts, always aim to leave a bud that faces outward. This encourages new growth in the right direction and prevents future crowding. For branches thicker than your thumb, use the 3-cut method: undercut first, then make your top cut, and finally remove the branch. This technique prevents bark from tearing and creates a smoother wound for healing.
Seasonal Timing Insight: Fall is ideal for pruning because the tree's growth has slowed, making it less stressful. However, avoid pruning when temperatures drop below freezing or when rain is forecasted for the next 24 hours. The tree needs time to callus over wounds before winter sets in. I always prune on a dry, sunny day when the tree has energy to recover.
Pro Tips for Trim Apple Trees In The Fall
- Fall pruning sets the stage for next year's harvest—here's how to avoid common mistakes and maximize your tree's health.
- Tool Preparation: Always sterilize your pruning tools with rubbing alcohol before and after use.
- Visualizing the Tree's Shape: Step back frequently to assess your progress.
Frequently asked questions
Got questions about trimming apple trees in the fall? You’re not alone! Here are answers to the most common concerns—from timing to tools and everything in between.
When is the exact best time to trim apple trees in the fall?
Late fall, after leaf drop (November–December) but before hard freezes, is ideal. This timing helps the tree heal before winter while avoiding late-season pests. If you missed it, wait until early spring—just avoid trimming during dormancy (mid-winter) to prevent frost damage.
Can I use regular garden shears or do I need special pruning tools?
For small branches (under ½ inch thick), sharp bypass pruners work fine. Thicker branches require loppers or a pruning saw. Sterilize tools with rubbing alcohol between cuts to prevent disease spread. Avoid dull tools—they tear bark and invite infections.
What if I accidentally cut too much? Will my tree survive?
Don’t panic! Apple trees are resilient, but aim to remove no more than 25% of the canopy in one season. If you over-prune, focus on lightening the center next year and avoid cutting large branches. Over time, the tree will recover—just monitor for stress signs like excessive leaf drop.
Will trimming in fall attract pests or diseases?
Pruning in late fall reduces pest risks since many insects are dormant. However, sterilize tools and avoid trimming when wet to lower disease risk. Remove all fallen leaves and debris post-pruning to deter overwintering pests like aphids or fungal spores.
Do I need to seal pruning wounds on apple trees?
No! Sealing wounds with paint or pruning sealant is unnecessary—it can trap moisture and harm the tree. Apple trees naturally seal cuts with callus tissue over time. Just make clean cuts at a 45-degree angle just outside the branch collar for the best healing.
What if the weather turns bad during pruning?
Stop immediately if rain or wind picks up. Wet conditions can spread disease, and strong winds make branches harder to handle. Resume pruning when the forecast is dry and calm. If you’re halfway through, cover tools and focus on finishing the next day.
Wrapping up and next steps
Trimming your apple trees in the fall is a simple yet powerful way to ensure they thrive for years to come! 🌳 By removing dead branches, shaping the canopy, and encouraging airflow, you’re setting the stage for healthier fruit production and stronger growth.
With the right tools, timing, and technique, you’ll feel like a pro in no time.
Ready to take the next step? Start small—even just pruning a few branches can make a difference. And if you’re feeling ambitious, check out seasonal pruning schedules to keep your trees happy year-round. Happy trimming! ✂️