Trees
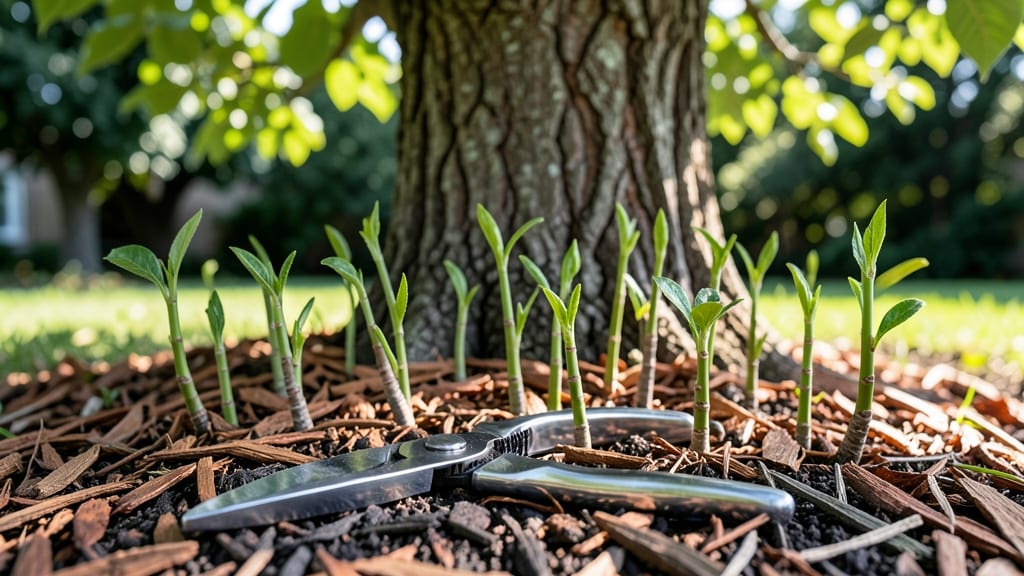
Stopping trees from sending up shoots starts with understanding why they do it—those stubborn suckers are the tree’s way of regenerating if the main trunk gets damaged or stressed. 🌳 I’ve battled this problem with my aging apple tree, and the suffocation method finally gave me the control I needed to break the cycle for good.
This approach works by cutting off the shoots’ access to sunlight and nutrients without harming the main tree. You’ll need a heavy-duty tarp, landscape fabric, or even thick cardboard, plus some landscape staples or rocks to secure it.
The key is timing—spring or early summer is ideal, when new shoots are just starting to emerge but before they’ve established strong roots.
Within a few months, you’ll see the shoots wither and die as their energy reserves run out. The main tree stays healthy because its roots remain undisturbed, while the suffocation method starves the unwanted growth. It’s a slow process, but it’s permanent when done right—no more digging or herbicides needed.
Works for fruit trees, ornamental trees, and even stubborn shrubs. The method is especially effective for trees with aggressive suckering habits, like willows or poplars. Just be patient—consistency is the secret to success.
📚 In This Guide
- What you need
- Instructions
- Tips and common mistakes
- Wrapping up and next steps
What you need
- ● Heavy-duty plastic sheeting (6-mil thickness or thicker) – at least 4' x 6' per shoot cluster (more for larger areas).
- ● Staple gun + heavy-duty staples (or a landscaping staple gun for extra grip).
- ● Shovel or spade (for digging a shallow trench, ~2" deep).
- ● Garden twine or zip ties (to secure edges tightly).
- ○ Weed barrier fabric (optional but recommended) – landscape fabric rated for UV resistance to block light completely.
- ● Rocks or bricks (for weighing down edges and preventing wind lift).
- ● Pruning shears or loppers (to trim shoots before suffocating).
- ● Gloves (heavy-duty work gloves to protect hands).
- ● Black plastic mulch (for a faster suffocation effect).
- ● Soil solarizer (if available) – speeds up decomposition with heat.
- ● Marking spray or flags (to label treated areas and avoid future digging).
- ● Knee pads (for comfort during long sessions).
Step-by-Step guide for eliminating tree suckers with the suffocation method
Here's how to permanently stop unwanted tree shoots using a simple, effective approach.
🪴 Step 1: Identify and Locate the Suckers
First, find all the suckers around the tree's base. These are the small, fast-growing shoots that emerge from the root system or graft union. Look for them within a 2-3 foot radius of the main trunk—this is where they'll be most aggressive. Use a sharp knife or pruning shears to make a clean cut just above the soil line for any you spot now, but don't remove them yet. We'll handle the root source next.
Here's the thing—these suckers are connected to the tree's root system, so cutting them at the surface won't stop new ones from popping up. The suffocation method targets the roots directly. You'll know you've got the right spots when you see a cluster of shoots emerging from the same area, often in a circular pattern around the main tree.
💧 Step 2: Apply the Suffocation Layer
Spread a 4-6 inch thick layer of cardboard or thick plastic sheeting directly over the soil around the tree's base, extending 2-3 feet outward in all directions. This blocks sunlight and air from reaching the roots, effectively suffocating them. Overlap the edges by 4-6 inches to create a continuous barrier—no gaps allowed, or new shoots will find their way through.
Secure the edges with landscape staples or heavy rocks to keep it in place. If using cardboard, make sure it's plain (no glossy or treated varieties) and tear it into strips if needed to fit snugly. Water the area lightly after placing the barrier to help settle everything in place. You'll notice the soil stays cooler and drier under the suffocation layer, which speeds up the process.
☀️ Step 3: Monitor and Maintain the Barrier
Check the suffocation layer every 2-3 weeks for the first 3-4 months. Look for any gaps where light might be sneaking through—this is when new shoots often appear. If you find any, patch the holes immediately with additional cardboard or plastic. The goal is to keep the roots completely deprived of sunlight until they weaken and stop producing shoots.
Real talk: This method isn't instant. It can take 3-6 months for the roots to fully suffocate, depending on the tree species and soil conditions. During this time, you might see some shoots die back or slow their growth, but don't remove them—just let the suffocation do its work. Once the area stays clear of new shoots for at least 6 months, you can safely remove the barrier and replant with ground cover or mulch.
✂️ Step 4: Clean Up and Replant (When Ready)
After 6 months of no new shoots, carefully remove the suffocation layer. You'll likely see some dead or dying roots beneath it—this is a good sign the method worked. Use a garden fork to loosen the soil around the tree's base, then add a 2-3 inch layer of mulch to protect the roots and suppress any remaining weed growth.
Here's where it gets fun—now you can plant low-growing ground cover like clover or creeping thyme to keep the area weed-free and add visual appeal. Avoid planting anything that will compete with the tree's roots for nutrients, like aggressive grasses. Water the area lightly after replanting to help everything settle in. You've got this—no more stubborn suckers taking over!
Tips & tricks for eliminating tree suckers
Common pitfalls—and how to sidestep every one when tackling those stubborn tree shoots.
Target the Root System: In Step 1, when you spot those aggressive suckers, resist the urge to cut them all at once. Those shoots are connected to the tree's roots, so cutting them at the surface won't stop new ones from popping up. Focus on identifying the circular pattern where they emerge—this is where you'll place your suffocation barrier in Step 2. This targeted approach ensures you're addressing the root cause, not just the symptoms.
Layer Thickness Matters: The 4-6 inch thickness specified in Step 2 is critical for suffocating the roots. Too thin, and sunlight will sneak through, allowing new shoots to grow. Use multiple layers of cardboard if needed to reach that depth—every extra inch blocks more light. I've seen people use newspaper, but it breaks down too quickly. Cardboard or thick plastic is your best bet for lasting results.
Monitoring is Key: Those 2-3 week check-ins in Step 3 aren't just busywork—they're what makes this method work. I've seen people skip this step and then wonder why new shoots keep appearing. When you notice any gaps where light might be getting through, patch them immediately. Even a small hole can let enough light through to encourage new growth. Think of it like patching a roof during a storm—you wouldn't ignore a tiny leak, would you?
Pro Tips for Stop Trees From Sending Up Shoots
- Common pitfalls—and how to sidestep every one when tackling those stubborn tree shoots.
- Target the Root System: In Step 1, when you spot those aggressive suckers, resist the urge to cut them all at once.
- Layer Thickness Matters: The 4-6 inch thickness specified in Step 2 is critical for suffocating the roots.
Frequently asked questions
Got questions about stopping tree shoots?
You’re not alone! Here are some of the most common concerns—and straightforward answers—to help you tackle this problem like a pro.
What’s the best time of year to suffocate tree shoots?
The ideal time is early spring or late fall when shoots are actively growing but before extreme heat or cold sets in. This gives the suffocation method enough time to work without stressing other plants nearby. Avoid doing it during drought—soil moisture is key for effectiveness!
Will suffocating tree shoots harm my lawn or garden?
Not if done carefully! Use a thick, breathable barrier (like cardboard + mulch) to protect surrounding plants. Avoid plastic sheets—they can smother grass too. For delicate gardens, opt for manual removal with a hoe or vinegar spray (3% acetic acid) for spot treatment.
How long does it take for suffocation to kill tree shoots?
With the right method (e.g., cardboard + mulch), shoots typically die within 2–4 weeks in warm weather. In cooler climates, extend the timeline to 6–8 weeks. Patience is key—check weekly and reapply mulch if rain exposes the barrier.
What if new shoots keep coming back after suffocation?
Persistent shoots often mean the root system is still active. Try these fixes:
- Deep suffocation: Bury the barrier 6+ inches deep near the trunk.
- Root pruning: Cut roots with a sharp spade 6–12 inches from the trunk to weaken regrowth.
- Herbicide (last resort): Use glyphosate on exposed roots (follow label instructions!).
Are there chemical-free alternatives to suffocation?
Try these eco-friendly methods:
- Solarization: Cover shoots with clear plastic for 4–6 weeks (traps heat to kill roots).
- Manual removal: Dig out shoots with the root (use a dandelion tool for stubborn ones).
- Salt or vinegar: Apply undiluted white vinegar or rock salt directly to shoots (avoid desired plants!).
Pro tip: Combine methods for best results—e.g., suffocate + manually pull regrowth weekly.
Wrapping up and next steps
Stopping unwanted tree shoots doesn’t have to be a guessing game—with the right techniques, like the suffocation method, you can achieve permanent results while keeping your landscape tidy. Remember, consistency and patience are key, whether you’re using mulch, cardboard, or heavy-duty plastic. You’ve got this!
Now that you’re armed with the know-how, take action today! Start by assessing your problem areas, gather your supplies, and tackle those shoots before they become a bigger headache. Your yard will thank you! 🌱✨