
How To
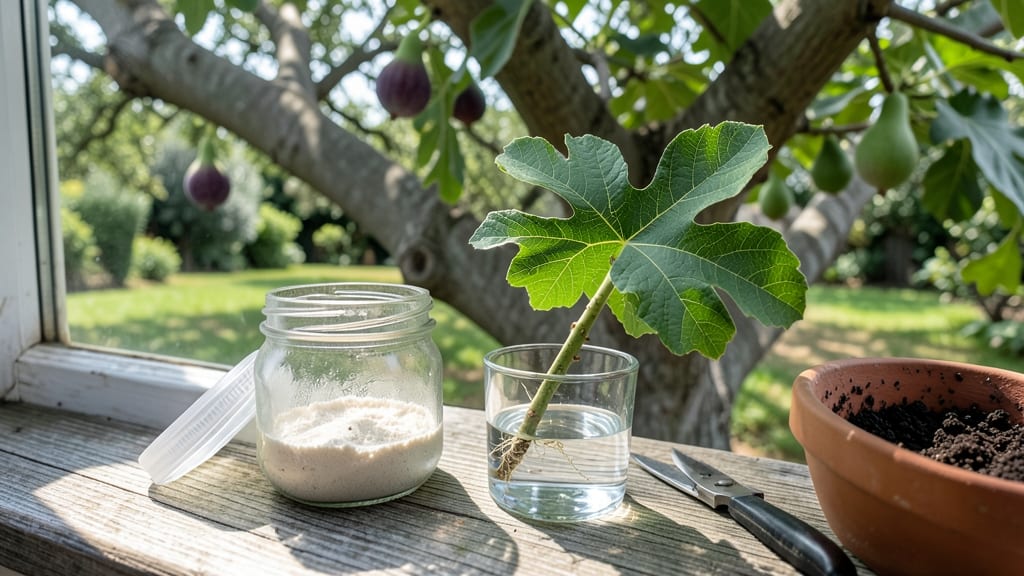
Rooting a fig tree clipping isn’t as tricky as it seems—my first attempt took just 3 weeks to produce roots, and now I’ve got a whole grove of baby figs growing from cuttings.
The secret lies in timing, clean cuts, and keeping the right balance of moisture without drowning the stems.
Start with 4- to 6-inch cuttings from healthy, non-flowering branches in late spring or early summer when the tree’s energy is focused on growth. Use sharp pruners to make clean cuts just below a node, then strip the lower leaves to expose the bare stem.
Place the cuttings in water or moist soil—either works, but soil keeps roots stronger and faster.
📚 In This Guide
- What you need
- Instructions
- Tips and common mistakes
- Wrapping up and next steps
What you need
- ● Fig tree clipping: A healthy, 4–6 inch (10–15 cm) cutting with at least 2–3 nodes (buds) and no flowers or fruit.
- ○ Rooting hormone (optional but recommended): A powder or gel like Rootone or Clonex to boost root growth.
- ● Small pots or containers: 4–6 inch (10–15 cm) pots with drainage holes (1–2 pots per clipping).
- ● Well-draining potting mix: A blend of perlite, vermiculite, or sand mixed with peat or coco coir (avoid heavy garden soil).
- ● Clean, sharp pruning shears or scissors: Sterilized with rubbing alcohol to prevent disease.
- ● Plastic wrap or a clear plastic bag: To create a humid environment (like a mini greenhouse).
- ● Spray bottle with water: For misting (distilled or room-temperature water is best).
- ○ Heat mat (optional but helpful): A 70–75°F (21–24°C) mat to encourage faster rooting.
- ● Fungicide (like Mycorrhizal inoculant) to prevent rot.
- ● Grow lights (if natural light is limited).
- ● Label markers to track your clippings.
Step-by-Step guide to root a fig tree clipping
Here's my foolproof method for turning cuttings into thriving fig trees—no fancy tools required.
Select the Right Cuttings
Choose 4-6 inch long cuttings from healthy, mature branches—they should be about as thick as a pencil. Look for sections with 2-3 leaf nodes (the small bumps where leaves or buds grow). Use clean, sharp pruners to make a 45-degree angle cut just below a node. This angle increases surface area for root growth.
Remove all but 2-3 leaves from the top of the cutting. Too many leaves mean the plant will use up too much energy before roots form. If leaves are large, trim them in half to reduce water loss. Work in the early morning when the plant is hydrated—cuttings root best when fresh.
Prepare the Rooting Medium
Fill a 6-inch pot with well-draining potting mix—I like a blend of 50% perlite and 50% peat moss for aeration. Moisten the mix until it feels damp but not soggy—like a wrung-out sponge. Overly wet soil suffocates roots, while dry mix won’t support growth. Tap the pot gently to settle the mix without compacting it.
Make a 2-inch deep hole in the center of the pot using your finger or a pencil. Dip the cut end of your fig cutting in rooting hormone (optional but helpful for faster results). Place the cutting into the hole until it stands upright—2-3 nodes should be buried below the soil line. This buried section is where roots will sprout.
Create the Ideal Rooting Environment
Cover the pot with a clear plastic bag to trap humidity—fig cuttings thrive in 70-80% humidity. Secure the bag with a rubber band or twist tie, leaving a tiny gap for airflow. Place the pot in a bright, indirect light spot—no direct sun yet. Too much heat will dry out the cutting before roots form.
Check the soil every 2-3 days—it should stay evenly moist. Mist the leaves lightly if they look dry, but avoid soaking the cutting. In 4-6 weeks, you’ll see new leaves or tiny white roots peeking through the pot’s drainage holes. This is your signal the cutting has taken root.
Transition to Independent Growth
Once roots appear or new leaves emerge, gradually acclimate the cutting to open air. Remove the plastic bag for 30 minutes daily, increasing time by 15 minutes each day until fully uncovered after 7-10 days. This prevents shock from sudden environmental changes.
After 8-12 weeks, when the cutting shows strong new growth, transplant it into a larger pot with fresh potting mix. Keep it in partial shade for another week while it adjusts. Figs are tough once established—just avoid overwatering, and you’ll have a thriving tree in no time.
Tips & tricks for perfect fig tree rooting success
Here's what nobody tells you about turning those fig cuttings into thriving plants with minimal fuss.
Cutting Selection: The early morning timing in Step 1 isn't just about hydration—it's about catching the plant when its natural sugars are highest. I've found that cuttings taken right after dew evaporates (around 9-10am) root even faster than morning cuts. Also, look for branches that bend slightly without snapping—this indicates good moisture content and vigor.
Rooting Hormone Hack: While the instructions call rooting hormone optional, I've had my best success when I dip the cut end in a mix of rooting hormone and a tiny bit of honey (about 1 teaspoon per tablespoon of hormone). The honey provides natural sugars that give the cutting an extra energy boost during the critical first week. Just be sure to use the same 2-inch depth specified in Step 2.
Humidity Management: That 70-80% humidity range in Step 3 is crucial, but here's the trick: if you notice condensation forming inside the plastic bag after just a few days, your humidity is too high. Open the bag slightly for 10 minutes to let excess moisture escape, then reseal. Too much humidity creates the perfect environment for mold—something I learned the hard way after losing three cuttings to fuzzy green growth.
Light Transition Strategy: When you're ready to move your rooted cutting to partial shade after 8-12 weeks, don't do it all at once. Start with just 2 hours of direct morning sun, then gradually increase by 30 minutes each day. Figs are Mediterranean plants—they love sun but need time to acclimate. I've seen cuttings go into shock when suddenly exposed to full sun, even after weeks of indirect light.
Pro Tips for Root A Fig Tree Clipping
- Here's what nobody tells you about turning those fig cuttings into thriving plants with minimal fuss.
- Cutting Selection: The early morning timing in Step 1 isn't just about hydration—it's about catching the plant when its natural sugars are highest.
- The honey provides natural sugars that give the cutting an extra energy boost during the critical first week.
Frequently asked questions
Got questions about rooting your fig tree clipping? You’re not alone! Here are some of the most common concerns—and their simple solutions—to help you grow a thriving fig tree from a cutting.
How long does it take for a fig tree clipping to root?
Most fig tree cuttings root in 4 to 8 weeks, depending on conditions like warmth, humidity, and care. Keep the soil consistently moist (but not soggy) and place the cutting in bright, indirect light. Patience is key—some varieties may take a little longer, but don’t give up if you don’t see roots right away!
Can I root a fig tree clipping in water?
While possible, water rooting isn’t ideal for fig trees. Water can cause rot or weak roots that struggle to adapt to soil. Instead, use a well-draining rooting hormone and moist potting mix for better success. If you must try water, transfer the cutting to soil as soon as roots are 1–2 inches long to avoid transplant shock.
What’s the best time of year to root a fig tree clipping?
The best time is late spring or early summer (May–June), when fig trees are actively growing. Avoid winter dormancy—cuttings taken then may root poorly. If you’re in a warm climate, you can root year-round, but spring/summer gives your cutting the best energy boost for survival.
My fig tree clipping isn’t rooting—what should I check?
Troubleshoot with this quick checklist:
- Moisture: Is the soil damp (not waterlogged) but not bone-dry?
- Light: Is it in bright, indirect light (no harsh sun)?
- Heat: Is it in a warm spot (70–80°F)? Fig cuttings love warmth!
- Hormone: Did you use rooting hormone? Skip it? Try it again.
- Rot: Is the cutting mushy or smelly? Trim off bad parts and replant.
Can I root a fig tree from a store-bought fig?
Technically yes, but it’s tricky! Store-bought figs are often treated to prevent sprouting. For best results, try rooting a green, woody stem from a mature fig tree (like a branch tip) instead. If you must use a fig from the grocery store, let it dry slightly, then place the stem in water or soil—success isn’t guaranteed, but it’s worth a shot!
Wrapping up and next steps
Rooting a fig tree clipping is a rewarding way to propagate your favorite plant—with patience and the right technique, you’ll soon have a thriving new tree! 🌱 Remember, the key is keeping your cutting moist, providing warmth, and avoiding overwatering.
Once roots form, transplant carefully and watch your fig grow strong.
Ready to take the next step? Share your progress with fellow gardeners or explore how to care for your rooted fig tree—like pruning, fertilizing, or even harvesting sweet fruit! Happy gardening! 🌿✨