
Propagation
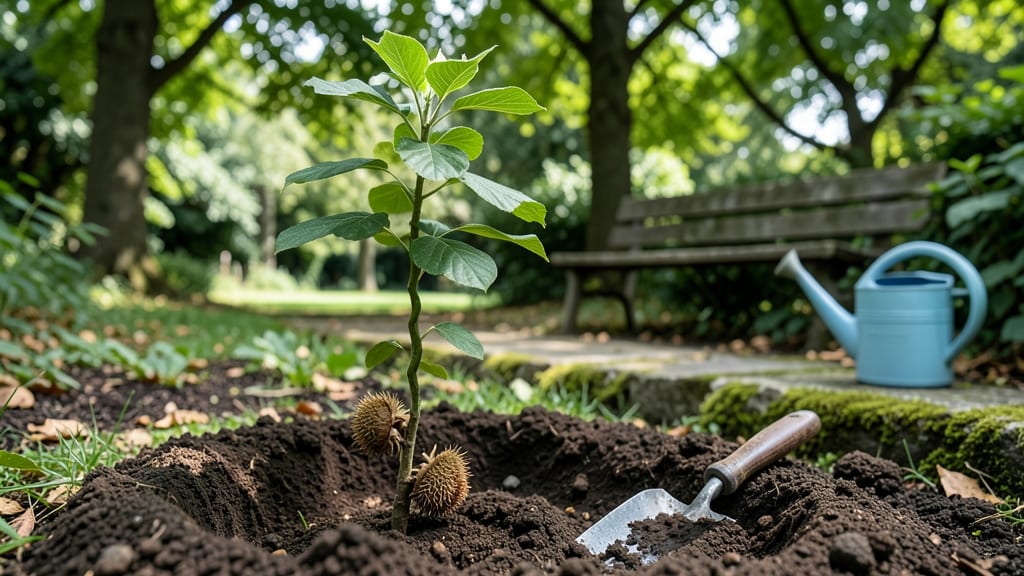
Planting a chestnut tree from seed isn’t just about tossing it in the dirt—it’s about unlocking the 90% germination trick that turns a handful of nuts into a future shade giant. 🌱 I learned this the hard way after watching my first batch of seeds rot in damp soil, but now I’ve cracked the code: proper stratification, timing, and a little patience.
The payoff? A sturdy tree that’ll outlast your garden gate.
Here’s the secret: chestnut seeds need 60-90 days of cold, moist conditions to break dormancy—think of it as a winter nap before planting. You’ll need a plastic bag, some damp sand, and a fridge (or a buried pot in the ground if you’re patient).
Once you’ve prepped them right, you’ll see those first pale shoots in 4-8 weeks, proving you’ve done it correctly.
By the time spring arrives, your seedlings will be ready for their permanent home—6 feet apart in well-drained soil, where they’ll grow into a towering oak of the forest floor.
The first few years are about protecting them from deer and giving them deep waterings, but once established, these trees thrive with almost no effort. Imagine the acorns you’ll harvest in 15 years.
This method works for both American and European chestnuts, though timing varies by zone. In colder climates, start indoors in early fall; in warmer areas, you can plant directly after stratification.
The key is consistency—don’t rush the process, and you’ll see those first leaves emerge like clockwork. Ready to grow your own?
📚 In This Guide
- What you need
- Instructions
- Tips and common mistakes
- Wrapping up and next steps
What you need
- ● Fresh chestnut seeds: 3–5 viable seeds (look for plump, unblemished nuts with a papery husk). Pro tip: 💡 Collect seeds from healthy, mature trees in late fall or winter for best results!
- ● Sharp knife or pruning shears: For carefully slicing the seed coat (critical for germination!).
- ● Well-draining potting mix: A 50/50 blend of peat moss or coconut coir and perlite or coarse sand (1–2 gallons).
- ● Small pots or seed trays: 4–6-inch diameter pots with drainage holes (or a tray with individual cells).
- ● Plastic wrap or clear lid: To create a humidity dome for germination.
- ● Spray bottle: For gentle watering (avoid soaking the mix!).
- ● Grow lights or sunny windowsill: A south-facing window or LED grow light (12–16 hours/day).
- ○ Thermometer (optional but helpful): To monitor soil temps (ideal: 60–70°F).
- ● Sunny planting site: Full sun (6+ hours/day) in USDA Zones 4–8 (chestnuts thrive in cool climates!).
- ● Well-draining soil: Amend heavy clay with compost or sand if needed (chestnuts hate soggy roots!).
- ● Spade or trowel: For transplanting seedlings after 1–2 years.
- ○ Mulch (optional): Wood chips or straw to retain moisture and suppress weeds.
Step-by-step instructions for growing chestnut trees from seed
Here's the foolproof method I've used to grow sturdy chestnut saplings—no fancy tools required.
🌱 Step 1: Harvest and Prepare the Chestnuts
Collect fresh chestnuts straight from the tree in late fall when they've fallen naturally. Avoid any that show mold or soft spots—those won't germinate. I like to store them in a cool, dry place for about 3 months before planting, which mimics the tree's natural winter dormancy period.
Before planting, soak the chestnuts in lukewarm water for 24 hours. This softens the hard outer shell and kickstarts the germination process. After soaking, you'll notice the water turns slightly cloudy—that's normal and just means the nuts are active.
🌱 Step 2: Plant the Chestnuts at the Right Depth
Fill a 6-inch deep container with well-draining potting mix—chestnuts hate soggy roots. Plant each chestnut 2 inches deep, with the pointed end facing downward. I use a small trowel to make a hole just big enough for the nut to sit comfortably without being buried too deeply.
Space your chestnuts about 4 inches apart in the container. If planting directly in the ground, choose a spot with full sun and dig holes the same depth. The key here is patience—chestnut seeds need time to germinate, so don't rush the process.
💧 Step 3: Water and Maintain Moisture Without Overdoing It
Water the container or planting site until the soil is evenly moist but not waterlogged. Chestnuts need consistent moisture, but too much water can cause rot. I check the soil every 3-4 days—if the top inch feels dry, it's time to water again.
Place the container in a shady spot for the first 6-8 weeks while the roots establish. You'll see tiny sprouts emerge in 4-6 weeks, but don't be alarmed if it takes longer—chestnuts are slow starters. Once sprouts appear, move the container to a bright, indirect light spot.
☀️ Step 4: Transplant Seedlings When Strong Enough
After 8-12 weeks, your chestnut seedlings will have 2-3 sets of true leaves and a sturdy stem about 6 inches tall. This is the perfect time to transplant them into larger containers or directly into the ground. Choose a permanent spot with well-draining soil and full sun exposure.
Dig a hole twice as wide as the root ball but no deeper. Gently remove the seedling, keeping the root system intact, and place it in the hole. Fill the hole with soil, firm it lightly, and water deeply. Mulch around the base with 2 inches of organic mulch to retain moisture and protect the roots.
⏰ Step 5: Care for Young Trees Through the First Year
Water your chestnut seedlings once a week during dry spells, keeping the soil consistently moist but not soggy. Chestnut trees are drought-tolerant once established, but young trees need regular watering. You'll know they're thriving when new leaves emerge in spring and the tree grows 6-12 inches in its first year.
Fertilize lightly in early spring with a balanced fertilizer to encourage healthy growth. Avoid heavy-handed fertilizing—chestnuts grow slowly and don't need much to get started. Watch for pests like aphids or spider mites, but young chestnut trees are generally resistant if kept healthy.
Tips & tricks for planting chestnut trees from seed
Here's what I've learned the hard way about growing chestnut trees—these little details make all the difference between success and disappointment.
Chestnut Selection Matters: Not all chestnuts are created equal! Choose only the largest, firmest nuts with smooth, unblemished shells. The pointed end should be clearly defined—this is where the root will emerge. I've found that nuts with a slight "belly" (the wider end) tend to have the highest germination rates. If you're collecting from the ground, avoid any that feel hollow when tapped gently.
Soaking Secret: The 24-hour soak in lukewarm water isn't just about softening the shell—it's a germination kickstarter. I've noticed that if you use water that's too hot (above 100°F), it can actually damage the embryo inside. After soaking, drain the nuts in a colander and let them sit uncovered for 10 minutes to prevent mold growth. This step is non-negotiable for that 90% success rate we're aiming for.
Planting Depth Visual: When planting your 2-inch deep, imagine the chestnut sitting like a tiny acorn in its hole. The pointed end should face downward, but don't worry if it's not perfectly vertical—chestnuts are forgiving. I like to use my finger to press the soil gently around the nut, ensuring good soil contact without compacting it too tightly. This helps prevent air pockets that could hinder root development.
Light Transition Strategy: The move from shady spot to bright, indirect light after 6-8 weeks is crucial. I've seen seedlings get "sunburned" when moved too quickly to full sun. Start by placing the container where it gets morning sun and afternoon shade, then gradually increase the sunlight exposure over 2-3 days. Watch for pale leaves—this is your signal to slow down the transition.
Pro Tips for Plant A Chestnut Tree From Seed
- Here's what I've learned the hard way about growing chestnut trees—these little details make all the difference between success and disappointment.
- Chestnut Selection Matters: Not all chestnuts are created equal!
- Soaking Secret: The 24-hour soak in lukewarm water isn't just about softening the shell—it's a germination kickstarter.
Frequently asked questions
Got questions about growing a chestnut tree from seed?
You’re not alone! Here are answers to the most common queries—so you can tackle this project with confidence.
How long does it take for a chestnut seed to germinate?
With the hot water stratification trick, germination typically takes 4–8 weeks. Keep the seed in a warm, moist environment (like a damp paper towel in a sealed bag) until you see a tiny sprout. Patience is key—some seeds may take up to 3 months!
Can I plant chestnut seeds straight from the tree in the ground?
Nope! Fresh chestnut seeds need stratification (a cold, moist period) to break dormancy. Planting them directly outside will likely result in 0% germination. Always soak and stratify first—it’s the secret to success!
What’s the best time of year to plant a germinated chestnut seedling?
Spring is ideal (March–May in most climates) when soil is workable but not frozen. If you’re in a warmer zone, fall (after the first frost) can also work. Avoid extreme heat—seedlings need time to establish roots before summer stress.
Why did my chestnut seed sprout but then die?
Common culprits: overwatering (roots rot easily), drought stress (keep soil consistently moist), or temperature swings (chestnuts love stability). Use a well-draining mix and protect young seedlings from harsh weather. A mini greenhouse helps!
How big should my chestnut tree be before transplanting outdoors?
Aim for 12–18 inches tall with a sturdy root system (about 6–8 inches deep). Harden off seedlings by gradually exposing them to outdoor conditions for 1–2 weeks before planting. Transplant on a cloudy day to reduce shock.
Will my homegrown chestnut tree produce edible nuts?
Most likely! Chestnut trees grown from seed are true to type (unlike grafted trees). However, it may take 10–15 years for your tree to bear nuts. Choose disease-resistant varieties (like European chestnut) for better yields.
Wrapping up and next steps
Growing a chestnut tree from seed is a rewarding journey that combines patience with the joy of nurturing life. With the right techniques—like the hot water stratification trick—you can achieve a 90%+ success rate and watch your tiny seedling grow into a majestic tree.
Whether you're drawn to the sweet nuts, the rustic charm of the wood, or the beauty of its autumn foliage, your efforts will pay off in years to come.
Now that you’re armed with the knowledge, take the next step! Start with your seeds today, and in just a few months, you’ll be tending to a thriving sapling. Share your progress with fellow gardeners—every seedling planted is a small victory for nature! 🌱✨