
Propagation
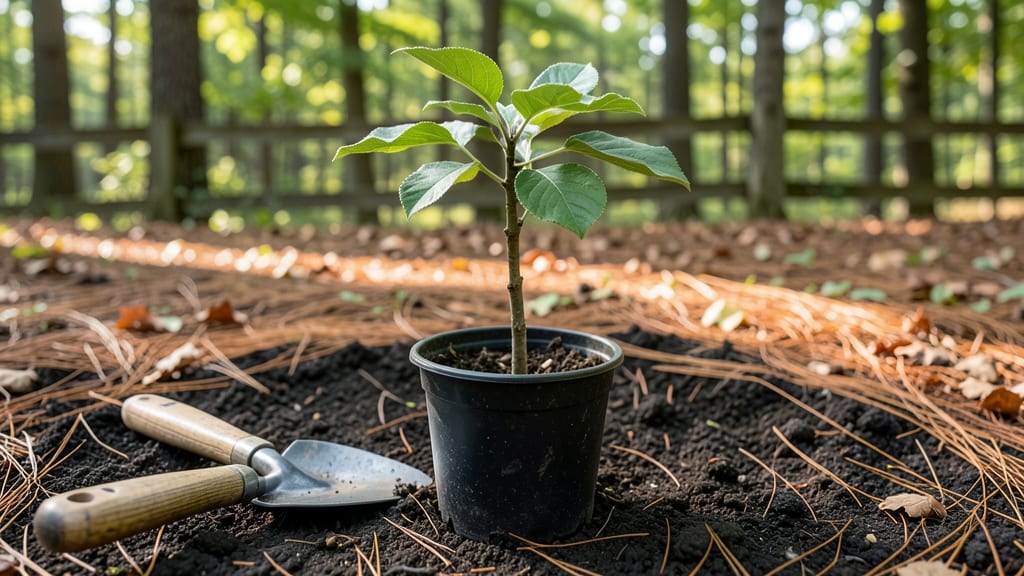
Growing an apple tree from an apple seed is the ultimate beginner-friendly project—no nursery trips, just a kitchen counter and a little patience. 🌱 I tried it last fall with a Honeycrisp core, and now I’ve got a tiny sprout that’s already twice as tall as my thumb.
The catch? Store-bought seeds rarely produce true-to-type fruit, but the adventure is half the fun. You’ll learn how to break dormancy, nurture a seedling, and give nature a hand without needing a green thumb.
The process starts with a simple trick called stratification—mimicking winter’s chill to wake up the seed. All you need is a damp paper towel, a plastic bag, and your fridge’s crisper drawer for about 6-8 weeks.
Once sprouted, it’s just a matter of transplanting into soil and watching those first leaves unfurl. Most seedlings take 3-5 years to bear fruit, but the journey includes teaching kids about nature, experimenting with heirloom varieties, and celebrating tiny milestones like true leaves or the first signs of root growth.
What you’ll end up with is a scrappy, resilient tree that might just surprise you with a single apple years down the road. The branches will spread wider than expected, the bark will develop character, and you’ll have a living lesson in how trees grow.
Even if the fruit isn’t perfect, the satisfaction of watching something you nurtured from a seedling to a sapling is unmatched. It’s the kind of project that turns neighbors into garden envy—whether they know it’s a gamble or not.
Works best in USDA Zones 4-8, but the principles adapt everywhere. Just remember: this isn’t about instant gratification. It’s about the quiet joy of watching roots tangle into soil and leaves stretch toward the sun, one season at a time. Ready to plant that seed?
📚 In This Guide
- What you need
- Instructions
- Tips and common mistakes
- Wrapping up and next steps
What you need
- ● Apple seeds: 1-3 fresh, organic seeds (from a non-hybrid apple variety like Granny Smith, Fuji, or Honeycrisp—avoid grocery store apples if possible!)
- ○ Small pots or seed trays: 2-3 (4-6 inches deep) with drainage holes. Optional: Biodegradable seed pods for easy transplanting.
- ● Well-draining potting mix: 2-3 bags (sterile, seed-starting mix works best). Avoid garden soil—it can harbor diseases!
- ● Spray bottle: For gentle watering (a fine mist setting is ideal).
- ● Plastic wrap or humidity dome: To create a mini greenhouse effect.
- ● Grow lights or sunny windowsill: A south-facing window or LED grow lights (12-16 hours of light/day).
- ● Larger container or garden bed: For transplanting seedlings (1-gallon pots or a prepared outdoor spot).
- ● Pruning shears: Small, sharp pair for trimming as the tree grows.
- ● Fertilizer: Balanced, water-soluble fertilizer (5-10-5 ratio) for young trees.
- ● Seed stratification kit: A small fridge or cold stratification setup to simulate winter (if your seeds need it).
- ● pH testing kit: To check soil acidity (ideal pH for apples: 6.0-6.5).
- ● Mulch: Organic mulch (like straw or wood chips) to retain moisture and regulate temperature.
- ● Tree stakes or cages: For support as the tree matures (especially in windy areas).
- ● Apple tree pollination partner: If you want fruit, plant a second variety nearby for cross-pollination!
Step-by-Step instructions for growing an apple tree from a seed
Here's the simple, rewarding way to start your own apple tree from scratch!
🌱 Step 1: Extract and Prepare the Seed
Grab a fresh apple—avoid those from the store that may have been treated to prevent sprouting. Cut the apple in half and locate the seeds nestled in the core. I like to use a spoon to gently scoop them out without damaging the seed coats. You'll need about 4-5 seeds per tree you want to grow.
Place the seeds in a small bowl of lukewarm water and let them soak for 24 hours. This softens the outer shell and kickstarts germination. After soaking, you'll notice the seeds swell slightly—this is your cue they're ready for planting. Drain the water and pat the seeds dry with a paper towel before moving to the next step.
🪴 Step 2: Plant the Seeds in a Moist Growing Medium
Fill a small container—like a 4-inch pot—with well-draining potting mix. I like to use a mix of 50% potting soil and 50% perlite to ensure good aeration. Moisten the mix until it feels like a damp sponge, but not soggy. Press the soil down lightly to create a firm planting surface.
Plant the seeds about ½ inch deep, spacing them 1 inch apart in the pot. Cover them lightly with a thin layer of additional soil, just enough to keep them in place. Place the pot in a warm spot—around 70°F—where it can receive indirect light. A sunny windowsill works perfectly. Keep the soil consistently moist but never waterlogged.
☀️ Step 3: Provide Warmth and Light for Germination
Germination can take anywhere from 2-6 weeks, depending on the apple variety and conditions. You'll know it's happening when you see a tiny sprout pushing through the soil. This is the moment that matters: patience is key—don't rush it by overwatering or moving the pot too soon.
Once the sprouts appear, move the pot to a bright, sunny location where the seedlings can get at least 6 hours of sunlight daily. If you're growing indoors, a grow light positioned 6 inches above the seedlings will help them stay strong and avoid becoming leggy. You'll notice the seedlings start to develop their first set of true leaves (not the initial seed leaves) in about 4-6 weeks.
🌿 Step 4: Transplant Seedlings and Care for Growth
When the seedlings are about 4-6 inches tall and have 4-5 true leaves, it's time to transplant them into individual 6-inch pots. Use the same well-draining potting mix to fill the pots. Gently remove the seedlings from their original container, being careful not to damage the roots, and plant them at the same depth they were growing before.
Water the seedlings thoroughly after transplanting, and place them back in a sunny spot. Continue to keep the soil moist but not waterlogged. Over the next few months, the seedlings will grow taller and stronger. Once they reach 12-18 inches in height and have developed a sturdy stem, they'll be ready for their final outdoor planting spot.
⏰ Step 5: Acclimate and Plant Outdoors
Before moving the seedlings outside, harden them off by placing them in a sheltered outdoor area for 1-2 hours the first day, gradually increasing their time outside over 1-2 weeks. This helps them adjust to the outdoor conditions without shock. Choose a sunny, well-drained location in your yard for planting.
Dig a hole twice as wide as the root ball but no deeper. Place the seedling in the hole, ensuring the top of the root ball is level with the ground. Backfill the hole with soil and water deeply. Mulch around the base of the tree with 2-3 inches of organic mulch to retain moisture and protect the roots. Your apple tree is now planted and ready to grow into a fruit-bearing tree with time and care!
Tips & tricks for growing an apple tree from an apple
Here's what I wish I knew before starting my own apple tree journey—these little tricks make all the difference!
Seed Selection: Choose seeds from heirloom apples when possible—they're more likely to grow true to type. Store-bought apples often come from grafted trees, so their seeds might not produce the same variety. If you're using a mix of apples, you'll get a diverse collection of seedlings, which can be fun for variety but less predictable for fruit quality.
Germination Environment: The 70°F warm spot mentioned in Step 2 is crucial—too cold and germination slows, too hot and seeds may rot. I like to place my pots on top of my fridge during winter months to maintain consistent warmth. A clear plastic bag loosely draped over the pot helps maintain humidity without suffocating the seeds.
Transplanting Timing: When your seedlings reach 4-6 inches in Step 4, don't rush the transplant. The key is seeing those 4-5 true leaves—these indicate the plant has enough energy to handle the move. I've found that seedlings with just 2-3 leaves often struggle after transplanting, so wait for that extra growth.
Outdoor Transition: The 1-2 week hardening off process in Step 5 is your secret weapon against transplant shock. Start with just 1-2 hours on the first day, then gradually increase by 1 hour each day. Watch for signs of stress like wilting or yellowing leaves—these mean you're moving too fast. A sheltered spot like under a patio cover works perfectly for this adjustment period.
Pro Tips for Grow An Apple Tree From An Apple
- Here's what I wish I knew before starting my own apple tree journey—these little tricks make all the difference!
- Seed Selection: Choose seeds from heirloom apples when possible—they're more likely to grow true to type.
- Germination Environment: The 70°F warm spot mentioned in Step 2 is crucial—too cold and germination slows, too hot and seeds may rot.
Frequently asked questions
Got questions about growing an apple tree from a seed? You’re not alone! Here are some of the most common concerns—and their straightforward answers—to help you succeed.
Can I grow any apple tree from a store-bought apple?
Not all apples are created equal! Store-bought apples are often hybrids bred for taste, not propagation. For the best results, use seeds from heirloom or organic apples—these are more likely to grow true to their kind. If you’re unsure, try a variety like Granny Smith or Honeycrisp, which have a higher germination rate.
How long does it take for an apple seed to sprout?
Patience is key! Apple seeds can take anywhere from 3 to 6 weeks to sprout, depending on temperature and moisture. Keep the soil consistently moist (but not soggy) and place the pot in a warm, sunny spot. If nothing happens after 8 weeks, the seed may not be viable—try again with fresh seeds!
Will my homegrown apple tree produce fruit like the parent apple?
Probably not! Apple trees grown from seed are not true to type, meaning the fruit may look, taste, or ripen differently. For consistent, delicious apples, consider grafting a known variety onto your seedling later. If you’re okay with surprises, enjoy the adventure—your tree might grow something totally unique!
What should I do if my seedling looks weak or diseased?
Act fast! Yellow leaves, wilting, or spots could signal overwatering, pests, or fungal issues. Isolate the plant and check for common culprits like aphids or powdery mildew. Adjust watering habits, trim affected leaves, and treat with neem oil if needed. If the problem persists, your seedling may not recover—start over with a fresh seed.
Can I grow an apple tree indoors?
While possible, it’s not ideal for long-term growth. Apple trees need full sun (6+ hours/day) and plenty of space to thrive. If you’re set on indoor growing, place your seedling near a south-facing window and supplement with a grow light. Once it’s 2–3 feet tall, transplant it outdoors permanently for the best results.
Wrapping up and next steps
Growing an apple tree from a seed is a rewarding journey that blends patience, curiosity, and a touch of green thumbs! 🌱 While it may take years to bear fruit, the process is simple, educational, and deeply satisfying.
Start small—plant that seed today—and watch as it grows into a living testament to nature’s magic.
Ready to take the next step? Experiment with different apple varieties, track your tree’s progress, or even share your success with fellow gardening enthusiasts! Your future orchard awaits—one seed at a time. 🍏✨