
Pruning
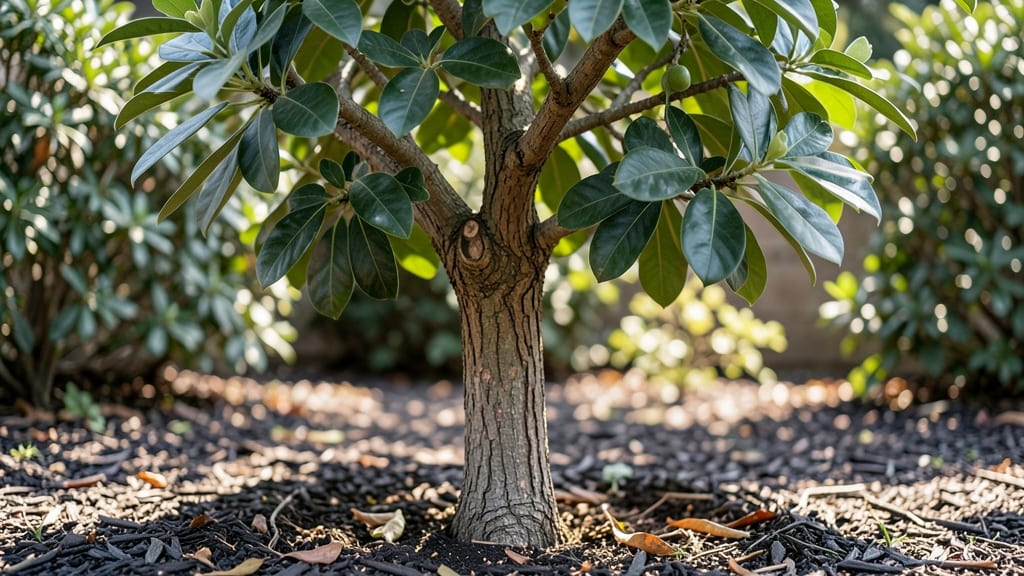
A grafted avocado tree delivers year-round fruit without the decades-long wait—just three strategic pruning cuts unlock the secret. I learned this after my first attempt with a seedling left me waiting for fruit until my great-grandkids could enjoy it.
The difference? Grafting combines the hardiness of a rootstock with the productivity of a fruiting variety, and pruning keeps it focused on bearing.
You’ll need sharp pruners, a sunny spot with 6+ hours of light, and well-draining soil (think 50/50 mix of potting soil and perlite). The three cuts target water sprouts, crossing branches, and overgrowth—each one redirects energy to fruit production.
Most home growers skip this step, which is why their trees stay leafy but barren.
Within 6-8 weeks of proper pruning, you’ll see new growth where fruit buds form. The tree stays compact, produces harvests every 8-10 months, and resists disease better than seed-grown varieties. No more waiting for decades—just consistent, delicious fruit with minimal effort.
Works in containers or in-ground, from Zone 9-11 (with winter protection) to greenhouses in cooler climates. The same principles apply whether you’re grafting your own tree or buying a pre-grafted sapling. Here’s how to keep it thriving all year.
📚 In This Guide
- What you need
- Instructions
- Tips and common mistakes
- Wrapping up and next steps
What you need
- ● Grafted avocado tree (choose a healthy, disease-resistant variety like Hass, Fuerte, or Bacon—ensure it’s already grafted for faster fruiting!)
- ● Well-draining potting mix (10–15 gallons for young trees; 20+ gallons for mature trees) – Mix in perlite or sand for aeration.
- ● Pot or container (18–24" diameter with drainage holes for potted trees; or a raised bed if planting outdoors)
- ● Pruning shears (sharp, sterilized shears for clean cuts—avoid dull tools that crush stems!)
- ● Pruning saw (for thicker branches, 3–6" in diameter)
- ○ Horticultural sealant (optional but helpful for sealing larger cuts to prevent disease)
- ● Gloves (gardening gloves to protect hands from sap and thorns)
- ● Watering can or hose with a gentle nozzle (avoid overwatering—avocados hate soggy roots!)
- ● Fertilizer (balanced 10-10-10 or citrus-specific fertilizer; follow package rates)
- ● Root stimulator (to boost growth after repotting or pruning)
- ● Mulch (organic mulch like straw or wood chips to retain moisture)
- ● Support stakes (for young trees in windy areas)
- ● pH test kit (avocados prefer slightly acidic soil, pH 6.0–7.0)
- ● Sunlight meter (to ensure your tree gets 6+ hours of direct sun daily)
How to maintain a grafted avocado tree for consistent fruit production
Mastering these three strategic cuts keeps your grafted avocado tree healthy and productive.
Identify and Prune Water Sprouts in Early Spring
Water sprouts are the fast-growing, vertical shoots that emerge below the graft union. These compete with your fruit-bearing branches for energy, and if left unchecked, they'll weaken your tree's overall vigor. Look for them in late February to early March, just as new growth begins. Use sharp, clean pruning shears to cut these sprouts back to the main trunk or a lateral branch.
Here's the thing—don't hesitate to remove even small sprouts. I've seen growers let them grow for months, only to realize they've sapped the tree's strength just as flowering season approaches. The key is to make clean cuts at a 45-degree angle, about ¼ inch above a lateral bud. This encourages proper healing and prevents disease entry points.
You'll notice water sprouts have a slightly different texture than fruit-bearing branches—they're thinner and more upright. If you're unsure, wait until the tree starts showing new growth in spring. That's when these shoots become most obvious. Remove them before they grow more than 6 inches tall, or they'll become harder to manage.
Thin Out Overcrowded Branches After Flowering
After your avocado tree flowers in late spring to early summer, focus on thinning out crowded branches to improve air circulation and sunlight penetration. Look for branches that are growing too close together or crossing each other. These create shaded areas where humidity lingers, increasing the risk of fungal diseases like root rot.
Select 2-3 of the strongest, most vigorous branches to keep per main branch. Remove the others completely at their point of origin. I always prioritize branches that are at least ½ inch in diameter and show good spacing from other branches. This ensures your tree maintains its structural integrity while maximizing fruit production.
When making these cuts, avoid leaving stubs. Cut back to the branch collar (the swollen area where the branch meets the trunk) for the cleanest possible cut. You'll see new growth emerge from the lateral buds you've preserved, and these will develop into stronger, fruit-bearing branches. This thinning also makes harvesting fruit much easier in the future.
Shape and Lift the Canopy in Late Summer
In August to September, focus on lifting the lower branches of your avocado tree to create an open center. This allows sunlight to reach all parts of the canopy and makes harvesting easier. Start by identifying branches that are growing downward or inward. These are the ones that need to be lifted and spread outward.
Make your cuts just above a lateral bud that's growing in the direction you want the branch to go. For example, if a branch is growing downward, cut it back to a bud that's growing upward. This technique encourages the branch to grow in the desired direction. You'll see new growth emerge within 4-6 weeks, and these shoots will form the new structure of your tree.
While shaping, avoid removing more than 25% of the tree's foliage in one season. This prevents stress that could lead to fruit drop or reduced flowering. The goal is to create a balanced, open canopy that allows sunlight to penetrate to the center. This not only improves fruit quality but also makes it easier to spot pests or diseases early.
Bonus: Year-Round Maintenance Checkpoints
Between these three main cuts, keep an eye on your tree's overall health. In winter, remove any dead, diseased, or broken branches immediately. These are easy to spot—they'll have no leaves, brown or blackened wood, or signs of pest activity. Prune these out as soon as you notice them to prevent the spread of disease.
Throughout the year, watch for suckers (new shoots growing from the base of the tree or along the trunk). These can be removed at any time, but it's easiest to spot them in spring or early summer when growth is most active. Use your fingers or a small pruning tool to snap them off cleanly at the base. Suckers drain energy from your fruit-bearing branches, so don't let them go unchecked.
Tips & tricks for perfect grafted avocado maintenance
These simple yet powerful strategies will help you maintain a thriving grafted avocado tree with minimal effort.
Timing is Everything: The late February to early March window for pruning water sprouts is critical because this is when your tree begins its active growth cycle. If you miss this timing, those sprouts will grow rapidly and become harder to manage—trust me, I've seen them reach 2 feet tall before anyone noticed! The key is to act as soon as you spot them, ideally when they're still under 6 inches. This prevents them from competing with your fruit-bearing branches for nutrients during flowering season.
Precision Cutting Technique: When pruning, always make your cuts at a 45-degree angle about ¼ inch above a lateral bud. This angle is crucial because it creates a larger surface area for the wound to heal, reducing the risk of disease entry. I've found that using sharp, clean pruning shears makes all the difference—dull tools can crush the stems, causing more damage than the cut itself. For water sprouts, cut back to the main trunk or a lateral branch to redirect the tree's energy to where you want it to go.
Branch Selection Strategy: In Step 2, when thinning crowded branches, focus on keeping 2-3 of the strongest, most vigorous branches per main branch. These should be at least ½ inch in diameter and spaced well apart. The branch collar—the swollen area where the branch meets the trunk—is your guide for clean cuts. I've learned the hard way that leaving stubs creates weak points where diseases can enter. Always cut back to this collar, and you'll see healthier regrowth emerge from the preserved lateral buds.
Canopy Shaping Insight: During the August to September shaping phase, remember that you're not just pruning—you're sculpting your tree's future. When lifting downward-growing branches, cut just above a bud that's growing in the direction you want the branch to go. This redirection technique takes patience, but you'll see new growth emerging in just 4-6 weeks. The goal is to create an open center that allows sunlight to reach all parts of the canopy, which directly translates to better fruit quality and easier harvesting.
Pro Tips for Grafted Avocado Tree
- These simple yet powerful strategies will help you maintain a thriving grafted avocado tree with minimal effort.
- Timing is Everything: The late February to early March window for pruning water sprouts is critical because this is when your tree begins its active growth cycle.
- Precision Cutting Technique: When pruning, always make your cuts at a 45-degree angle about ¼ inch above a lateral bud.
Frequently asked questions
Got questions about your grafted avocado tree?
You’re not alone! Here are answers to the most common concerns—from timing to troubleshooting—so you can keep your tree thriving and productive.
How long does it take for a grafted avocado tree to bear fruit?
A grafted avocado tree typically starts producing fruit within 1–3 years after grafting, depending on the variety and growing conditions. Dwarf or semi-dwarf grafts may fruit faster (1–2 years), while standard-sized trees could take a bit longer. Patience pays off—consistent care (water, sunlight, and pruning) speeds up the process!
When is the best time to prune a grafted avocado tree?
Prune your grafted avocado tree in late winter or early spring (just before new growth begins). Avoid heavy pruning during summer or fall, as it can stress the tree. Focus on shaping, removing dead wood, and opening the canopy for airflow. Pro tip: Use sterilized tools to prevent disease at the graft union!
What should I do if my grafted avocado tree’s branches are dying?
Dying branches could signal root rot, fungal infection, or graft failure. First, check for soggy soil (overwatering) or wilting leaves. If the graft union (the swollen area where the scion meets the rootstock) looks cracked or blackened, the graft may have failed—consider replacing the tree. For other issues, prune affected branches below the damage and treat with fungicide.
Can I graft an avocado tree myself, or should I buy a pre-grafted one?
While grafting is possible for DIYers, pre-grafted trees are ideal for beginners because they’re already compatible and stable. If you’re ambitious, research T-budding (easier than whip-and-tongue grafting) in late spring/early summer. Just ensure your rootstock and scion are compatible varieties—like Hass on Mexican rootstock—to avoid rejection.
Why aren’t my grafted avocado fruits ripening evenly?
Uneven ripening often happens due to uneven sunlight exposure or inconsistent pollination. Prune to improve airflow and sunlight penetration, and hand-pollinate flowers with a small brush if bees aren’t visiting. Also, avocados ripen after harvest—pick them firm and let them soften at room temperature (like an apple!).
Wrapping up and next steps
Growing a grafted avocado tree is a rewarding journey that brings year-round fruit with minimal effort—especially when you master those three simple pruning cuts! 🌱 By keeping your tree healthy, open, and productive, you’re not just shaping branches; you’re cultivating a bountiful harvest for seasons to come.
Now that you’re armed with the right tools, techniques, and answers to common questions, it’s time to roll up your sleeves and give your tree the care it deserves.
Ready to see those avocados ripen? Start by scheduling your first pruning session this weekend—your future guacamole (or smoothie!) will thank you. Happy grafting—and even happier harvesting! 🥑✨