
Pruning
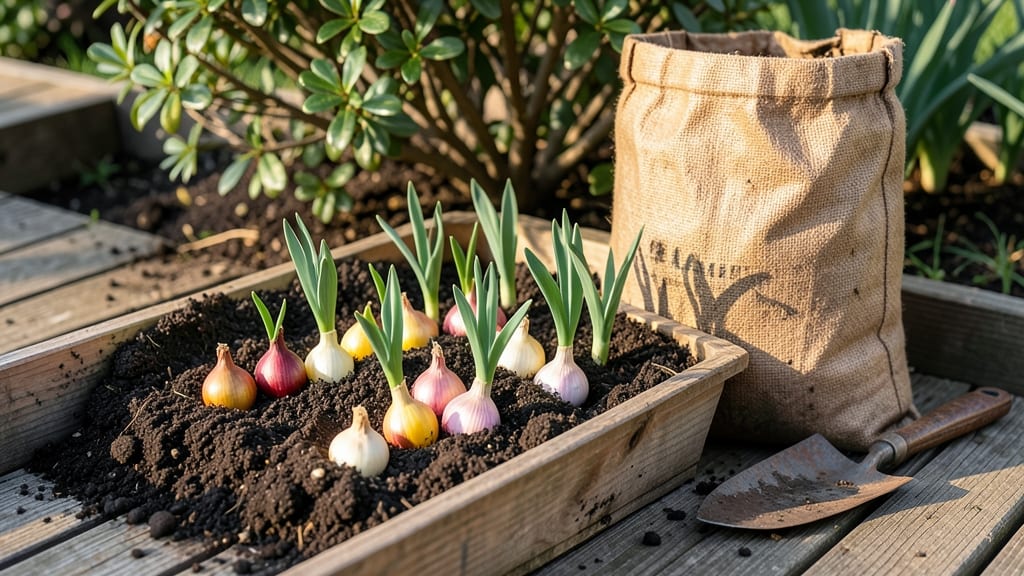
Buying bulbs from Dollar Tree saved me $120 last fall while filling my Pacific Northwest garden with daffodils, tulips, and crocuses that would’ve cost four times as much elsewhere.
The trick isn’t just the price—it’s knowing which varieties thrive in our damp, cool climate and when to plant them for maximum impact.
Most Dollar Tree bulbs arrive in late summer, giving you a head start on fall planting. I stock up on tulips, hyacinths, and alliums—all cold-hardy choices that multiply over time. Store extras in a cool, dry spot until planting, and you’ll have blooms for years with minimal effort.
The savings alone make it worth trying, but the long-term payoff is even sweeter.
Imagine bright yellow daffodils pushing through soggy soil in March or purple alliums towering over spring greens by May. With proper care—good drainage, a little compost, and patience—these budget bulbs become the stars of your garden. They even naturalize, returning year after year with less work each season.
Best of all, you can mix them into containers, borders, or even under trees where other plants struggle. The Pacific Northwest’s mild winters mean fewer surprises, and Dollar Tree bulbs prove you don’t need expensive stock to create a showstopping spring display. Ready to plant?
📚 In This Guide
- What you need
- Instructions
- Tips and common mistakes
- Wrapping up and next steps
What you need
- ● Dollar Tree bulbs: 10–20 bulbs (e.g., tulips, daffodils, or crocus—check for firm, undamaged bulbs).
- ● Garden soil or potting mix: 1–2 bags (well-draining, amended with compost if possible).
- ● Garden trowel or bulb planter: 1 (for easy digging).
- ● Watering can or hose with a gentle spray nozzle: 1.
- ○ Mulch (optional but recommended): Straw, shredded bark, or leaves (1–2 inches to retain moisture).
- ● Garden gloves: 1 pair (to protect hands from dirt and sharp bulb edges).
- ● Bulb fertilizer: 1 packet (low-phosphorus, like 5-10-10, for PNW-friendly blooms).
- ● Plant markers: 10–20 (to label varieties if mixing types).
- ● Garden twine or stakes: For tall bulbs (e.g., tulips) to prevent flopping in windy PNW climates.
- ○ Drip irrigation kit: Optional for automated watering (great for busy gardeners!).
How to transform Dollar Tree bulbs into Pacific Northwest garden stars
Here’s how I turn bargain bulbs into vibrant, climate-adapted blooms—without breaking the bank.
Select the Right Bulbs for Your Region
Not all Dollar Tree bulbs thrive in the Pacific Northwest’s cool, wet winters and mild summers. Focus on hardy varieties like daffodils, tulips, hyacinths, and alliums, which tolerate USDA Zones 6-8. Avoid tropical bulbs like cannas or dahlias—they’ll rot in our damp winters.
Check for firm, dry bulbs with no mold or soft spots. A slight papery skin is normal, but shriveled or sprouting bulbs won’t survive. If you’re unsure, plant a mix of small and large bulbs—smaller ones often produce surprising blooms.
Plant at the Correct Depth and Timing
Timing is everything for Pacific Northwest gardens. Plant fall-blooming bulbs (like tulips) in October, when soil temps drop to 50-60°F. Spring-bloomers (daffodils) go in November, after the first frost. Planting too early risks rot; too late means weak growth.
Dig holes twice as deep as the bulb’s height—a 6-inch bulb needs a 12-inch hole. Space smaller bulbs 4-6 inches apart; larger ones (like tulips) need 6-8 inches. Mix the 1 pound of bone meal into the soil at the bottom for extra phosphorus, which encourages strong roots.
Mulch and Protect for Winter
After planting, cover the bed with 3-4 inches of straw or shredded leaves to insulate bulbs from freezing temps. In heavy-rain areas, add a wire mesh cage to prevent soil erosion. The mulch keeps soil temps stable, preventing bulb rot—a common issue in our wet winters.
Water deeply once after planting, then let winter rains do the work. Overwatering now can drown bulbs before they establish roots. Come spring, remove mulch when shoots appear—2-3 inches tall is your cue.
Feed and Support for Maximum Blooms
When green shoots break ground in early spring, sprinkle ½ cup of 10-10-10 fertilizer around each plant. Water lightly to activate it. Bulbs need moderate sunlight (6+ hours daily)—plant in partial shade if your yard gets intense afternoon sun, which can scorch leaves.
Stake tall varieties (like tulips) with bamboo stakes before blooms open. Pacific Northwest winds can snap stems, and no one wants flopped flowers. Remove spent blooms after flowering to redirect energy to next year’s growth.
Divide and Multiply for Next Year
After foliage yellows (usually 6-8 weeks post-bloom), dig up bulbs if they’ve crowded. Separate offsets (small bulbs forming around the main bulb) and replant them immediately. This ensures stronger blooms next season—and more bulbs for free!
Store divided bulbs in a cool, dry place (50-60°F) until replanting. Label varieties with toothpicks and masking tape—Dollar Tree bulbs often lack tags, and you’ll forget which is which by spring.
Tips & tricks for perfect budget-friendly Pacific Northwest bulb gardens
Here's what nobody tells you about maximizing those bargain bulbs—lessons I learned after losing my first batch to winter rot.
Bulb Selection Intelligence: At Dollar Tree, you'll often find mixed packs with unknown varieties. When in doubt, prioritize bulbs with a slight papery texture—they're more likely to be dormant and ready for planting. I've had surprising success with the smaller bulbs in these packs, which often get overlooked but produce just as many blooms as their larger counterparts.
Soil Temperature Timing: The 50-60°F soil temperature window in Step 2 is your sweet spot for fall planting. Use a soil thermometer for accuracy—our Pacific Northwest weather can shift unexpectedly. If you're planting in late October and soil temps are still warm, wait a few days. Cold soil helps prevent rot, which is the #1 killer of newly planted bulbs in our climate.
Mulch Layer Strategy: That 3-4 inch mulch layer in Step 3 isn't just for insulation—it's also a moisture barrier. In our rainy winters, proper mulching prevents water from pooling around bulbs, which can cause them to rot before they even have a chance to establish roots. I like to use straw because it breaks down slowly and adds organic matter to the soil.
Spring Care Secret: When those green shoots appear in early spring, resist the urge to fertilize immediately. Wait until you see actual growth about 2-3 inches tall before applying that ½ cup of 10-10-10 fertilizer. This timing prevents fertilizer burn on tender new shoots and gives your bulbs time to recover from winter dormancy.
Pro Tips for Dollar Tree Bulbs
- Here's what nobody tells you about maximizing those bargain bulbs—lessons I learned after losing my first batch to winter rot.
- Bulb Selection Intelligence: At Dollar Tree, you'll often find mixed packs with unknown varieties.
- Soil Temperature Timing: The 50-60°F soil temperature window in Step 2 is your sweet spot for fall planting.
Frequently asked questions
Got questions about scoring stunning blooms without breaking the bank?
Here are answers to the most common queries about Dollar Tree bulbs—from planting tips to troubleshooting tricks!
Can I plant Dollar Tree bulbs in the Pacific Northwest’s rainy climate?
Many Dollar Tree bulbs (like daffodils, tulips, and crocuses) thrive in PNW’s cool, wet conditions. Just ensure they’re planted in well-draining soil—rainwater can cause rot if bulbs sit in soggy spots. Add a layer of mulch to protect them during winter’s heavy rains.
When’s the best time to plant Dollar Tree bulbs in the PNW?
For fall-blooming bulbs (e.g., tulips, hyacinths), plant them 6–8 weeks before the first frost (typically September–October in the PNW). Spring-bloomers like daffodils can go in late fall or early winter. Check your local frost dates to time it perfectly!
Are Dollar Tree bulbs as good as name-brand ones?
While they may not be premium varieties, Dollar Tree bulbs are often healthy and viable—just inspect them for mold, soft spots, or sprouts before buying. For long-term garden success, pair them with compost or bulb fertilizer to give them a nutrient boost. Think of it as a budget-friendly starter!
What do I do if my Dollar Tree bulbs don’t sprout?
First, check if they’re planting-depth correct (usually 2–3x the bulb’s height). If they’re still dormant, try soaking them in warm water for 12 hours before replanting. Some bulbs (like tulips) need cold stratification—store them in the fridge for 8–10 weeks if you planted them too early. Patience is key!
Can I mix Dollar Tree bulbs with perennials or shrubs?
Yes! Bulbs make gorgeous underplantings for perennials, shrubs, or even under trees (where sunlight is limited). Choose shade-tolerant bulbs like snowdrops or glory-of-the-snow for dappled light. Just avoid planting them too close to aggressive spreaders like hostas. Layering bulbs with other plants adds year-round interest!
Wrapping up and next steps
Transforming your Pacific Northwest garden on a budget doesn’t have to mean sacrificing beauty—Dollar Tree bulbs prove it! From vibrant daffodils to hardy tulips, these affordable blooms bring color, resilience, and joy to your outdoor space without breaking the bank.
Whether you’re a seasoned gardener or just starting, every bulb you plant is a step toward a thriving, low-maintenance garden.
Ready to dig in? 🌱 Grab your gloves, pick up a few bulbs, and let your creativity bloom! Start small—even a single bed or container can make a big impact. Happy planting!