
Blooming
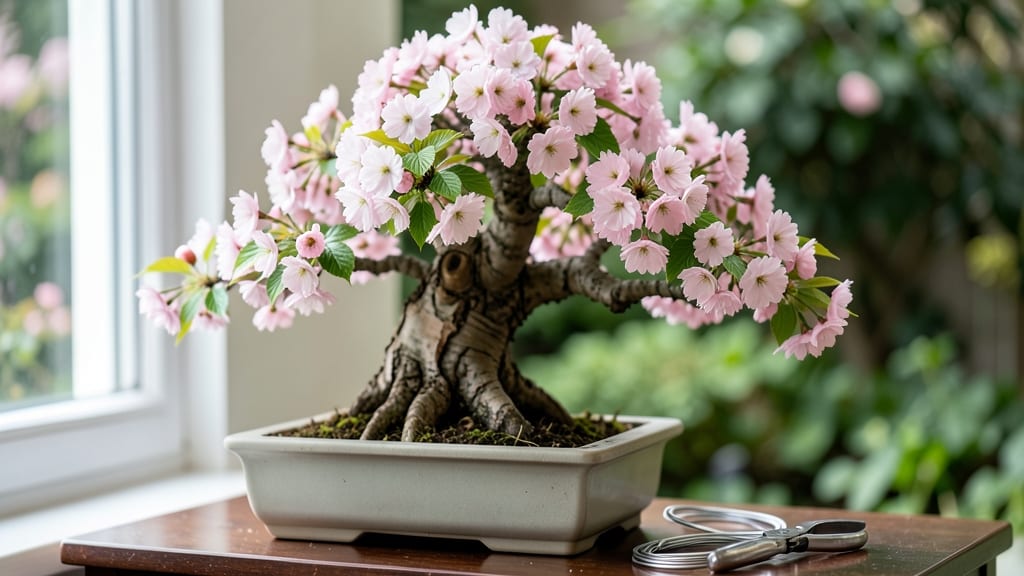
A cherry blossom bonsai tree brings spring's delicate beauty to your windowsill year-round—if you nail the species, soil, and pruning. 🌸 I learned the hard way that Prunus serrulata bonsai demand patience, but the payoff is worth it: those tiny pink blooms in February when your neighbors' gardens are still asleep.
The secret starts with the right setup: a shallow, well-draining pot, gritty soil mix, and a spot where it gets morning sun and afternoon shade. Most beginners overwater, which is why my first bonsai lost its leaves—turns out, these trees hate soggy roots.
Once you get the balance right, you'll see new growth within weeks, and those signature blossoms appear reliably every spring.
What makes this rewarding is watching the tree mature over years—each pruning shapes the branches into graceful arcs, and the bark develops character like an old friend. You'll end up with a living work of art that's uniquely yours, not something mass-produced.
The best part? Even in winter, when other plants fade, your bonsai stays vibrant.
This works for any indoor space with decent light, though southern exposures are ideal. If you've ever wanted to grow something beautiful but struggled with traditional gardening, this is your chance—just be ready to commit to the long game. Let's get those tiny roots thriving!
📚 In This Guide
- What you need
- Instructions
- Tips and common mistakes
- Wrapping up and next steps
What you need
- ● Cherry Blossom Bonsai Seedling or Sapling: 1–2 Prunus serrulata or Prunus × yedoensis (Yoshino cherry) bonsai-ready plants (age 3–5 years for best results).
- ○ Optional: Pre-bonsai cherry tree branches (for grafting or styling).
- ● Bonsai Pot: 1 shallow, well-draining pot (5–10 inches wide, with drainage holes).
- ● Material: Unglazed ceramic or clay (preferred for breathability).
- ● Soil Mix: 1 bag (5–10 lbs) akadama (60%), pumice (20%), and organic compost (20%).
- ○ Optional: Perlite or lava rock for extra aeration.
- ● Concave Bonsai Shears: 1 pair (for precise cuts).
- ● Wire (Copper or Aluminum): 1–2 rolls (1–3mm gauge, for branch shaping).
- ● Root Hook: 1 (for gentle root pruning without damage).
- ● Wire Cutters: 1 (to remove shaping wire cleanly).
- ● Watering Can: 1 with a rose or fine-spray nozzle (avoid overhead watering).
- ● Fertilizer: 1 bottle balanced liquid fertilizer (e.g., 10-10-10, diluted to half-strength).
- ○ Optional: Slow-release bonsai fertilizer pellets for convenience.
- ● Humidity Tray: 1 (for dry climates, especially during blooming season).
- ● Sunlight: Full sun (6+ hours/day) or bright indirect light (west-facing windows are ideal).
- ● Temperature: Ideal: 60–80°F (15–27°C).
- ● Dormancy: 40–50°F (4–10°C) in winter (simulate with a cool, dark space).
- ● Space: A stable, draft-free area (outdoor pots need winter protection).
Step-by-step instructions for cultivating a cherry blossom bonsai tree
Here's how to nurture delicate blossoms on a tiny scale—patience and precision pay off.
🌱 Step 1: Select and Prepare Your Prunus Serrula Seedling
Start with a young Prunus serrula (Chinese bird cherry) seedling, the classic choice for cherry blossom bonsai. These trees grow slowly and develop stunning spring flowers over time. Look for a healthy, sturdy plant with no signs of pests or disease—flexible branches that can be trained are ideal. I always check for small buds along the branches, as these indicate the tree's potential to flower.
If you're starting from a nursery tree, repot it immediately into a 5-7 inch bonsai pot with a well-draining mix of 50% akadama, 30% pumice, and 20% organic compost. The coarse texture prevents root rot while allowing airflow. Tap the pot gently on your workbench to settle the soil—you want it firm but not compacted, so roots can establish without floating.
☀️ Step 2: Position for Light and Temperature Control
Place your bonsai in a location with bright, indirect light—think of it as morning sun with afternoon shade. A south-facing window works, but direct afternoon sun can scorch delicate leaves. I rotate my tree a quarter turn every week so it grows evenly. In winter, when days are short, supplement with a 12-hour grow light to prevent dormancy issues.
Maintain temperatures between 60-75°F during active growth (spring-fall) and 40-50°F in winter. Cherry blossom bonsai need a cold period to flower, so don't keep them indoors year-round. A covered patio or unheated garage works well for winter dormancy. Watch for buds forming in late winter—that's your signal to bring it back inside for blooming season.
💧 Step 3: Master the Watering Balance
Water when the top ½ inch of soil feels dry to the touch. Stick your finger in—if it's damp, wait another day. Overwatering is the #1 killer of bonsai, especially in small pots. I water from the bottom by placing the pot in a shallow tray of water for 10-15 minutes, then drain completely. This encourages deep root growth and prevents surface crusting.
Mist the foliage daily in dry climates to mimic humidity levels of 50-60%. In summer, I set up a small pebble tray with water beneath the pot to increase moisture without soggy roots. Reduce watering in winter to every 7-10 days, letting the soil dry more thoroughly to simulate dormancy conditions.
✂️ Step 4: Prune and Wire for Structure
Prune new growth to 2-3 leaves after each flush to encourage branching. Use sharp bonsai shears to make clean cuts just above a leaf node. I prune in early spring before buds swell and again after flowering to maintain shape. Never remove more than ⅓ of the foliage at once—this stresses the tree and can delay flowering.
Wire branches in late winter or early spring when new growth is tender but established. Use aluminum or copper wire (thickness depends on branch size) to gently shape the tree. Wrap wire in a spiral, leaving room to tighten as branches grow. Check wires monthly—they should never cut into the bark. Remove wires once the branch holds its new position, usually after 3-4 months.
🌿 Step 5: Fertilize and Encourage Blooms
Feed your bonsai with a balanced liquid fertilizer (10-10-10) diluted to half strength every 2 weeks during active growth. Switch to a high-phosphorus formula (5-10-5) in early spring to promote flowering. I always fertilize after watering to prevent root burn. In fall and winter, reduce feeding to every 6-8 weeks or stop completely during dormancy.
To encourage blossoms, provide a 10-14 day cold period at 40-50°F in late winter. This mimics natural conditions and triggers flowering. After buds form, move the tree to a cooler spot (55-65°F) with bright light to prevent buds from dropping. Once flowers appear, avoid moving the tree—even a slight shift can cause blossoms to fall prematurely.
Tips & tricks for perfect cherry blossom bonsai care
Between us, these are the secrets that'll help your bonsai thrive—and actually bloom like the pros do.
Soil Settlement Secret: After repotting with that 50-30-20 akadama-pumice-compost mix, give the pot a firm tap on your workbench to settle the soil. This isn't just about compacting—it's about creating tiny air pockets that prevent waterlogging while still letting roots breathe. I learned this the hard way when my first bonsai developed root rot from uneven soil packing.
Light Rotation Technique: That weekly quarter-turn rotation isn't just about even growth—it's about preventing the tree from leaning toward the light source. I mark my windowsill with a small piece of tape to track positions. In winter, when natural light is scarce, supplement with that 12-hour grow light but keep it 6-8 inches away to avoid heat stress. The goal is consistent light exposure, not intensity.
Winter Dormancy Watch: The 10-14 day cold period at 40-50°F is non-negotiable for flowering, but timing matters. Start this chilling period when you see buds beginning to swell—usually in late February. I set a reminder in my phone because missing this window means no blossoms that spring. A covered patio or unheated garage works perfectly, but avoid temperature swings that can shock the tree.
Pruning Precision: When you're trimming to 2-3 leaves after each growth flush, make your cuts just above a leaf node at a 45-degree angle. This creates a larger surface for new growth to emerge. I always sterilize my shears with rubbing alcohol between cuts to prevent spreading any potential diseases. And remember—those buds you see forming in late winter? Leave them be until after they open completely.
Pro Tips for Cherry Blossom Bonsai Tree
- Between us, these are the secrets that'll help your bonsai thrive—and actually bloom like the pros do.
- Soil Settlement Secret: After repotting with that 50-30-20 akadama-pumice-compost mix, give the pot a firm tap on your workbench to settle the soil.
- Light Rotation Technique: That weekly quarter-turn rotation isn't just about even growth—it's about preventing the tree from leaning toward the light source.
Frequently asked questions
Got questions about keeping your cherry blossom bonsai tree thriving? You’re not alone! Here are some of the most common queries—plus straightforward answers to help you nurture your miniature masterpiece with confidence.
How often should I water my cherry blossom bonsai?
Water your bonsai when the top 1-2 inches of soil feel dry—usually every 2-3 days in warm weather or 5-7 days in cooler months. Overwatering is the #1 killer! Use a moisture meter or stick your finger in the soil to check. Pro tip: Drain excess water from the tray to avoid root rot.
When will my cherry blossom bonsai bloom?
Patience is key! Most bonsai (even cherry blossoms) take 3-5 years to bloom indoors. Outdoor-grown bonsai may flower sooner if they experience winter chilling (30-50°F for 6-8 weeks). Mimic seasonal changes with artificial cold treatments if indoors.
Can I keep a cherry blossom bonsai indoors year-round?
Yes, but with adjustments! Indoor bonsai need bright, indirect light (south/west windows) and humidity (40-60%). Use a humidifier or pebble tray. For blooms, rotate the tree to prevent lopsided growth. Warning: Avoid drafts or direct heat (like vents), which stress the tree.
Why aren’t my cherry blossom leaves turning pink or red?
Color changes (like pink or red foliage) are rare in bonsai—most cherry blossoms stay green. If you want color, look for ‘Koyo-nishiki’ varieties (variegated) or autumn-pruned branches to enhance seasonal hues. Bonus: Yellow leaves? Check for overwatering or nutrient deficiencies (use a balanced fertilizer in spring/summer).
How do I prune my bonsai to encourage more blossoms?
Prune after flowering (late spring) to shape the tree and reduce leaf size (pinch new growth to 2-3 leaves). Avoid heavy pruning in fall/winter—this stresses the tree. For more blooms, prune older wood (2-3 years old) and avoid cutting flower buds! Timing matters: Do light trims in summer to promote airflow.
Wrapping up and next steps
Growing a cherry blossom bonsai tree is a rewarding journey that brings a touch of nature’s beauty into your home year-round. With patience, the right techniques, and a little love, you’ll cultivate a stunning miniature masterpiece that blooms like springtime in your living space. 🌸
Ready to take the next step? Start by selecting your favorite Prunus variety and gather your tools—then begin your bonsai adventure today! Whether you’re a beginner or a seasoned gardener, every small prune or watering session brings you closer to that dreamy, delicate blossom.
Happy growing! 🌱✨