
Pruning
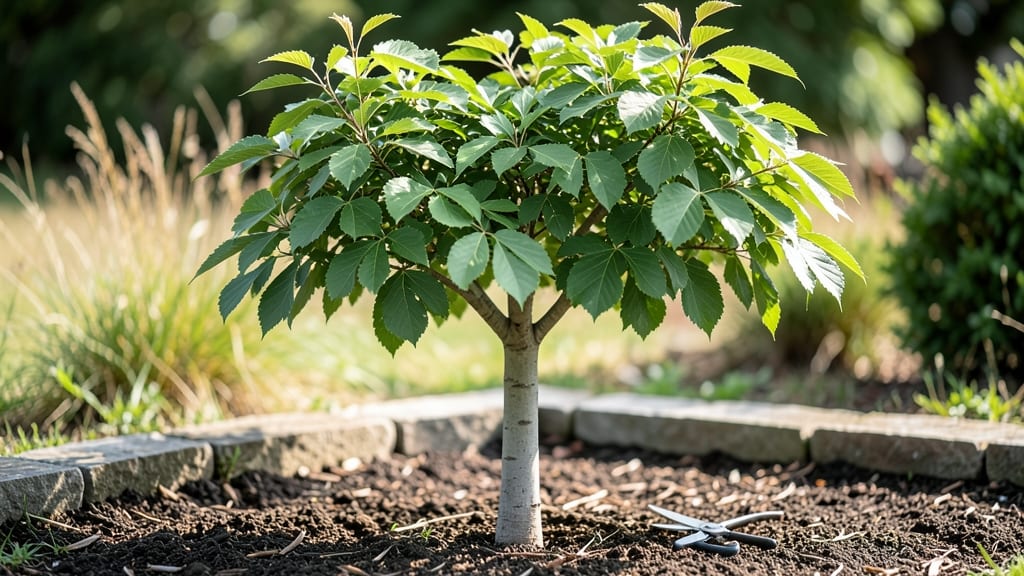
Your young black walnut tree’s future strength starts with the right pruning cuts today. ✂️ I’ve watched these trees go from scraggly saplings to sturdy giants by focusing on three key pruning principles—removing dead wood, opening the canopy for sunlight, and shaping the structure early.
The first three years are make-or-break for black walnuts, and skipping this step means years of catching up later.
Black walnuts grow fast but need guidance to avoid weak limbs and crowded branches. You’ll need sharp pruning shears, a ladder for higher cuts, and a clear day to work—no pruning when branches are wet or brittle.
The goal is to remove no more than 25% of the tree’s foliage in any one season, so think of this as sculpting, not hacking. Start by removing any branches growing straight up or rubbing against others—they’ll compete for resources and create entry points for disease.
What you’ll end up with is a tree that produces thicker, sweeter nuts and stands strong against storms. The canopy opens up to let sunlight reach the lower branches, which means more leaf surface for photosynthesis and fewer weak, leggy limbs.
By the time your black walnut is five years old, it’ll look like a well-groomed shade tree instead of a wild sapling. The best part? Proper pruning now means less cleanup work later when those branches get too heavy to trim.
This works for black walnuts planted in open fields, along property lines, or even in large suburban yards—just adjust spacing to give them room to grow.
The key is consistency: a little attention each year keeps the tree healthy and productive for decades. Let’s get those branches shaped right from the start.
📚 In This Guide
- What you need
- Instructions
- Tips and common mistakes
- Wrapping up and next steps
What you need
- ● Pruning shears: Bypass pruners (for cuts up to ½ inch thick) – recommended brands: Felco or Corona.
- ● Loppers: 1 pair (for branches ½ to 1½ inches thick) – look for ratcheting models for ease.
- ● Pruning saw: 1 handheld saw (for branches thicker than 1½ inches) – choose a curved blade for precision.
- ● Disposable gloves: 2 pairs (nitrile or leather) – black walnut sap can irritate skin!.
- ● Rubbing alcohol (70%+) or bleach solution: 1 small bottle or spray – for sterilizing tools between cuts.
- ● Heavy-duty trash bags: 2–3 bags (for collecting debris and fallen nuts).
- ● Extension pole: 1 (with pruning saw attachment) – for high branches.
- ● Tree wound dressing: 1 small tube – only use if dealing with large wounds (1+ inch).
- ● Ladder: 1 (if tree exceeds 8 feet tall) – ensure it’s stable and rated for outdoor use.
- ● Notebook & pencil: 1 – to sketch pruning plans or track growth.
- ● Safety goggles: 1 pair – protects eyes from sap and debris.
- ● Check local regulations – some areas restrict pruning during nesting seasons (typically March–August).
- ● Confirm the tree’s age – black walnuts should be 3–5 years old before heavy pruning.
- ● Choose a dry, overcast day to minimize stress on the tree.
- ● Have a buddy handy – pruning large branches can be risky!
Strategic pruning techniques for a thriving young black walnut sapling
Here's how to shape a strong, healthy framework without stunting growth.
✂️ Step 1: Assess the Tree's Natural Structure
Start by examining your black walnut sapling for its dominant central leader—the strongest upward-growing branch. This will be your tree's backbone. Look for branches that grow at a 45-60 degree angle from the trunk, as these form the best scaffold for future canopy growth.
Black walnuts are naturally vigorous, so avoid over-pruning. Your goal is to remove only no more than 25% of the tree's foliage in any single session. Use clean, sharp pruning shears to make cuts just outside the branch collar—the swollen area where the branch meets the trunk.
🌿 Step 2: Remove Problematic Branches First
Prioritize branches that cross or rub against others—these create wounds that invite disease. Also target branches growing directly upward from the trunk (called "water sprouts") or those growing at less than 30 degrees from the trunk, as they'll compete with the central leader.
For each branch you remove, make your cut at a 45-degree angle about ¼ inch above an outward-facing bud. This encourages new growth to continue outward rather than inward. Black walnut wood bleeds heavily when cut, so prune on a dry day to minimize sap loss.
☀️ Step 3: Thin the Canopy for Light Penetration
Focus on removing branches from the lower third of the tree to create an open center. This allows sunlight to reach the inner branches, which prevents future dieback. Aim to space remaining branches 6-12 inches apart along the trunk for proper air circulation.
Watch for branches that grow too close together—these create dense clusters that can harbor pests. You'll know you've achieved good thinning when you can see light filtering through the canopy from above. Avoid "heading back" (cutting back to a lateral branch) as this encourages weak, bushy growth.
⏰ Step 4: Time Pruning for Optimal Healing
Prune your black walnut during late winter or early spring when the tree is still dormant but just before buds begin to swell. This timing gives the tree 6-8 weeks to heal before the growing season begins. Never prune in fall—walnut trees are particularly susceptible to fungal infections when cuts heal slowly.
After pruning, monitor the tree for signs of stress like wilting or yellowing leaves. Black walnuts are resilient, but over-pruning can lead to reduced nut production. If you notice excessive sap bleeding from cuts, apply a thin layer of tree wound pruning sealant to protect the wound.
Tips & tricks for perfect young black walnut pruning
Between us, these small adjustments can make all the difference in shaping a strong black walnut for years to come.
Branch Angle Insight: When selecting branches to keep in Step 1, focus on those growing between 45-60 degrees from the trunk. This angle creates the ideal scaffold for future canopy growth. I've found that branches growing at exactly 60 degrees often produce the strongest framework—just enough upward growth without becoming too vertical. Think of it like building a sturdy ladder: you want diagonal supports, not straight poles.
Pruning Timing Secret: The late winter to early spring window mentioned in Step 4 is absolutely critical. I once pruned in fall and ended up with fungal infections that took months to heal. The 6-8 week healing period before buds swell gives the tree's natural defenses time to protect the wounds. If you must prune outside this window, do it during a dry spell when temperatures are above freezing.
Canopy Thinning Strategy: In Step 3, when creating that open center, aim to remove about 30% of the lower branches. This might seem aggressive, but it's what creates that perfect light-filtering effect. I've seen black walnuts with dense lower canopies develop dead branches years later because sunlight couldn't reach the interior. The key is to visualize sunlight streaming through—you should be able to see light patterns on the ground beneath the tree.
Cutting Technique: That 45-degree angle in Step 2 isn't just for looks—it's about directing water away from the wound. I've seen too many cuts made straight across that collect water and become breeding grounds for disease. Always make your cut just outside the branch collar, and be patient—rushing leads to jagged edges that heal poorly. A sharp pruner makes all the difference here.
Pro Tips for Young Black Walnut Tree
- Between us, these small adjustments can make all the difference in shaping a strong black walnut for years to come.
- Branch Angle Insight: When selecting branches to keep in Step 1, focus on those growing between 45-60 degrees from the trunk.
- Pruning Timing Secret: The late winter to early spring window mentioned in Step 4 is absolutely critical.
Frequently asked questions
Got questions about nurturing your young black walnut tree?
You're not alone! Here are some of the most common concerns—plus clear, actionable answers to keep your tree thriving.
When is the best time to prune a young black walnut tree?
The ideal window is late winter or early spring (before buds swell), when the tree is dormant but about to wake up. Avoid pruning in fall—this invites fungal diseases like Anthracnose. For severe damage, summer pruning (after 60°F temps) is a last resort, but prioritize winter/early spring for best results.
How much can I trim off a young black walnut tree in one session?
Never remove more than 25% of the canopy in a single pruning—this stresses the tree and weakens growth. For a young tree (under 5 years), limit cuts to dead, diseased, or crossing branches (no more than 3–4 branches total). Focus on shaping, not size reduction, to encourage a strong structure.
Why does my young black walnut tree have so many "water sprouts"?
Water sprouts (fast-growing vertical shoots) are your tree’s way of compensating for stress—often from over-shading, poor soil, or heavy pruning. To manage them, prune them back to a lateral branch or bud in early spring. Pro tip: Improve soil drainage and mulch (2–3 inches of wood chips) to reduce their frequency.
Can I use regular pruning tools on a black walnut tree?
Not safely! Black walnut sap contains juglone, a chemical that can corrode metal tools. Use high-quality stainless steel or carbon steel pruners (like Felco or Corona) and clean them thoroughly with soap and water after use. For large branches, a bow saw with a non-metallic blade is ideal.
What’s the best alternative if my young black walnut tree isn’t thriving?
If your tree struggles with poor growth, yellowing leaves, or pest issues, consider these steps first: Test soil pH (black walnuts prefer 6.0–7.5) and amend with compost. If problems persist, consult a local arborist—sometimes root rot or walnut husk fly larvae (common pests) need targeted treatment. In extreme cases, grafting onto a resistant rootstock may help.
Still curious? Drop your question in the comments—we’re happy to help your black walnut grow into a canopy powerhouse!
Wrapping up and next steps
Growing a young black walnut tree into a thriving, sturdy canopy is all about patience, precision, and proper pruning techniques.
By removing dead branches, shaping the structure early, and avoiding over-pruning, you’ll set the stage for a healthy, resilient tree that yields abundant nuts for years. Your efforts today will pay off with a stunning, shade-providing giant tomorrow!
Ready to take the next step? Mark your calendar for your first pruning session—spring or late winter is ideal—and gather your tools. For extra guidance, explore local arborist resources or join gardening forums to connect with fellow tree lovers. 🌳