Trees
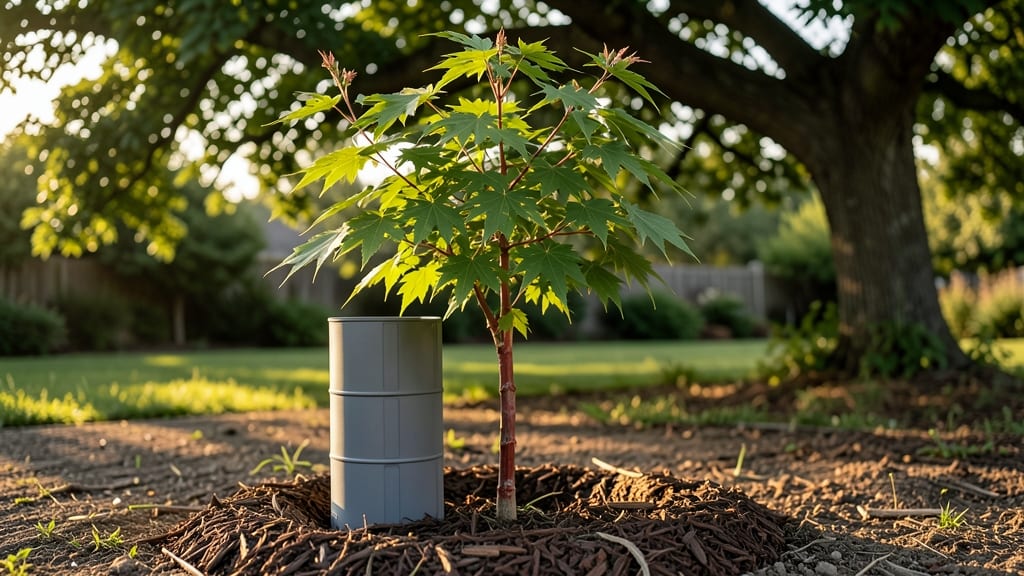
Tree guards for young trees are the unsung heroes of healthy growth—keeping deer from nibbling bark and storms from snapping fragile trunks. I learned this the hard way when a curious rabbit turned my sapling into a snack bar last spring.
The right guard transforms a vulnerable seedling into a resilient survivor, and it’s easier than you think to set up.
You’ll need a few basic supplies: sturdy material (plastic, metal, or even cardboard wrapped in wire), a tape measure, and a few hours on a calm day. The key is matching the guard’s height to your tree—typically 6-8 feet tall for deer protection, with extra height in storm-prone areas.
Plastic guards are lightweight and affordable, while metal offers durability for aggressive wildlife.
Once installed, you’ll see the difference immediately. Roots stay undisturbed, bark stays intact, and your tree grows straighter without competition. The best part? Guards last 3-5 years with minimal upkeep—just check for cracks or warping once a season. No more worrying about deer browsing or wind damage ruining your investment.
Whether you’re protecting a new oak or a delicate fruit tree, these guards work year-round. The only real mistake is skipping them entirely—trust me, your future shade tree will thank you. Let’s get those young trees the armor they deserve.
📚 In This Guide
- What you need
- Instructions
- Tips and common mistakes
- Wrapping up and next steps
What you need
- ● Tree guards (pre-made): 2–4 guards per tree (depending on height and trunk thickness)
- ● Material: Plastic, metal, or heavy-duty cardboard (minimum 18–24" tall)
- ● Diameter: Match the guard to the tree’s trunk (e.g., 4–6" for saplings, 6–12" for larger young trees)
- ● DIY materials (if building your own): PVC pipes (4–6" diameter, cut to 24–36" length)
- ● Corrugated plastic or metal sheets (for wrapping)
- ● Staple gun + staples (for securing wraps)
- ● Heavy-duty duct tape or wire (alternative to staples)
- ● Tools: Measuring tape
- ● Scissors or utility knife (for cutting materials)
- ● Drill (if attaching hardware to guards)
- ● Level (to ensure guards are straight)
- ● Safety gear: Work gloves (to protect hands from splinters or sharp edges)
- ● Safety goggles (if drilling or cutting metal/plastic)
- ● Tree tie straps (to secure guards without damaging bark)
- ● Reflective tape (for visibility in low-light areas)
- ● Post-hole digger (if burying guards for extra stability)
- ● Paint or spray (to blend guards with the landscape)
- ● Weatherproof sealant (for DIY metal guards)
How to install tree guards for young trees safely
Here’s the method I trust to protect young trees from damage while ensuring they grow strong.
Measure and Select Guard Height and Placement
Start by measuring your tree’s current height and projecting its growth over the next 2-3 years. The guard should extend at least 12 inches above the tallest branches to deter wildlife like deer and rabbits. For a 4-foot sapling, a 6-foot guard is ideal—this accounts for both current height and future growth.
Position the guard 1-2 inches away from the trunk to allow airflow and prevent moisture buildup. If you place it too close, the tree may develop rot or pests. Mark the ground with a stake where the guard will sit—this ensures straight installation and prevents leaning later.
Choose and Prepare the Guard Material
Select a sturdy, weather-resistant material like galvanized steel, heavy-duty plastic, or wire mesh. Avoid thin plastic, which can tear or warp in storms. For wildlife protection, wire mesh with 1-inch gaps works best—small enough to block deer but large enough to allow air circulation.
Cut the guard to the measured height, leaving 2-3 inches of extra length at the top for securing. If using a cylindrical guard, ensure the diameter is wide enough to fit snugly around the tree without crushing the trunk. For mesh guards, reinforce the seams with staples or zip ties to prevent tearing.
Install the Guard Securely Around the Tree
Begin at the base of the tree and wrap the guard tightly, leaving no gaps where animals could slip through. For cylindrical guards, use adjustable straps or bungee cords to secure it—tight enough to stay upright but loose enough to avoid restricting growth. If using wire mesh, overlap the edges by 3-4 inches and fasten with staples or heavy-duty zip ties.
Drive 3-4 sturdy stakes into the ground around the guard, spacing them evenly. Attach the guard to the stakes with flexible straps or wire—this keeps it upright even in wind. Avoid rigid attachments, which can snap off in storms and damage the tree.
Monitor and Adjust for Growth
Check the guard every 3 months to ensure it hasn’t shifted or loosened. Young trees grow quickly, so you may need to add extensions or reinforce seams as branches outgrow the protection. If the guard rubs against the trunk, loosen it immediately—constant friction can scar the bark and invite disease.
Remove the guard once the tree reaches maturity—typically when the trunk diameter is 3-4 inches. Leaving it on too long can girdle the tree as it grows wider. Use pruners to cut the guard cleanly at the base, then dispose of it properly to prevent wildlife from chewing through it.
Tips & tricks for sturdy tree guard installation
Installing tree guards properly makes all the difference between protection and potential damage. Here’s what I’ve learned from years of safeguarding young trees in all kinds of weather.
Height and Placement Precision: When measuring for your 6-foot guard on a 4-foot sapling, account for both current height and projected growth. Use a tape measure to mark the top edge at least 12 inches above the tallest branches—this prevents wildlife from reaching over the guard. I’ve seen deer leap surprisingly high when desperate for tender shoots, so don’t underestimate their vertical reach. The 1-2 inch clearance from the trunk is crucial; I once saw a guard pressed too tightly against a trunk, creating a moisture trap that led to fungal growth within weeks.
Material Selection Matters: For wire mesh guards, I recommend using 1-inch gaps—this blocks deer while allowing air circulation, which prevents rot. When cutting your guard to height, leave that extra 2-3 inches at the top for securing. I’ve had mesh guards fail when the seams weren’t properly reinforced; always use heavy-duty zip ties or staples to prevent tearing during storms. Galvanized steel guards hold up best in harsh weather, but they require more effort to cut and shape.
Securing Technique: The 3-4 stakes you’ll use should be positioned at equal intervals around the guard—this creates a stable triangle support system. When attaching the guard to stakes, flexible straps work better than rigid wire, which can snap in high winds. I’ve seen guards collapse when rigid attachments transferred too much force to the tree during storms. Always test the guard’s stability by gently pushing it before securing completely.
Long-Term Maintenance: The 3-month monitoring schedule is non-negotiable for young trees. I’ve seen guards shift as little as 3 months after installation, especially in loose soil. When checking for rub spots, run your fingers along the entire length of the guard—you’ll feel the rough spots before they become visible scars. Remember that once the trunk reaches 3-4 inches in diameter, it’s time to remove the guard completely to prevent girdling.
Pro Tips for Tree Guards For Young Trees
- Installing tree guards properly makes all the difference between protection and potential damage.
- Height and Placement Precision: When measuring for your 6-foot guard on a 4-foot sapling, account for both current height and projected growth.
- Material Selection Matters: For wire mesh guards, I recommend using 1-inch gaps—this blocks deer while allowing air circulation, which prevents rot.
Frequently asked questions
Got questions about tree guards? You’re not alone!
Here are answers to the most common concerns—from installation to troubleshooting—so you can keep your young trees thriving with confidence.
What’s the best time of year to install tree guards?
Install guards right after planting (spring or early fall) to protect young trees from wildlife, weather, and human damage. Avoid winter—frost can crack plastic, and snow may hide hazards. If you’re retrofitting, do it before pests (like deer or rabbits) become active in your area.
Can I make my own tree guard instead of buying one?
DIY options include:
- Wire cages: Use chicken wire or hardware cloth (1–2 ft tall) for small trees.
- PVC pipes: Cut and secure around the trunk with zip ties.
- Cardboard tubes: Coat with waterproof sealant for short-term use.
How do I fix a tree guard that’s leaning or damaged?
If your guard is crooked or cracked:
- Plastic/Metal: Remove, clean the tree trunk, and reattach with sturdy stakes (angled into the ground). Use zip ties or screws for stability.
- Wire Cages: Bend wires back into shape and secure with extra ties. Replace if rusted or sharp.
- Storm Damage: Check for hidden cracks in the trunk—if the guard’s failing, the tree might need support too (like a tree tie).
Do tree guards need ventilation? What if it rains?
Yes! Guards should have small gaps or slits (especially near the top) to allow airflow and prevent moisture rot. If yours is solid, add a few holes with a drill or scissors. During heavy rain, ensure the base isn’t pooling water—dig a small trench around the guard to redirect runoff. Most guards are weather-resistant, but check for mold or mildew annually.
Will tree guards attract pests like rodents or insects?
Not if installed correctly! Solid guards can trap pests, but ventilated designs (with holes or mesh) reduce risks. To deter critters:
- Use smooth materials (like metal or plastic)—rough surfaces attract chewing pests.
- Avoid placing guards near woodpiles or dense brush.
- Inspect guards seasonally for nests or chew marks.
Wrapping up and next steps
Protecting your young trees with sturdy tree guards is a simple yet powerful way to ensure their long-term health and vitality. Whether you're safeguarding against curious wildlife, harsh winds, or accidental damage, the right guard makes all the difference. 🌱
Now that you’re armed with the knowledge and tools, take action today! Measure, choose the right materials, and install your guards before the next storm or critter encounter. Your future shade—and your tree’s future—will thank you!