
Trees
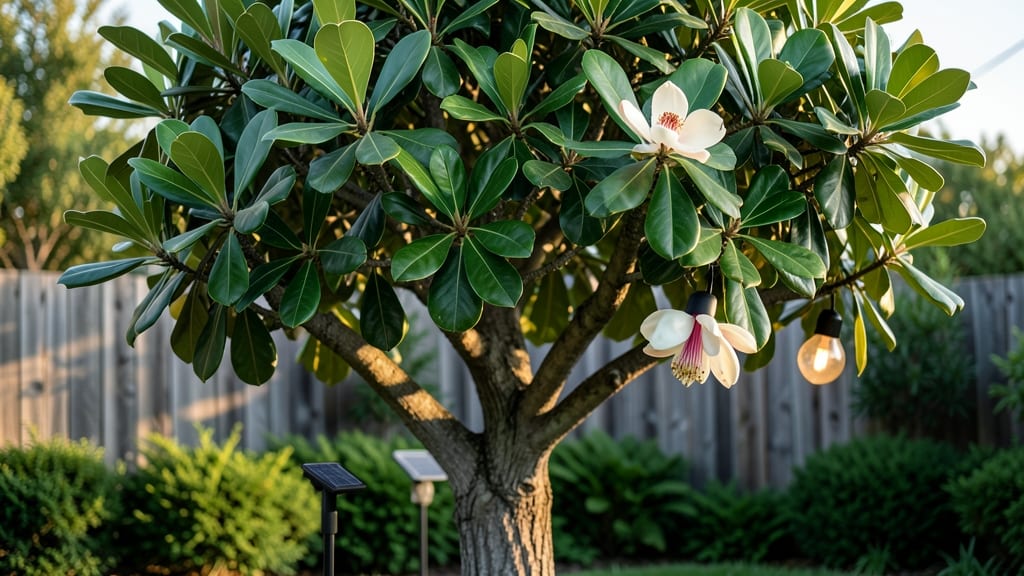
Transforming your backyard into a twilight wonderland starts with wrapping solar-powered lights around your trees. ✨ I used to think string lights were just for patios, but draping them through branches creates a magical canopy glow that turns evenings into cozy gatherings.
The best part? No wiring, no fuss—just plug-and-play illumination that lasts all night.
You’ll need flexible solar string lights (12-16 feet per tree), zip ties or decorative clips, and a sunny afternoon to install them. Start with a few trees to test the vibe—my favorite setup wraps lights around trunks before fanning them upward into the branches.
For taller trees, use spotlights hung from hooks to highlight the canopy from below.
What you’ll end up with is a soft, golden glow that makes your garden feel like a secret retreat. The lights work year-round, though summer evenings feel extra special with the scent of blooming night-blooming jasmine in the air.
Plus, you’ll save on electricity costs while adding curb appeal that neighbors will envy.
Works for any yard size, from a single shade tree to a full orchard. The key is balancing coverage and visibility—too many lights can look cluttered, but a few strategically placed strands create just the right ambiance. Let’s make your evenings shine!
📚 In This Guide
- What you need
- Instructions
- Tips and common mistakes
- Wrapping up and next steps
What you need
- ● Solar-powered string lights: 10–20 ft (depending on tree size; choose 12V LED lights for efficiency).
- ● Waterproof wire or fishing line: 50–100 ft (for secure, weather-resistant hanging).
- ● Small zip ties or clear plastic ties: 20–30 (to attach lights to branches without damage).
- ○ Solar-powered battery pack (optional but recommended): 1–2 (12V, 10,000mAh+ for extended runtime).
- ● Non-toxic, weatherproof adhesive (e.g., Command™ hooks): 5–10 (for lightweight decorations or battery packs).
- ○ Decorative elements (optional but fun!): Fairy lights (50–100 small bulbs for extra sparkle).
- ● Mini solar-powered lanterns (2–4, for a cozy glow).
- ● Twinkling star ornaments (non-metallic, to avoid wind noise).
- ● Ladder or step stool: Tall enough to reach your tree’s canopy safely.
- ● Scissors or wire cutters: For trimming wire/light strands.
- ○ Gloves (optional): To protect hands from branches or adhesive residue.
- ● Safety first!: Check for power lines near tall trees.
- ● Ensure all materials are child- and pet-safe (no small parts or toxic adhesives).
How to install solar lights in trees for magical evening glow
Transform your yard into a twinkling wonderland with this simple, foolproof method.
🌿 Step 1: Choose the Right Lights and Locations
Pick waterproof solar-powered string lights rated for outdoor use—look for IP65 or higher for weather resistance. I recommend 16-24 inch spacing between lights to create even coverage. For 4 trees, you’ll need about 30-50 lights total, depending on size.
Select branches that are 6-12 feet high for best visibility. Avoid thick limbs that might snap under weight. Test branch strength by gently pressing down—if it bends but doesn’t break, it’s safe. I like to place lights near leaf clusters so they peek through naturally.
🪴 Step 2: Secure the Lights Without Damaging Bark
Use soft zip ties (not wire or metal clips) to attach lights—these won’t cut into the tree and can be removed easily. Wrap the tie around the branch and the light’s hook, leaving 1 inch of slack so the light can sway gently in the wind. Never tie directly to the trunk; bark damage invites pests.
Space ties every 3-4 feet along the branch to distribute weight evenly. If using multiple strands, stagger them so lights don’t overlap. I start at the outer edges of the canopy and work inward, creating a cascading effect. Avoid overcrowding—3-4 lights per branch is plenty for a balanced look.
☀️ Step 3: Charge and Position for Maximum Glow
Install lights at least 4-6 hours before sunset on a sunny day to ensure full charge. Place the solar panel on a south-facing branch (in the Northern Hemisphere) where it gets direct sunlight for 6+ hours. If your tree is shaded, use a secondary solar panel on a nearby unobstructed surface.
Adjust light placement so they glow through gaps in leaves—this creates a dappled, magical effect. For extra drama, weave strands vertically down the trunk (if the tree is thin) or horizontally across branches. Test the setup at dusk to spot any dim lights—these may need repositioning closer to the panel.
⏰ Step 4: Maintain for Long-Lasting Brilliance
Clean lights monthly with a damp cloth—dirt and pollen block solar absorption. Remove ties in late fall to prevent them from cutting into bark during winter. Store lights in a dry, shaded spot if you’ll take them down for the season. I mark each tree’s location with a small flag so I remember where to reinstall them next year.
Replace batteries every 2-3 years—even rechargeable ones degrade over time. If lights dim after a few weeks, check the solar panel’s angle. Adjust it weekly in early morning to follow the sun’s path. A little tweak makes a huge difference in brightness!
Tips & tricks for perfect solar-powered tree lighting
Between us, these little details make the difference between a charming twinkle and a tangled mess. Here's what I've learned from years of testing setups in my own yard.
Light Placement Strategy: In Step 1, when choosing branch locations, focus on areas where leaves naturally part. I like to imagine how sunlight filters through during the day—those same gaps will let the lights shine through beautifully at night. For extra magic, place a few lights near the tree trunk where they'll create a soft halo effect when viewed from below.
Zip Tie Technique: Don't make my mistake: using regular zip ties will cut into bark over time. I now use soft, fabric-covered zip ties that grip without damaging the tree. When securing in Step 2, leave that 1-inch slack—it allows the lights to sway gently in the wind, which actually makes them look more natural and prevents tangling.
Solar Panel Optimization: The 4-6 hours of sunlight before sunset in Step 3 is non-negotiable, but here's the secret: position your solar panel on the southernmost branch you can reach. In the Northern Hemisphere, this gets maximum exposure. If your tree is in shade most of the day, consider adding a secondary solar panel on a nearby fence or deck—it can power the entire string.
Seasonal Maintenance: I learned this the hard way after removing ties too late—always take them off by late fall before winter rains. The moisture trapped against the bark can cause rot. I now mark my calendar with a note: "Remove tree lights before first frost." For storage, I wrap the entire string around a cardboard tube and label it with the tree locations.
Pro Tips for Solar Lights In Trees
- Between us, these little details make the difference between a charming twinkle and a tangled mess.
- Light Placement Strategy: In Step 1, when choosing branch locations, focus on areas where leaves naturally part.
- Zip Tie Technique: Don't make my mistake: using regular zip ties will cut into bark over time.
Frequently asked questions
Got questions about solar-powered tree lights? You’re not alone!
Here are some of the most common queries—and their straightforward answers—to help you glow up your outdoor space with ease.
How long do solar tree lights last on a single charge?
Most high-quality solar tree lights last 8–12 hours on a full charge, depending on sunlight exposure and battery capacity. For longer glow, opt for lights with 18650 batteries (they hold more power) or place them in sunnier spots during the day.
Can I use these lights in cold or rainy weather?
Solar tree lights are weather-resistant (look for IP44 or IP65 ratings), but extreme cold (<32°F) may shorten battery life. Rain or snow won’t damage them, but ensure the solar panel stays clean for optimal charging.
What’s the best way to install them without damaging the tree?
Use soft, flexible straps or clip-on designs to avoid scratching bark. For larger trees, wrap lights around branches gently—never drill or nail into the trunk. Pro tip: Distribute lights evenly for balanced lighting and minimal stress on branches.
Are there alternatives if my tree isn’t big enough for lights?
No problem! Try solar-powered string lights draped over smaller trees, shrubs, or even fences. For ground coverage, solar stake lights or LED tree stakes create a magical glow without needing a thick canopy.
Why are my solar tree lights flickering or not staying bright?
Flickering often means low battery or dusty solar panels. Clean the panel with a damp cloth, ensure it gets 6+ hours of sunlight daily, and check for loose connections. If issues persist, replace the battery (most are user-replaceable).
Wrapping up and next steps
Transforming your outdoor space with solar-powered tree lights isn’t just about aesthetics—it’s a magical blend of sustainability, creativity, and cozy charm. Whether you’re illuminating a backyard retreat, a garden path, or a festive holiday display, these lights bring warmth and whimsy without the hassle of wires or electricity bills. 🌳✨
Ready to glow up your greenery? Start small—pick one tree or a cluster—and let your imagination lead the way. Grab your supplies, follow the steps, and enjoy the enchanting ambiance your trees will create after sunset!
- Next step: Share your lit-up canopy with us—tag us in your photos for a chance to be featured!