
Pruning
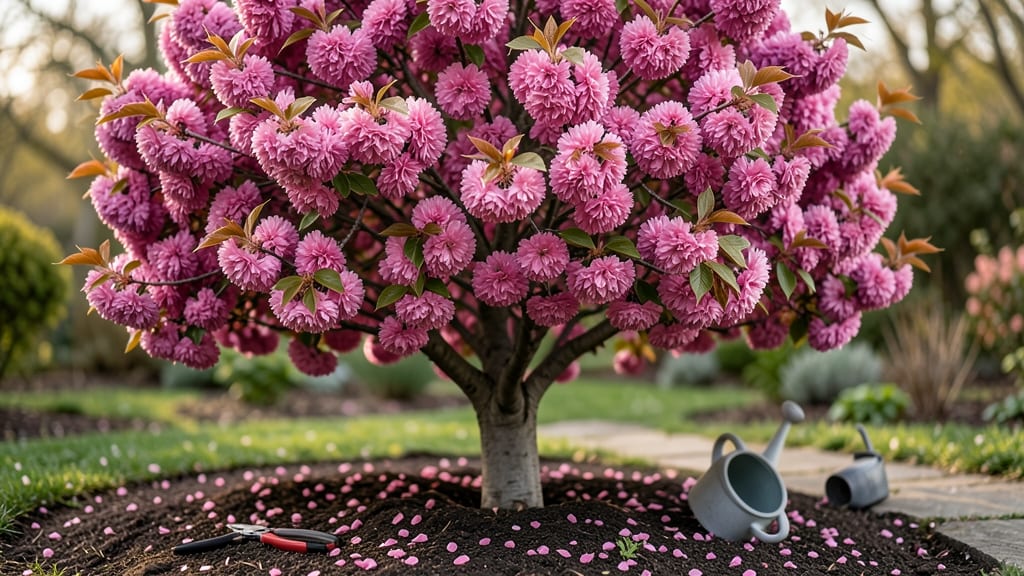
Planting a Snow Fountain cherry tree means welcoming a pollinator paradise that thrives in the Pacific Northwest’s damp climate—no deadheading required. ✨ I’ve watched bees and butterflies swarm its cascading white blooms for weeks, and the tree’s glossy foliage stays vibrant long after the flowers fade.
The secret lies in its care: well-draining soil, afternoon shade, and strategic pruning to encourage that iconic weeping habit.
This tree isn’t fussy about soil as long as it drains well—amend heavy clay with compost if needed. Give it 6-8 hours of sunlight daily, though it tolerates partial shade better than full sun.
Space it 15-20 feet from structures to avoid invasive roots that can crack sidewalks over time. Mulch heavily to retain moisture and keep roots cool during summer heatwaves.
You’ll love how the showy blossoms in early spring transition into lush, dark green foliage that turns subtle bronze in fall. Unlike many cherries, it doesn’t demand constant deadheading—just an occasional trim to shape it and remove dead wood.
The trade-off? It’s slightly prone to powdery mildew in humid summers, so monitor leaves and prune for airflow.
Perfect for urban gardens, park plantings, or as a standalone specimen. With minimal effort, you’ll create a low-maintenance focal point that blooms reliably and supports local wildlife. Let’s get yours planted for next spring’s spectacle.
📚 In This Guide
- What you need
- Instructions
- Tips and common mistakes
- Wrapping up and next steps
What you need
- ● Pruning shears – Bypass pruners (sharp, 6-8 inch blades) for clean cuts on smaller branches.
- ● Loppers – 8-12 inch handles for thicker branches (½–1 inch diameter).
- ● Pruning saw – For branches thicker than 1 inch (avoid tearing the bark!).
- ● Rubbing alcohol (70% isopropyl) – 8 oz bottle to sterilize tools between cuts.
- ● Garden gloves – Heavy-duty, cut-resistant (e.g., nitrile-coated) for protection.
- ○ Disposable pruning bags or bucket – To collect clippings (optional but helpful for cleanup).
- ● Permanent marker – Fine-tip for marking branches to remove (if planning ahead).
- ● Hand pruners with ratcheting mechanism – Eases pressure on tough cuts.
- ● Pruning sealant – Small jar (e.g., tree wound dressing) for large cuts >2 inches.
- ● Step stool or ladder – Sturdy, non-slip model (4–6 ft height) for tall trees.
- ● Sharpener/file – For maintaining tool edges between uses.
- ● Camera or phone – To document your tree’s progress before/after!
- ● Know your tree’s age – Young trees (under 3 years) need light pruning; mature trees (5+ years) can handle more.
- ● Check the weather – Prune on a dry, overcast day (avoid frost or extreme heat).
- ● Identify dead/diseased branches – Look for brown, brittle wood or fungal growth (remove these first).
- ● Review local regulations – Some areas restrict pruning near power lines or during nesting seasons.
Step-by-step guide to planting and caring for a Snow Fountain cherry tree
Here’s how to establish this stunning Pacific Northwest pollinator favorite with minimal fuss.
🌱 Step 1: Choose the Perfect Planting Spot
Select a location with full sun exposure (6-8 hours daily)—this tree thrives in open spaces where it can showcase its cascading branches. The Pacific Northwest climate suits it perfectly, but avoid low-lying areas where cold air pools, as young trees need protection from late frosts.
Check soil drainage by digging a 12-inch deep hole—if water pools within 30 minutes, amend with 2-3 inches of compost to improve aeration. The Snow Fountain cherry prefers slightly acidic to neutral soil (pH 6.0-7.0), so test your soil if unsure. I’ve found that even in heavy clay soils, adding organic matter transforms the texture over time.
🪴 Step 2: Plant with Proper Spacing and Support
Dig a hole twice as wide as the root ball but no deeper—this encourages roots to spread horizontally rather than settling too low. Gently remove the tree from its container and loosen any circling roots with your fingers. Place it in the hole so the top of the root ball sits 1-2 inches above ground level—this prevents water from pooling at the base.
Backfill with native soil mixed with 1 part compost to improve fertility. Water deeply to settle the soil, then add a 3-inch layer of mulch (keeping it 6 inches away from the trunk) to retain moisture and suppress weeds. Stake the tree only if necessary—this variety has strong natural growth, but a single stake can provide temporary support during establishment.
☀️ Step 3: Water Deeply and Establish a Routine
Water the tree immediately after planting with 5 gallons of water, then repeat every 3-4 days until new growth appears. The key is deep watering—let the soil dry out slightly between sessions to encourage strong root development. Overwatering smothers roots, while underwatering stresses the tree during its first critical year.
You’ll know it’s thriving when you see new leaves unfurling within 4-6 weeks—this is your signal that roots have taken hold. After the first year, reduce watering to once a week during dry spells, as mature trees are surprisingly drought-tolerant once established. Here’s the thing—this tree’s pollinator appeal starts the moment it flowers, so proper watering now means more bees and butterflies later.
✂️ Step 4: Prune Strategically for Shape and Health
Prune in late winter or early spring before buds swell, removing any dead, crossing, or weak branches first. The Snow Fountain’s natural weeping habit means you’ll mostly be shaping rather than cutting back aggressively. Use clean, sharp pruners to make cuts just outside the branch collar—this prevents unsightly stubs and promotes faster healing.
Thin out crowded branches to improve airflow, which reduces disease risk. I like to step back every few years and assess the tree’s structure—this variety handles pruning well, but avoid heavy cuts that could compromise its graceful form. The goal is to maintain an open center that lets sunlight reach the lower branches, encouraging even flowering.
Tips & tricks for perfect Snow Fountain cherry tree planting
Took me years to master these little details that make all the difference with this pollinator magnet.
Sunlight Secret: The 6-8 hours of daily sun isn't just about light—it's about consistent warmth. I've noticed the tree's cascading branches grow most dramatically when planted on the south or southwest side of your property. If your yard has afternoon shade from neighboring trees, consider planting near a wall that reflects sunlight back onto the tree during those critical late afternoon hours.
Soil Preparation Strategy: That 12-inch deep drainage test is your first clue about soil health. If water pools within 30 minutes, you're dealing with compacted soil. My go-to fix is mixing in 2-3 inches of compost AND adding a handful of perlite to break up clay. The goal is to create a sponge-like texture that holds moisture but drains freely—this tree's roots need oxygen as much as water.
Watering Wisdom: The 5 gallons of water right after planting isn't just about hydration—it's about settling the soil around the roots. I've learned to water slowly in stages, letting the first gallon soak in completely before adding the next. This prevents surface runoff that can wash away the precious topsoil. After the initial watering, I always check the soil 2 inches down with my finger—it should feel moist but not soggy.
Pruning Precision: When you're shaping in late winter, focus on creating an open vase shape rather than just removing dead branches. I like to make my cuts just outside the branch collar where it meets the trunk—this is where the tree's natural healing response kicks in. For the weeping branches, I only prune back about 1/3 of the branch length to maintain that graceful fountain effect while still improving airflow.
Pro Tips for Snow Fountain Cherry Tree
- Took me years to master these little details that make all the difference with this pollinator magnet.
- Sunlight Secret: The 6-8 hours of daily sun isn't just about light—it's about consistent warmth.
- Soil Preparation Strategy: That 12-inch deep drainage test is your first clue about soil health.
Frequently asked questions
Got questions about the stunning snow fountain cherry tree? You’re not alone! Whether you’re a first-time grower or a seasoned gardener, here are answers to the most common queries to help you nurture this pollinator powerhouse with ease.
When is the best time to plant a snow fountain cherry tree?
The ideal time to plant your snow fountain cherry tree is in early spring or early fall. This gives the roots time to establish before extreme temperatures arrive. Avoid planting in late fall or winter, as frost can stress young trees. For the Pacific Northwest’s mild climate, spring planting (March–April) is often the sweet spot!
Does a snow fountain cherry tree need deadheading?
Nope—this is one of its standout features! The snow fountain cherry (Prunus serrulata ‘Snow Fountain’) produces zero messy seed pods or spent blooms, so you won’t waste time deadheading. Just sit back and enjoy the nonstop spring blooms and delicate foliage without the cleanup. Win-win for pollinators and you!
How cold-hardy is this tree, and will it survive PNW winters?
This tree thrives in USDA Zones 5–8, making it perfect for the Pacific Northwest’s chilly winters. It handles temperatures down to -20°F (-29°C) with ease, though young trees may need winter mulch for extra protection. In rainy PNW climates, ensure good drainage to prevent root rot—this tree’s resilience matches its beauty!
Why aren’t bees visiting my snow fountain cherry tree?
If pollinators seem scarce, check these fixes:
- Timing: Plant near other early-blooming trees (like Prunus or Magnolia) to attract bees in stages.
- Location: Place it in full sun (6+ hours/day) and avoid windy spots.
- Pesticides: Skip chemical sprays—bees need this nectar!
- Water: A light morning watering can signal blooms to bees.
If the issue persists, your tree might need a companion plant to draw in early visitors.
Can I grow a snow fountain cherry tree in a container?
While possible, this tree grows 15–20 feet tall and thrives best in the ground. If you’re set on container growing, choose a large (30+ gallon) pot with drainage and prune aggressively to control size. Expect slower growth and potential root-bound stress. For the Pacific Northwest’s space, planting in-ground is the best long-term option!
Pro Tip: Mulch Matters!
Spread 3–4 inches of mulch around the base (but keep it away from the trunk) to retain moisture and regulate soil temperature. This is especially helpful in the PNW’s wet winters—just avoid piling mulch too high to prevent rot.
Wrapping up and next steps
The Snow Fountain cherry tree isn’t just a stunning addition to your Pacific Northwest garden—it’s a low-maintenance pollinator powerhouse that thrives without deadheading! With its delicate blooms, cold-hardy nature, and ability to attract bees and butterflies, this tree is the perfect blend of beauty and eco-friendly simplicity.
Whether you're a seasoned gardener or just starting out, its resilience makes it a dream for any outdoor space.
Ready to plant your own? Start by researching local nurseries or online seed suppliers, then pick the perfect spot in your yard. Your pollinators—and future neighbors—will thank you! 🌸🐝