Pruning
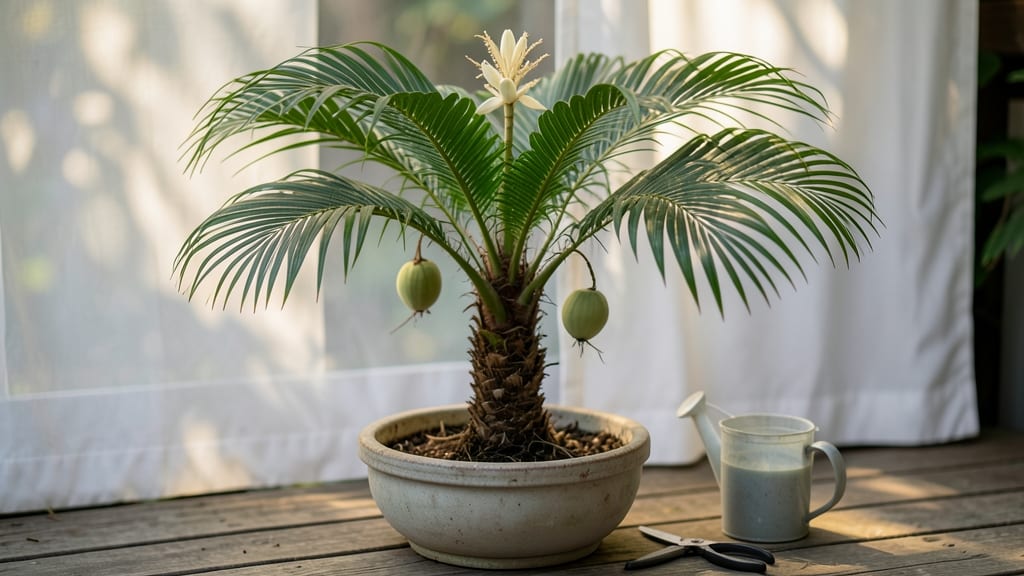
Growing a small coconut tree indoors means tropical vibes without the beach trip. 🌴 My first attempt with a dwarf variety taught me that these palms thrive in pots—just give them bright light, warmth, and consistent moisture.
The key is choosing the right cultivar, like 'Pygmy' or 'Malayan Dwarf,' which stay under 10 feet tall even indoors.
You’ll need a container at least 18 inches wide with drainage holes, a well-draining potting mix, and a spot near a south-facing window or under grow lights. These trees love humidity, so misting or a pebble tray helps mimic their native climate.
Pruning is minimal—just remove dead fronds and yellowing leaves to keep the plant healthy.
With the right care, you’ll see new fronds unfurling within months, and if you’re lucky, tiny coconuts forming after a few years. The reward? Fresh tropical air, lush greenery, and the joy of growing something most people think needs a beachside plot.
Let’s get your mini coconut tree off to a great start.
Bonus tip: Rotate the pot occasionally so the tree grows evenly, and fertilize lightly during spring and summer. Frost is the enemy, so keep it indoors if you live in a colder climate. These trees are forgiving but reward patience with stunning, compact growth.
📚 In This Guide
- What you need
- Instructions
- Tips and common mistakes
- Wrapping up and next steps
What you need
- ● Small coconut tree seedling or nut: Choose a dwarf variety (e.g., Nana or Malayan Dwarf) for compact growth (1–3 ft tall at maturity).
- ○ Growing container (if potted): A 5–10 gallon pot with drainage holes (use fabric pots for better aeration). Optional: Self-watering pots for convenience.
- ● Well-draining potting mix: A blend of 50% coconut coir, 30% perlite, and 20% compost (avoid heavy garden soil).
- ● Fertilizer: Balanced liquid fertilizer (10-10-10) for early growth.
- ● Slow-release organic fertilizer (e.g., fish emulsion or worm castings) for long-term nutrition.
- ● Pruning tools: Bypass pruners (for clean cuts on small branches).
- ● Sterilized knife or shears (for precision trimming).
- ○ Support stakes (optional): 3–4 ft bamboo stakes + soft plant ties to secure young trees in windy areas.
- ● Climate: USDA Zones 10–12 (or grow indoors with grow lights in cooler zones).
- ● Sunlight: Full sun (6+ hours daily)—partial shade may stunt growth.
- ● Watering setup: Drip irrigation or watering can (coconut trees hate soggy roots!).
- ● Patience: Dwarf varieties take 3–5 years to produce coconuts (but it’s worth the wait! 🥥).
Step-by-Step instructions for growing a compact coconut tree
Here's the straightforward method I've used to grow healthy, space-friendly coconut trees that produce reliably.
🌱 Step 1: Select and Prepare the Right Nursery Plant
Start with a dwarf coconut palm variety like 'Maypan' or 'Malayan Dwarf'—these stay under 15 feet tall at maturity. Look for a 3-4 foot tall nursery plant with a sturdy trunk and healthy fronds (no brown edges or yellowing). The root ball should be intact, with no exposed roots.
Remove the plant from its container and inspect the roots. If they're circling tightly, gently tease them apart with your fingers. This prevents root-bound stress later. Soak the roots in lukewarm water for 30-60 minutes before planting to hydrate them thoroughly. You'll know it's ready when water runs clear—no muddy runoff.
☀️ Step 2: Choose the Perfect Sunny Spot
Coconut palms need full sun exposure—at least 6-8 hours of direct sunlight daily. In colder climates, plant near a south-facing wall or fence for winter protection. The soil should drain exceptionally well—coconut palms hate soggy roots. If your soil is heavy clay, amend it with 3-4 inches of coarse sand or gravel mixed into the top 12 inches of soil.
Dig a hole twice as wide as the root ball but only as deep as the container it came in. Loosen the sides of the hole with a shovel to encourage root spread. Here's the thing—don't bury the trunk too deeply. The base should sit 1-2 inches above ground level to prevent rot.
💧 Step 3: Plant and Water for Strong Establishment
Place the coconut palm in the hole and backfill with native soil, pressing gently around the edges to remove air pockets. Water deeply to settle the soil—1-2 gallons should soak into the hole completely. Avoid compacting the soil too firmly; coconut palms need aerated roots to thrive.
Create a watering basin by mounding soil around the base to form a slight well. This keeps irrigation focused on the roots. Water every 2-3 days for the first 2 weeks, then taper to once a week once new fronds appear. Overwatering is the #1 killer of young coconut palms—always check soil moisture before watering.
✂️ Step 4: Maintain for Year-Round Growth
Fertilize every 3 months with a balanced palm fertilizer (look for a 6-6-6 or 8-2-12 NPK ratio). Apply it 6 inches away from the trunk and water it in immediately. Young palms need 1-2 tablespoons per feeding, while mature trees handle 4-6 tablespoons. Too much fertilizer burns roots—follow package rates closely.
Remove dead or yellowing fronds as they appear using clean, sharp pruners. Cut just above the point where the frond meets the trunk—never leave stubs. This encourages new growth and prevents disease. In winter, protect young palms from frost with burlap wraps or move potted palms indoors if temperatures drop below 40°F.
🌿 Step 5: Harvest and Encourage Productivity
Coconut palms produce flowers and fruit on their lower fronds—watch for small green clusters forming near the base. Harvest when the husk turns golden-brown and the nut sounds hollow when shaken. Wear gloves—the husk is sharp and fibrous. Cut the fruit from the stem with pruners, leaving 1-2 inches of stem attached to the tree.
To encourage more flowers, feed the palm with potassium-rich fertilizer (like 0-0-50) in late summer. This boosts fruit production for the next season. Real talk: patience is key—dwarf varieties take 3-5 years to bear fruit, while standard palms may wait 5-7 years. But once established, a healthy coconut palm produces 50-100 nuts per year!
Tips & tricks for growing a compact coconut tree
Here's what I've learned after growing these space-friendly palms for years—tricks that'll help your tree thrive and produce reliably.
Root Preparation Matters: When you're soaking those roots for 30-60 minutes in Step 1, use lukewarm water—not cold tap water. Cold water can shock the roots, while lukewarm (around 70°F) helps them absorb moisture more effectively. I also add a pinch of sea salt to the water (about 1 teaspoon per gallon) to help prevent transplant shock. This simple step makes a huge difference in how quickly your palm establishes itself.
Sunlight Strategy: The 6-8 hours of direct sunlight required in Step 2 can be tricky if you're in a cooler climate. If your area gets less than 6 hours of full sun, supplement with a grow light for 4-6 hours daily during winter months. Position the light about 12-18 inches above the fronds to avoid burning them. I've seen palms struggle when they don't get enough light, especially in their first year.
Watering Wisdom: That watering basin you create in Step 3 isn't just for looks—it's crucial for deep watering. Fill it with 1-2 gallons of water and let it soak in completely before adding more. The key is to water deeply and infrequently rather than lightly and often. I test soil moisture by sticking my finger 2 inches into the soil—if it's dry, it's time to water. Overwatering is the silent killer of coconut palms, so always check before adding more water.
Fertilizer Timing: When you're fertilizing every 3 months in Step 4, I've found that the timing matters just as much as the amount. Apply the first feeding 2-3 months after planting, then continue the 3-month schedule. In late summer, switch to that potassium-rich fertilizer (0-0-50) to boost flowering for next season's harvest. This timing helps your palm build strength while preparing for fruit production.
Pro Tips for Small Coconut Tree
- Here's what I've learned after growing these space-friendly palms for years—tricks that'll help your tree thrive and ...
- Root Preparation Matters: When you're soaking those roots for 30-60 minutes in Step 1, use lukewarm water—not cold ta...
- Sunlight Strategy: The 6-8 hours of direct sunlight required in Step 2 can be tricky if you're in a cooler climate. I...
Frequently asked questions
Got questions about growing your own small coconut tree? You’re not alone—many gardeners wonder about timing, care, and even creative workarounds for limited spaces. Here are some of the most common queries (and answers!) to help you thrive:
How long does it take for a small coconut tree to produce fruit?
A dwarf coconut palm (Cocos nucifera 'Nana') typically starts flowering in 3–5 years under ideal conditions (warmth, full sun, and consistent moisture). Patience is key—young trees focus on root and canopy growth first! If you’re in a cooler climate, consider growing in containers to bring indoors during winter.
Can small coconut trees survive cold weather?
Most dwarf varieties tolerate brief dips to 25–30°F (-4 to -1°C), but prolonged frost will damage or kill them. For colder zones, grow in large pots (15+ gallons) and move them indoors near a sunny window or under grow lights. A frost cloth can offer extra protection during light freezes.
Are there alternatives to dwarf coconut trees for small spaces?
Yes! If space is tight, try these low-maintenance tropical palms:
- Pygmy date palm (Phoenix roebelenii) – Hardy to 15°F (-9°C) and grows just 6–10 ft tall.
- Areca palm (Dypsis lutescens) – Lush, fast-growing, and thrives indoors.
- Kentia palm (Howea forsteriana) – Slow-growing, elegant, and cold-resistant to 25°F (-4°C).
Why is my small coconut tree’s fronds turning yellow or brown?
Yellowing fronds often signal overwatering or nutrient deficiencies. Check the soil—it should be slightly moist but not soggy. Brown tips? Low humidity or fluoride buildup (from tap water) may be the culprit. Try:
- Watering deeply but less frequently (once a week, depending on climate).
- Flushing soil with rainwater or distilled water monthly.
- Fertilizing with a balanced palm fertilizer (10-10-10) every 2–3 months.
How often should I prune a small coconut tree?
Prune only dead or yellowing fronds—never more than 1/3 of the canopy at once. For dwarf varieties, trim 1–2 fronds per year to encourage new growth. Use sterilized pruners to avoid disease, and dispose of debris far from the tree (it can harbor pests). Pro tip: Wear gloves—palm fronds can be sharp!
Wrapping up and next steps
Growing a small coconut tree is a rewarding journey that brings tropical beauty and fresh harvests to your space—no matter how limited!
With the right pruning techniques, you’ll ensure a healthy, compact canopy that thrives year-round. Remember: patience and consistency are key. Whether you’re a seasoned gardener or a curious beginner, your little coconut tree will thank you with lush growth and delicious rewards.
Ready to take the next step? Start small:
- 🌱 Observe your tree’s growth weekly and adjust pruning as needed.
- 📅 Mark your calendar for seasonal maintenance—spring and fall are ideal!
- 👩🌾 Share your progress with fellow plant lovers for tips and encouragement!