Trees
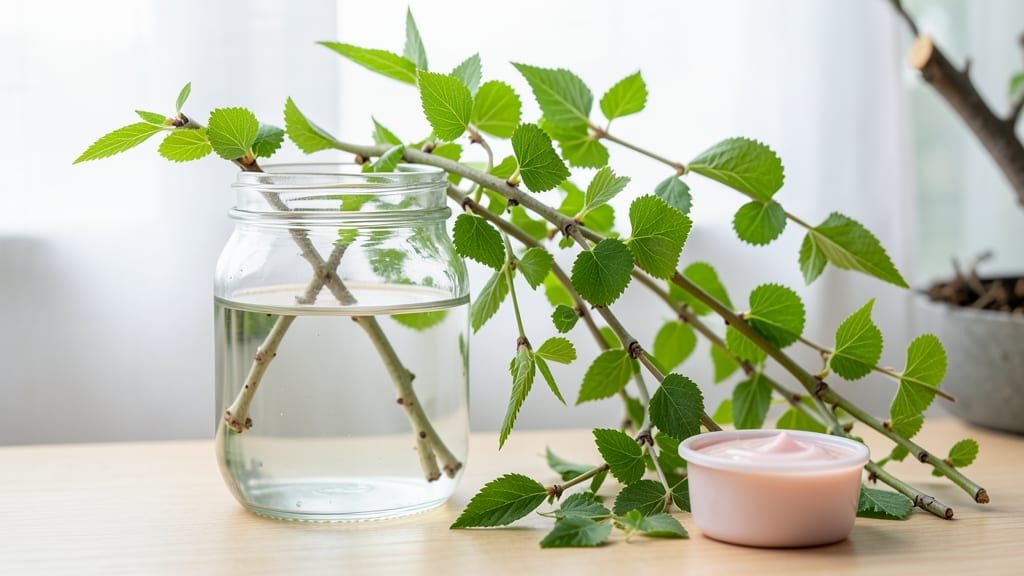
Rooting trees from branches turns yard waste into free, custom-grown shade trees—something I never thought possible until I tried it myself. 🌳 That first green shoot pushing through the soil after months of patience feels like magic, and the best part?
You’re growing a tree that matches your landscape perfectly, from the exact branch you chose. The process works for almost any tree, whether you’re propagating fruit trees, flowering dogwoods, or even your neighbor’s overgrown oak (with permission, of course).
Here’s the secret: timing, moisture, and a little rooting hormone make all the difference. You’ll need sharp pruners, a well-draining mix of perlite and peat moss, and a humid environment—think plastic bags over jars or a simple greenhouse setup.
Softwood cuttings (from current season’s growth) root faster in summer, while hardwood cuttings (from last year’s wood) do better in late fall or winter. Either way, keeping those cuttings consistently moist is non-negotiable.
Once rooted, you’ll transplant tiny saplings that look fragile but grow into sturdy trees with the same characteristics as their parent. Imagine free shade, privacy, or even fruit in just a few years—all from a branch you might’ve tossed.
The payoff is worth the wait, especially when you avoid common pitfalls like overwatering or using cuttings that are too old or diseased. With the right approach, success rates climb to 70-90%, and that first harvest of homegrown apples or the sight of your dogwood blooming makes every step worthwhile.
This method works for urban yards, rural homesteads, or even balcony gardens with dwarf varieties. Whether you’re replacing a lost tree or just experimenting, you’ll end up with a living legacy—one that grows right in your own backyard.
Ready to turn branches into beauty? Let’s get started with the right cuts and conditions for your climate.
📚 In This Guide
- What you need
- Instructions
- Tips and common mistakes
- Wrapping up and next steps
What you need
- ● Mature branches: Healthy, disease-free cuttings (4–6 inches long, pencil-thick or thicker). Choose from semi-hardwood (late spring to early fall) or hardwood (dormant season).
- ● Pruning shears or saw: Sharp, clean tools (sterilize with rubbing alcohol to prevent contamination).
- ○ Rooting hormone: A powder or gel (e.g., Rootone) to boost success rates. Optional but recommended!
- ● Well-draining potting mix: A blend of perlite, vermiculite, and peat moss (or a pre-mixed propagation mix). Avoid garden soil—it’s too dense!
- ● Containers: Small pots (4–6 inches wide) with drainage holes, or a shallow tray with holes for multiple cuttings.
- ● Plastic bags or humidity dome: To create a mini greenhouse effect (e.g., a clear plastic bottle cut in half).
- ● Misting bottle: For gentle hydration—no drenching!
- ● Water: Room-temperature, filtered if possible (chlorine can harm cuttings).
- ● Heat mat: Keeps roots warm (70–75°F ideal) for faster growth.
- ● Fungicide: Like Mycorrhizal inoculant to prevent rot.
- ● Grow lights: If rooting indoors with limited sunlight.
- ● Labels & markers: Track varieties and planting dates!
Step-by-Step instructions for rooting trees from branches
Here's how to turn cuttings into thriving trees—tested over years of trial and error.
🌱 Step 1: Select and Prepare Healthy Branches
Choose branches that are pencil-thick (about ¼ to ½ inch in diameter) and 4-6 feet long. They should be from the current year's growth—look for flexible stems with green bark and no signs of disease. Cut just below a leaf node at a 45-degree angle using clean, sharp pruners.
Strip off all but the top 3-4 leaves to reduce moisture loss. You'll see small bumps at the base of where leaves attach—these are the nodes where roots will form. Remove any flowers or fruit clusters, as they drain energy the cutting needs for root growth.
💧 Step 2: Create the Rooting Hormone Mixture
Fill a small container with 1 cup of water and add 1 tablespoon of honey. Stir until fully dissolved—this natural sugar solution provides energy for root development. For stronger results, add ½ teaspoon of cinnamon (it contains antifungal properties). Mix well and let it sit for 10 minutes before use.
Here's the thing—this mixture works better than store-bought rooting hormones for many tree species. The honey feeds microbial activity around the cutting, while the cinnamon prevents rot. You'll notice bubbles forming as the mixture activates—this is good! Use it within 24 hours for best results.
☀️ Step 3: Plant Cuttings in Moist Growing Medium
Fill a clean container with 6 inches of moist perlite (not soil—it compacts too much). Perlite provides excellent drainage while retaining enough moisture. Dip the cut end of each branch into your honey-cinnamon mixture for 10-15 seconds, then push it 2-3 inches deep into the perlite at a slight angle.
Space your 4 cuttings about 2 inches apart in the container. Gently pat the perlite around the base to secure the cuttings without compacting it. Place the container in a location with bright, indirect light—no direct sun yet. You'll see condensation form on the container walls within a few days—that's normal and indicates proper humidity levels.
🌿 Step 4: Maintain Ideal Conditions for Root Growth
Keep the perlite consistently moist but never soggy. Water when the top ½ inch feels dry to the touch. A spray bottle works best—avoid pouring water directly on the cuttings. Cover the container with a clear plastic bag secured with rubber bands to create a humidity dome. This traps warmth and moisture, which speeds up root formation.
Rotate the container a quarter turn daily so all cuttings receive even light. You'll notice tiny white root hairs forming at the nodes in 4-6 weeks. Don't peek inside the humidity dome too often—each time you open it, you reset the humidity cycle. If you see mold developing, remove the dome for 1 hour daily to air it out.
⏰ Step 5: Transplant When Roots Establish
After 8-12 weeks, gently tug on each cutting. If you feel slight resistance (but not full strength), roots have formed. Remove the cuttings carefully and plant them individually in 4-inch pots filled with a mix of 50% perlite and 50% potting soil. Water lightly immediately after transplanting.
Place the pots in partial shade for the first week to reduce transplant shock. Gradually increase sunlight exposure over 2 weeks. You'll see new leaves emerge within 3-4 weeks—that's your signal everything is working. Once roots fill the 4-inch pots (usually 3-4 months), you can transplant them to their permanent location.
Tips & tricks for perfectly rooting trees from branches
Here's what nobody tells you about turning cuttings into thriving trees—lessons from years of trial and error.
Branch Selection Matters: In Step 1, you can't stress enough how important it is to choose branches from the current year's growth. These young stems are packed with energy for root development. I learned this the hard way after struggling with woody, older branches that refused to root. Look for stems that bend slightly without snapping—this flexibility indicates healthy, root-ready material. Also, avoid branches with any signs of disease or insect damage, even if they look otherwise healthy.
Timing is Everything: The 10-minute wait after mixing your rooting hormone solution in Step 2 is crucial. This gives the honey and cinnamon time to fully activate and create that bubbly microbial boost. I used to skip this step, thinking "what's 10 minutes?" but I noticed a significant difference in root formation when I followed it exactly. Pro tip: Use a clean, glass container for mixing—it lets you see those bubbles forming, which means your solution is working!
Light and Humidity Balance: In Step 4, that bright indirect light is non-negotiable. Direct sunlight can scorch your cuttings while they're establishing roots, but too little light means they won't have the energy to grow. I place my setups near an east-facing window where they get morning sun but afternoon shade. The humidity dome is equally important—condensation on the plastic bag walls is your sign you've got the perfect environment. Just remember, every time you peek inside, you're letting moisture escape, so limit those checks.
Root Formation Cues: Those tiny white root hairs you'll see in 4-6 weeks are your first sign of success, but don't stop there. In Step 5, when you're checking for root establishment, look for that slight resistance when you gently tug—it should feel like the cutting is holding on but not completely anchored. I've found that if you wait until you feel full resistance, you might be pulling too hard and damaging those delicate new roots. Patience here pays off with stronger, healthier trees.
Pro Tips for Rooting Trees From Branches
- Here's what nobody tells you about turning cuttings into thriving trees—lessons from years of trial and error.
- Branch Selection Matters: In Step 1, you can't stress enough how important it is to choose branches from the current year's growth.
- Timing is Everything: The 10-minute wait after mixing your rooting hormone solution in Step 2 is crucial.
Frequently asked questions
Got questions about rooting trees from branches? You’re not alone! Here are some of the most common queries—and their answers—to help you succeed.
Which branches are best for rooting?
Look for semi-hardwood or hardwood cuttings (not soft, new growth) from healthy, disease-free branches. Ideal candidates are about pencil-thick (½ inch) and 6–12 inches long. Avoid branches with flowers or fruit—they’ll drain energy from rooting.
How long does it take for roots to form?
Patience is key! Most trees develop roots in 4–12 weeks, depending on the species, humidity, and care. Check for roots by gently tugging the cutting—if resistance meets your fingers, it’s rooted! Some fast growers (like willows) may root in just 2–3 weeks.
Do I need a greenhouse or can I root branches indoors?
You can root indoors with the right setup! Use a humidity dome (like a plastic bag with holes) or a propagator to mimic a greenhouse. Place cuttings near a bright, indirect light source (no direct sun) and maintain 60–70% humidity. A windowsill or under grow lights works well.
My cuttings are rotting—what went wrong?
Overwatering or poor airflow are the top culprits. Ensure your growing medium (perlite, sand, or peat) is moist but not soggy. Trim the bottom leaves to reduce moisture loss, and avoid sealing cuttings in airtight containers. If mold appears, increase airflow and reduce watering.
Can I root branches from any tree?
Most trees can be rooted, but some are easier than others. Fast-rooters include willows, poplars, and fruit trees (like apples or cherries). Tricky trees (e.g., oaks, maples) often need rooting hormone or grafting. Research your tree’s species for the best method!
Wrapping up and next steps
Rooting trees from branches is a rewarding way to propagate your favorite plants and expand your green space—without breaking the bank! 🌱 Whether you’re reviving a beloved tree or experimenting with new species, the key lies in patience, proper technique, and a little green thumb love.
Now that you’re armed with the right tools and knowledge, why not give it a try today? Start small with a single cutting, and soon, you’ll be watching roots sprout and new life grow right before your eyes.
🌟 Ready to Grow?
Pick a branch, gather your supplies, and let nature do the rest. Happy rooting—and may your garden flourish!