
Pruning
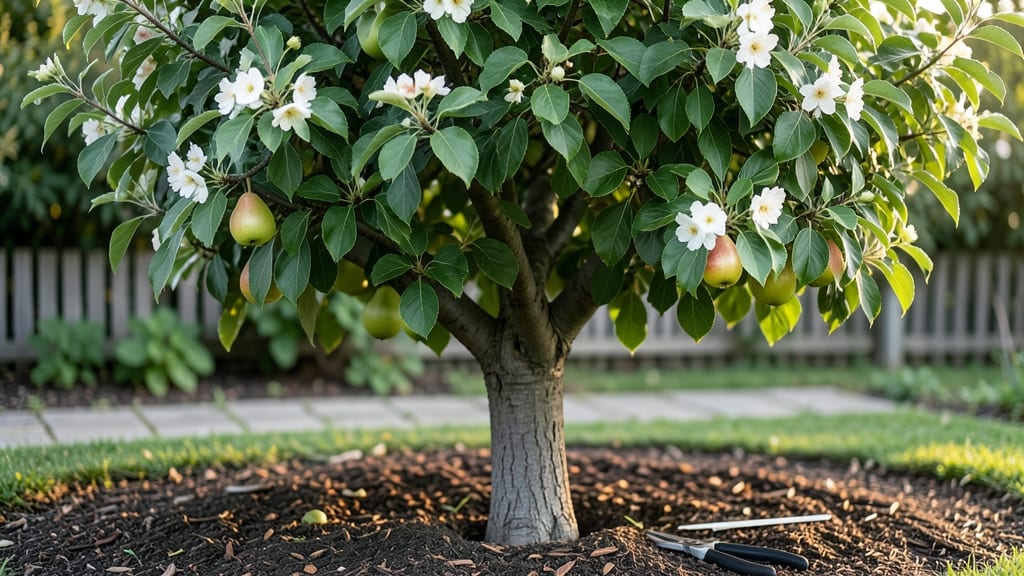
Late winter is the secret weapon for your the Orient pear tree's best bloom season ever—thicker branches, more flowers, and fewer hollow stems. ✨ I've pruned mine for three years now, and the difference in fruit production is staggering.
The key is timing: when the tree is still dormant but the first buds are swelling.
You'll need sharp pruning shears, rubbing alcohol for cleaning cuts, and a bucket for clippings. Start by removing dead or crossing branches first—these compete with fruit production. Then shape the tree by cutting back last year's growth by about one-third, always making cuts at 45-degree angles just above outward-facing buds.
This opens the center to sunlight and air, which is crucial for fruit set.
What you end up with is a tree that bursts into blossoms in spring and carries fruit through summer. The pears develop sweeter flavors when grown on open branches, and the tree itself becomes more resilient to disease.
I've seen my neighbors' neglected pear trees struggle with weak growth—this method changes that completely.
Works equally well for young trees or mature ones needing rejuvenation. The same principles apply whether you're shaping a new tree or restoring an older one. Here's how to do it right the first time—no guesswork involved.
📚 In This Guide
- What you need
- Instructions
- Tips and common mistakes
- Wrapping up and next steps
What you need
- ● Pruning shears: Bypass pruners (sharp, clean, and disinfected—think of them as your tree’s tiny surgeons! 🩺). Quantity: 1 pair (or 2 if your tree is large).
- ● Loppers: For thicker branches (½"–1½" diameter). Quantity: 1 pair.
- ● Pruning saw: For branches thicker than 1½". Quantity: 1 (with a fine-toothed blade for clean cuts).
- ● Gloves: Heavy-duty gardening gloves (to protect against thorns and rough bark). Quantity: 1 pair.
- ● Disinfectant: 70% isopropyl alcohol or a tree wound sealant (to prevent disease spread). Quantity: Small bottle or spray.
- ● Rag or paper towels: For cleaning tools between cuts. Quantity: 2-3.
- ● Ladder or step stool: If your tree is taller than 6 feet. Quantity: 1 (ensure it’s stable!).
- ○ Tarp or drop cloth: To collect debris and protect the ground. Quantity: 1 (optional but handy!).
- ● Hand saw: For precision cuts on stubborn branches.
- ● Pole pruner: For high-up branches (if you’re avoiding the ladder).
- ● Marking twine or flags: To tag branches for removal (great for planning!).
- ● Pruning sealant: Controversial but some swear by it for large cuts (use sparingly!).
- ● Notebook & pencil: To jot down notes on your tree’s structure post-prune.
How to prune your Orient pear tree for healthier growth
Late winter's the perfect time to shape your tree—here's how to do it right.
✂️ Step 1: Gather Your Tools and Safety Gear
Start by grabbing your sharp pruning shears and loppers—dull blades tear wood and invite disease. I always wear gloves to protect my hands from splinters and sap. If your tree's over 2 inches thick, switch to a pruning saw for clean cuts. Disinfect your tools with rubbing alcohol to prevent spreading any fungal spores from last season.
Check the weather forecast—wait for a dry, calm day between 40-60°F. Pruning on a windy day can stress the tree, and wet conditions slow healing. I like to schedule this on a Saturday morning when I can take my time without rushing.
🌿 Step 2: Identify and Remove Dead or Diseased Wood
Scan the tree for branches that are brown, mushy, or hollow—these won't recover. Dead wood often looks like a dried-out stick with no bark. Cut these out first, making your cuts just outside the branch collar (the swollen area where the branch meets the trunk). This ensures the tree can seal the wound properly.
Look for signs of disease like black spots, oozing sap, or fungal growth. Remove any infected branches immediately, then dispose of them in the trash—not your compost. Healthy branches should have a smooth bark and green leaves when you gently scrape the bark with your thumbnail.
✂️ Step 3: Thin Out Crowded Branches for Better Airflow
Your goal is to let light and air reach the center of the tree. Remove branches that cross or rub against each other—they'll eventually create wounds. I start at the top and work my way down, cutting branches that grow inward or downward. Aim to keep the tree's shape open, like an umbrella.
For every branch you remove, check if it's thicker than your wrist. If it is, make the cut in three stages: First, cut a notch on the underside of the branch about 1/3 of the way through. Then, cut through the top of the branch about 1-2 inches beyond the notch. Finally, remove the remaining stub. This method prevents the branch from tearing.
☀️ Step 4: Shape the Tree for Optimal Sunlight Exposure
Step back and visualize how sunlight will hit the tree throughout the day. Remove any branches growing directly toward the center or blocking light from reaching the lower branches. This encourages fruit production and prevents fungal issues. I like to keep the tree's canopy slightly wider at the top than the bottom—this mimics its natural growth pattern.
Pay special attention to water sprouts (fast-growing, vertical shoots) and suckers (shoots growing from the base). These steal energy from fruit production. Cut them out completely at the base. You'll know you're doing well when you can see light filtering through the branches on a sunny day.
🌱 Step 5: Clean Up and Apply Wound Treatment
After pruning, rake up all the fallen branches and debris. This reduces pests and diseases hiding in old wood. I like to compost the healthy-looking branches, but diseased ones go straight into the trash. Sweep the ground beneath the tree to remove any small twigs.
For larger cuts, apply a wound dressing or pruning sealant to protect the tree from infection. Focus on cuts bigger than 1/4 inch thick. While sealants aren't always necessary, they can help in wet climates or if you're pruning late in the season. Let the sealant dry completely before watering the tree.
Tips & tricks for pruning your Orient pear tree
Here's what nobody tells you about getting the most out of your late winter pruning session.
Tool Prep is Everything: Before you even touch the tree, take 10 minutes to sharpen your pruning shears and loppers. A dull blade crushes wood instead of making clean cuts, which invites disease. I use a file to sharpen mine—it takes about 2 minutes and makes all the difference. Also, keep a small bottle of rubbing alcohol handy to disinfect tools between cuts, especially when moving from diseased to healthy branches. This simple step prevents spreading fungal spores throughout your tree.
Visual Cues for Healthy Wood: In Step 2, when identifying dead or diseased branches, look for these telltale signs: Healthy wood should snap cleanly when you bend it, while dead wood will break with a dry, brittle sound. For disease detection, gently scrape the bark with your thumbnail—healthy bark should be smooth, while infected areas often have rough textures or unusual discoloration. This quick check saves you from accidentally pruning perfectly good branches.
Three-Stage Cutting Technique: The three-stage cutting method in Step 3 isn't just for thick branches—it's a game-changer for any cut over 1/2 inch thick. The notch you create first prevents the branch from tearing away from the trunk when you make the final cut. I've seen too many trees develop ugly tears from improper cutting, which creates perfect entry points for pests and diseases. Take your time with this step—rushing leads to mistakes that take years to heal.
Sunlight Mapping: For Step 4, try this trick: Stand directly under your tree at midday and look up. You should be able to see light filtering through the branches. If you can't, that's your signal to remove some branches. I like to visualize the tree as an open umbrella—light should be able to reach all parts of the canopy. This sunlight mapping technique ensures your tree gets the energy it needs for strong blooms and fruit production next season.
Pro Tips for Orient Pear Tree
- Here's what nobody tells you about getting the most out of your late winter pruning session.
- Tool Prep is Everything: Before you even touch the tree, take 10 minutes to sharpen your pruning shears and loppers.
- Visual Cues for Healthy Wood: In Step 2, when identifying dead or diseased branches, look for these telltale signs: Healthy wood should snap cleanly when you bend it, while dead wood will break with a dry, brittle sound.
Frequently asked questions
Got questions about your Orient Pear Tree? You’re not alone!
Whether you're a first-time grower or a seasoned pruner, these common queries will help you keep your tree thriving. Dive in for quick, actionable answers.
When is the best time to prune an Orient Pear Tree for blooms?
The ideal window is late winter—just before buds swell but before they break. For most regions, this falls between February and early March. Pruning at this time promotes vigorous spring growth and maximizes flower production. Avoid pruning in fall or early winter to prevent frost damage or disease entry.
How much can I trim off my Orient Pear Tree without harming it?
Aim to remove no more than 25% of the tree’s canopy in a single session. For young trees, light pruning (10-15%) is often enough to shape growth. Focus on dead, diseased, or crossing branches first, then thin out excess growth to improve airflow. Over-pruning can stress the tree and reduce fruit yield.
What should I do if my Orient Pear Tree isn’t blooming after pruning?
Several factors could be at play: age (young trees may take 3-5 years to bloom), light exposure (ensure 6+ hours of sun daily), or nutrient deficiencies (test soil pH and fertilize with citrus-specific nutrients if needed). Also, cross-pollination is key—plant a second variety nearby if your tree lacks blooms. Patience and adjustments often yield results!
Can I use the same pruning techniques for an Orient Pear Tree as for other fruit trees?
While basic principles apply (e.g., removing dead wood, thinning branches), Orient Pear Trees benefit from specialized care. Avoid heavy heading cuts—they can spur excessive vegetative growth at the expense of flowers. Instead, prioritize open-center shaping and selective branch removal to encourage an upright, productive structure.
What do I do if my pruned branches ooze sap or develop black spots?
Sap oozing is normal but sterilize tools between cuts to prevent bacterial spread. Black spots or fungal growth? Act fast: prune infected areas 6+ inches below the damage, then apply a copper fungicide or organic spray (like neem oil). Keep the area clean and avoid overhead watering to deter future issues.
Wrapping up and next steps
Growing an Orient Pear Tree is a rewarding experience, especially when you master the art of late-winter pruning to encourage vibrant blooms and lush fruit.
By following the right techniques—like thinning branches, shaping your tree, and timing cuts—you’ll set the stage for a healthier, more productive harvest. Your efforts now will pay off with stunning flowers and delicious pears in the coming seasons!
Ready to take the next step? Grab your pruners, mark your calendar for late winter, and start planning your pruning session. For extra guidance, explore seasonal care tips or connect with local gardening groups to share your progress. Happy pruning! 🌸✂️