
Pruning
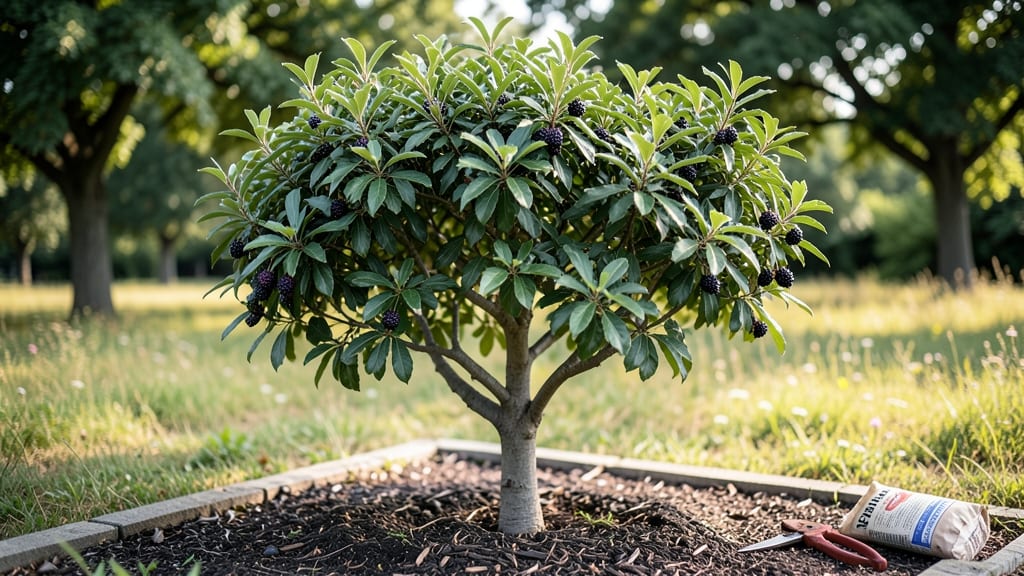
Growing a small mulberry tree in your urban backyard means fresh berries without the sprawling mess of traditional varieties. I planted a dwarf cultivar last spring, and this summer, its compact branches are heavy with purple fruit—just a few feet from my patio.
The secret isn’t just picking the right variety; it’s learning when and how to prune to keep it manageable while maximizing harvest.
Start with a dwarf or compact cultivar like ‘Illinois Everbearing’ or ‘Mulberry Tree Dwarf,’ which stay under 10 feet tall with proper care. These thrive in full sun with well-draining soil, and their shallow roots adapt well to containers if space is tight.
The pruning magic happens in late winter or early spring—cutting back 25% of last year’s growth opens the canopy to sunlight and air, preventing disease while encouraging fruit production.
By midsummer, you’ll see a neat, berry-laden tree that fits perfectly in small yards or even large pots. The fruit ripens in waves, so you’ll enjoy fresh berries for weeks, and the tree’s glossy leaves add seasonal interest.
Just avoid heavy pruning after mid-summer—it stresses the tree and delays next year’s harvest.
For container growing, choose a pot at least 18 inches wide with drainage holes and use a balanced fertilizer in early spring. Mulberries are tough once established, but young trees appreciate consistent moisture during their first year.
With this approach, you’ll have a productive, manageable tree that’s as easy to care for as it is rewarding to harvest.
📚 In This Guide
- What you need
- Instructions
- Tips and common mistakes
- Wrapping up and next steps
What you need
- ● Pruning shears: Bypass pruners (for cuts up to ½ inch thick) – 1 pair (look for bypass-style for cleaner cuts).
- ● Loppers: For thicker branches (½ to 2 inches) – 1 pair (with a long handle for reach).
- ● Pruning saw: For stubborn, larger branches (2+ inches) – 1 saw (bow or folding saw recommended).
- ● Gloves: Heavy-duty, cut-resistant gloves – 1 pair (mulberry thorns are no joke!).
- ● Disinfectant: 70% isopropyl alcohol or bleach solution (1 part bleach to 9 parts water) – small spray bottle (to sterilize tools between cuts).
- ○ Pruning sealant: Optional but helpful for larger cuts (1 small tube).
- ● Ladder: Sturdy, extendable ladder (height depends on tree size) – 1 (ensure it’s rated for your weight + tools).
- ● Safety gear: Safety glasses and long sleeves/pants (to protect from debris and thorns).
- ● Sharpener: File or sharpening stone for pruners/loppers (keep blades in top shape!).
- ● Tarp or drop cloth: To collect debris and protect your lawn/patio.
- ● Marking twine or flags: For tagging branches to remove (if pruning in stages).
- ○ Tree growth regulator: (e.g., hydrogen peroxide spray) – optional (to promote faster healing).
- ● Camera or sketchpad: To document the tree’s structure before pruning (great for beginners!).
Step-by-Step guide to pruning a compact mulberry tree for urban spaces
Here's how to maintain a small mulberry tree's shape while maximizing fruit production in tight spaces.
Assess the Tree Structure and Identify Key Branches
Start by examining the tree's overall shape and growth patterns. Look for the main scaffold branches—the primary limbs that form the tree's framework. These should be spaced 12-18 inches apart along the trunk and extend outward at a 45-60 degree angle. In a compact mulberry, you'll typically have 4-6 main branches radiating from the trunk.
Identify any suckers—vigorous shoots growing from the base or along the trunk. These compete with the main branches for nutrients and should be removed to maintain the tree's compact form. Use your pruning shears to cut suckers at the base, just above a bud or lateral branch. Mulberry suckers grow aggressively, so check for them twice yearly—once in early spring and again in late summer.
Next, locate any dead, diseased, or crossing branches. Dead branches appear dry and brittle, while diseased ones may show discoloration, fungal growth, or unusual leaf patterns. Crossing branches rub against each other, creating wounds that invite pests and diseases. Mark these branches with a small piece of tape or a flagging strip so you can address them during the pruning process.
Prune for Shape and Airflow During the Dormant Season
The best time to prune a mulberry tree for structural shaping is late winter or early spring, just before new growth begins. This allows the tree to heal quickly and ensures you don’t accidentally remove next year’s fruit buds, which form in late summer and early fall. Work on a dry, calm day to minimize stress on the tree and reduce the risk of spreading diseases through open wounds.
Begin by thinning out overcrowded branches to improve airflow and sunlight penetration. Aim to remove no more than 25% of the tree’s canopy in a single pruning session to avoid shocking the tree. Start with the smallest branches first, cutting them back to a bud or lateral branch just outside the branch collar—the swollen area where the branch meets the trunk or another branch.
For branches that are too large to cut with hand pruners, use a pruning saw to make clean cuts. Avoid leaving stubs, as these can invite decay. After making each cut, step back and assess the tree’s balance. The goal is to create an open-center shape that allows sunlight to reach the inner branches, encouraging even fruit production. In a compact mulberry, this means keeping the center slightly open while maintaining a rounded, bushy silhouette.
Maintain Size and Fruit Production Through Seasonal Pruning
After the initial dormant-season pruning, perform light maintenance pruning throughout the growing season to keep the tree compact and productive. In early summer, remove any water sprouts—fast-growing, vertical shoots that detract from the tree’s shape. These sprouts often appear at the ends of branches or along the trunk and can be pruned back to a bud or lateral branch without significantly impacting the tree’s vigor.
During late summer, focus on fruit-bearing branches. Mulberry fruit forms on new growth, so avoid heavy pruning at this time. Instead, trim back any branches that have produced fruit to encourage the development of next year’s fruiting wood. Cut these branches back by one-third to one-half their length, just above a bud or lateral branch. This promotes bushier growth and more fruit production in subsequent seasons.
Finally, conduct a light cleanup pruning in early fall to remove any dead, diseased, or damaged branches that may have appeared during the growing season. This keeps the tree healthy and prepares it for winter. Avoid heavy pruning at this time, as it can stimulate new growth that may not harden off before cold temperatures arrive.
Post-Pruning Care to Ensure Healthy Regrowth
After pruning, the tree will focus its energy on healing wounds and producing new growth. To support this process, apply a balanced, slow-release fertilizer around the tree’s drip line—the area directly under the outer canopy. Use ½ cup of 10-10-10 fertilizer per inch of trunk diameter, spread evenly over the soil surface and lightly worked into the top 2 inches of soil. Water the tree deeply to help the fertilizer dissolve and reach the roots.
Monitor the tree closely for signs of stress, such as yellowing leaves, wilting, or excessive leaf drop. These can indicate over-pruning or environmental stress. If you notice these symptoms, reduce watering slightly and avoid fertilizing until the tree shows signs of recovery. Mulberry trees are generally resilient, but they do best when pruned gradually and given time to adjust.
Keep the base of the tree clear of debris, including fallen leaves, fruit, and grass. This reduces the risk of fungal diseases and pests. Water the tree deeply once a week during dry periods, ensuring the soil is moist but not waterlogged. A 3-inch layer of mulch around the base of the tree helps retain moisture and regulate soil temperature, which is especially important for young or recently pruned trees.
Tips & tricks for perfect compact mulberry tree pruning
Mastering the art of pruning a compact mulberry tree takes patience and precision—here's how to elevate your technique for healthier growth and better fruit production.
Branch Angle Awareness: When assessing your tree's scaffold branches in Step 1, focus on maintaining that 45-60 degree angle from the trunk. Branches growing too upright (less than 45 degrees) create weak attachment points that can snap under fruit weight. I've seen too many compact mulberries develop structural issues because their branches were allowed to grow too vertically. Use a small protractor or even a DIY angle guide made from cardboard to verify angles during your assessment.
Sucker Management Strategy: Mulberry suckers are relentless—if you don't stay on top of them, they'll completely overtake your compact tree's shape. Here's my game-changer: After your initial spring pruning, apply a 2-inch wide band of horticultural paint around the trunk just above the soil line. This creates a visual barrier that makes new suckers instantly visible. Check this painted zone weekly during growing season, removing any new shoots immediately with clean pruning shears. This simple technique has saved me countless hours of hidden sucker removal.
Canopy Thinning Precision: During your dormant season pruning in Step 2, remember that removing no more than 25% of the canopy is crucial—but don't let that become an excuse for lazy pruning. Instead of just removing branches, focus on creating intentional gaps between branches. Aim for 6-12 inches of space between scaffold branches to maximize sunlight penetration. I like to visualize the tree's canopy as an umbrella—you want sunlight to reach every part of the underside, not just the outer edges.
Late Summer Pruning Insight: When trimming fruit-bearing branches in late summer (Step 3), look for branches that produced fruit but now have long, bare sections with only a few leaves at the tips. These are prime candidates for cutting back by one-third to one-half their length. The key is to cut just above a healthy outward-facing bud—this encourages new growth that will bear fruit next season while maintaining your tree's compact shape.
Pro Tips for Mulberry Tree Small
- Mastering the art of pruning a compact mulberry tree takes patience and precision—here's how to elevate your technique for healthier growth and better fruit production.
- Branch Angle Awareness: When assessing your tree's scaffold branches in Step 1, focus on maintaining that 45-60 degree angle from the trunk.
- Sucker Management Strategy: Mulberry suckers are relentless—if you don't stay on top of them, they'll completely overtake your compact tree's shape.
Frequently asked questions
Got questions about keeping your mulberry tree small while maximizing fruit and beauty? Here are some of the most common concerns—plus quick, practical answers to help you prune like a pro!
How often should I prune a small mulberry tree to keep it compact?
Prune your mulberry tree twice a year: once in late winter/early spring (before buds swell) to shape it, and again in summer after fruiting to control growth. Light trims between harvests can also encourage bushier growth. Avoid heavy cuts in fall—the tree needs time to harden off for winter!
Can I prune a mulberry tree too much? What are the signs?
Yes! Over-pruning (cutting back more than 25% of the canopy at once) stresses the tree, reducing fruit production. Signs include fewer berries, yellowing leaves, or weak new growth. If this happens, skip a pruning season and focus on watering and fertilizer to recover.
Should I remove all the suckers growing from the base of my mulberry tree?
Not necessarily! Remove 50-70% of suckers to redirect energy to the main trunk, but leave a few (2-3) to encourage a fuller shape. If you remove all suckers, the tree may become top-heavy and less productive. Use a sharp spade to cut at the base—never pull, or you’ll damage roots.
What’s the best way to prune a mulberry tree for maximum fruit yield?
Focus on open-center pruning: Thin out 1-2 old branches (over 3 years old) each year to improve airflow and sunlight penetration. Cut back last year’s fruit-bearing branches by 1/3 to stimulate new growth. Avoid "lion’s tailing" (cutting all branches to a stub)—this reduces future harvests!
Are dwarf mulberry trees a good alternative for small spaces?
Not exactly! True dwarf mulberry varieties don’t exist, but ‘Illinois Everbearing’ or ‘Red Ruby’ grow slower (10-15 ft tall) than standard types. For container growing, choose a potted mulberry tree (like ‘Mitcham’) and prune aggressively. Just know: even "small" mulberries need at least 6-8 hours of sun and regular pruning to stay manageable.
Why are my mulberry tree’s leaves turning yellow after pruning?
Yellow leaves post-pruning usually mean over-trimming or nutrient shock. Check for:
- Too many cuts (stick to 10-20% of the canopy per session).
- Underwatering—mulberries need 1-2 inches of water weekly.
- Poor soil? Amend with compost or a balanced fertilizer (10-10-10) in spring.
Wrapping up and next steps
Growing a small mulberry tree in your urban garden is totally doable—especially when you master compact canopy pruning! With the right tools, timing, and techniques, you’ll keep your tree healthy, productive, and perfectly sized for your space. Remember: patience and consistency are key!
Ready to take the next step? Start by monitoring your tree’s growth after each pruning session and adjust as needed. Before you know it, you’ll have a thriving, manageable mulberry tree that’s both beautiful and bountiful. Happy pruning! 🌿✂️