
Pruning
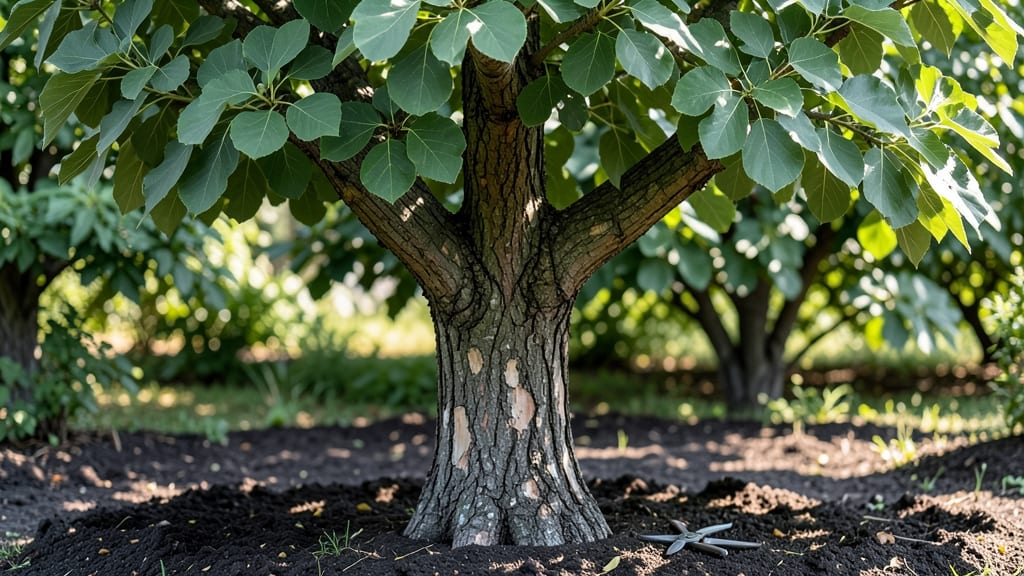
Your mulberry tree bark holds the key to stronger roots and sweeter fruit. 🌱 I’ve pruned mulberries for years, and the difference between healthy trees and struggling ones comes down to how you handle the bark—whether you’re shaping the canopy or using it as mulch.
The rough, papery texture might seem tough, but it’s packed with nutrients when broken down properly.
When pruning, focus on removing dead or crossing branches first—they’re the weak spots where disease lurks. Then, use the bark itself as a natural mulch around the base: it retains moisture, suppresses weeds, and slowly releases nutrients back into the soil.
My trees fruit twice as heavily after a good pruning and mulching session, and the bark keeps the roots cool in summer.
You’ll end up with a tree that thrives year-round, with glossy leaves and clusters of ripe berries. The bark’s natural properties mean less watering, fewer pests, and a stronger structure that supports heavy fruit loads. Plus, the process is simpler than you’d think—just a few tools and a little patience.
Works for both young saplings and mature trees, whether you’re growing in a backyard or a larger orchard. The same principles apply to keeping your mulberry productive and pest-free. Let’s get those branches in shape!
📚 In This Guide
- What you need
- Instructions
- Tips and common mistakes
- Wrapping up and next steps
What you need
- ● Pruning shears: Sharp, bypass type (for clean cuts) – 1 pair (3–5" blades recommended for small branches).
- ● Loppers: For thicker branches (½"–1½" diameter) – 1 pair (with a ratcheting mechanism for ease).
- ● Pruning saw: For branches >1½" in diameter – 1 (with a curved blade for precision).
- ● Disinfectant: 70% isopropyl alcohol or rubbing alcohol (to sterilize tools between cuts).
- ● Gloves: Heavy-duty, cut-resistant (to protect hands from thorns and splinters).
- ● Mulberry tree bark: Healthy, mature bark (focus on branches you’re pruning—no need to harvest extra!).
- ● Trash bags: 2–3 (for collecting pruned branches and debris).
- ● Pruning sealant: (e.g., tree wound dressing) – to protect large cuts (½" diameter or wider).
- ● Ladder: Sturdy, extendable (if tree exceeds 10–12 feet).
- ● Safety glasses: (to shield eyes from debris).
- ● Notebook & pen: (to jot down pruning notes or mark branches for future reference).
- ● Hand sanitizer: (for post-pruning clean-up!).
Step-by-step guide to pruning mulberry trees for optimal bark health
Healthy bark starts with the right cuts—here’s how to prune for strength and fruitfulness.
✂️ Step 1: Time Your Pruning for Best Results
Prune mulberry trees in late winter to early spring before new growth begins. This is when the tree is dormant but about to wake up—ideal timing for healing. Avoid pruning in fall, as new growth won’t harden off before winter, leaving cuts vulnerable to disease.
If you must prune later in the season, do it in early summer after the fruit has ripened. Never prune in late summer or fall, as this stresses the tree and weakens next year’s bark development. Watch for buds swelling along branches—that’s your cue that spring pruning season is near.
✂️ Step 2: Remove Dead, Diseased, or Crossing Branches First
Start by cutting out any dead, diseased, or broken branches—these are the weak links that invite pests and rot. Use clean, sharp pruning shears to make cuts at a 45-degree angle, about ¼ inch above a healthy bud or branch collar. This prevents water from pooling and rotting the bark.
Next, remove branches that cross or rub against each other. These create wounds where bark can split or peel over time. Look for branches growing inward—they’ll compete for sunlight and weaken the tree’s structure. Make your cuts just outside the branch collar to encourage smooth healing.
✂️ Step 3: Thin the Canopy for Airflow and Light
Step back and assess the tree’s shape. Mulberries thrive with an open, airy canopy—this prevents humidity buildup and reduces fungal risks. Remove 20-30% of the smallest, weakest branches to improve airflow. Focus on branches growing straight up or downward, as these don’t contribute to a balanced structure.
Thinning also boosts fruit production by letting sunlight reach inner branches. Aim for a well-spaced framework where light can penetrate to the tree’s center. If you see clusters of branches growing too close, prioritize removing the smallest ones—this encourages stronger growth from the remaining branches.
✂️ Step 4: Shape the Tree for Balance and Strength
Mulberries respond well to light structural pruning—avoid heavy cuts that shock the tree. Use your hands to visualize the final shape: a slightly rounded crown with a strong central leader (main trunk). Remove any branches that grow at sharp angles (less than 45 degrees) from the trunk, as these are prone to breaking.
For mature trees, limit pruning to no more than 25% of the canopy in a single season. If you’re pruning a young tree, focus on removing competing leaders (multiple main trunks) to establish a single, strong central stem. After pruning, step back—your goal is a tree that looks natural but is structurally sound.
🌿 Step 5: Clean Up and Protect the Tree
Rake up all clippings and debris from under the tree—leaving them invites pests and disease. Disinfect your pruning tools with rubbing alcohol between cuts to prevent spreading bacteria or fungi. Seal larger cuts (over ½ inch in diameter) with pruning sealant to protect the bark from cracking or splitting.
Water the tree deeply after pruning to help it recover. Mulberries are resilient, but proper aftercare ensures the bark heals cleanly. Avoid heavy fertilization right after pruning—let the tree focus on healing before pushing new growth. In a few weeks, you’ll see fresh buds forming along the pruned branches—that’s your sign the tree is thriving.
Tips & tricks for perfect mulberry tree pruning
Took me years to figure out these pruning secrets—here's how to avoid the mistakes that ruin mulberry bark health.
Timing is Everything: The late winter to early spring window is critical because the tree's sap is still dormant but about to wake up. I learned this the hard way after seeing bark split on trees pruned too early in spring. Watch for those swollen buds—they're your green light to start pruning. If you must prune later, wait until after fruit ripens in early summer to avoid stressing the tree.
Cutting Technique Matters: That 45-degree angle isn't just for looks—it prevents water from pooling in the wound. I used to make straight cuts and noticed bark peeling years later. Always cut just outside the branch collar where the branch meets the trunk. For branches thicker than your thumb, make a second cut about 6 inches back to prevent tearing. Use sharp tools—dull blades crush tissue and invite disease.
Strategic Canopy Thinning: The 20-30% rule for removing small branches might seem drastic, but it's what creates that open framework for airflow. I used to remove too few branches and ended up with fungal issues in the center. Focus on vertical growers and branches that don't contribute to the tree's shape. This isn't about making the tree look sparse—it's about creating a balanced structure where sunlight reaches all branches.
Aftercare Prevents Problems: That deep watering after pruning isn't just for show—it helps the tree recover by replacing lost moisture through the fresh cuts. I skipped this once and saw bark drying out along the pruned areas. Avoid fertilizing immediately after pruning; the tree needs to focus on healing rather than pushing new growth. A light application of mulch around the base helps retain moisture during recovery.
Pro Tips for Mulberry Tree Bark
- Took me years to figure out these pruning secrets—here's how to avoid the mistakes that ruin mulberry bark health.
- Timing is Everything: The late winter to early spring window is critical because the tree's sap is still dormant but about to wake up.
- Cutting Technique Matters: That 45-degree angle isn't just for looks—it prevents water from pooling in the wound.
Frequently asked questions
Got questions about mulberry tree bark and pruning? You’re not alone! Here are answers to the most common queries to help you keep your tree thriving—whether you’re a seasoned gardener or just starting out.
When is the best time to prune mulberry trees to avoid damaging the bark?
The ideal window is late winter or early spring (just before buds swell) when the tree is dormant. Avoid pruning in fall or winter, as cold weather can stress the bark and invite pests. If you must prune in summer, do it early to minimize stress—just avoid extreme heat!
Can I prune mulberry bark incorrectly, and how do I fix mistakes?
Yes! Common mistakes include cutting too close to the trunk (damaging the bark) or leaving jagged edges. To fix it:
- Seal cuts: Use pruning sealant on large wounds to prevent disease.
- Shape properly: Make cuts at a 45-degree angle just outside the branch collar (the swollen area where the branch meets the trunk).
- Thin out: Remove no more than 25% of the canopy in one session to avoid shocking the tree.
Does pruning mulberry bark affect fruit production?
Pruning boosts fruit production by improving airflow and sunlight exposure! Focus on:
- Removing dead or crossing branches (they compete for resources).
- Thinning out overcrowded growth near the trunk.
- Avoiding heavy pruning in fruit-bearing years—light shaping works best.
Are there alternatives to pruning mulberry bark if I’m not confident?
If pruning feels overwhelming, try these low-maintenance options:
- Hire a pro: Local arborists specialize in fruit tree pruning and can tailor cuts to your mulberry’s needs.
- Use tools wisely: Start with hand pruners for small branches, then graduate to a pruning saw for thicker limbs.
- Watch and wait: Mulberry trees are resilient—focus on removing only obvious deadwood if you’re unsure.
How do I tell if mulberry bark damage is from pruning or pests?
Pruning damage usually looks like clean cuts with no discoloration or oozing sap. Pest-related issues (like borers or scale) show as:
- Holes or sawdust-like frass in the bark.
- Cracked or blistered bark with sticky residue.
- Wilting leaves or unusual growths (e.g., mushrooms).
Wrapping up and next steps
Mastering the art of pruning mulberry tree bark is your ticket to a thriving, fruit-bearing tree that rewards you for years to come! 🌿 By following the right techniques—timing, tool care, and strategic cuts—you’ll promote healthier growth, better air circulation, and a bountiful harvest.
Whether you're a seasoned gardener or just starting, every snip brings you closer to a flourishing tree.
Ready to take the next step? Grab your pruners, mark your calendar for the best pruning season, and watch your mulberry tree transform. Happy pruning—your future fruit feast awaits! 🍇✨