
Pruning
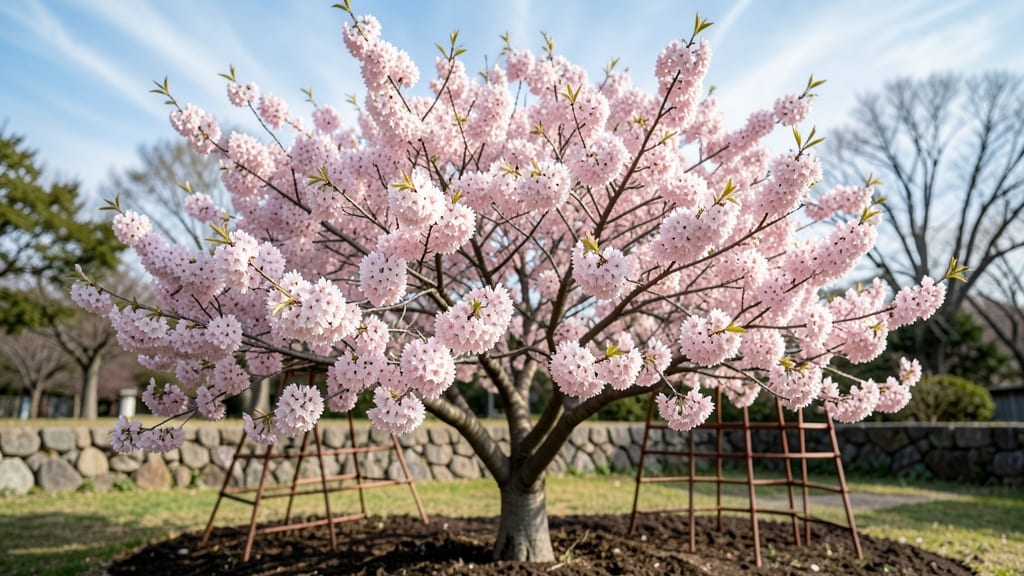
The Mount Fuji flowering cherry tree isn’t just a tree—it’s a living postcard of Japan’s most iconic peak, right in your Pacific Northwest yard. 🌸 Its delicate pink blooms cascade like snow against the mountain’s slopes, creating a breathtaking focal point that transforms any garden into a serene escape.
The real magic happens when you pair its dramatic form with the right pruning approach to ensure those blossoms return year after year, even through PNW’s chilly winters.
Here’s the thing—this tree thrives when you let its natural shape shine, but a few strategic cuts in late winter can open up the canopy for better light and air circulation.
I’ve seen Mount Fuji cherries in Portland and Seattle that look like living watercolors because their owners pruned just enough to encourage dense, healthy growth without sacrificing that dreamy, layered look. The key is working before buds swell, when the tree’s energy is still dormant but ready to respond.
What you’ll end up with is a tree that feels like a masterpiece, its branches heavy with blossoms in spring and its foliage turning a soft gold in fall. The scent alone—like cherry blossoms and nostalgia—will have neighbors stopping to ask where you got it.
And because it’s so cold-hardy, it survives PNW winters with minimal fuss, making it the ultimate low-maintenance showstopper.
Whether you’re planting it as a standalone specimen or near a patio, this tree demands space to stretch its branches wide—think 20-25 feet of drama. Pair it with hostas for shade, boxwoods for structure, or a gravel path to highlight its bark in winter.
The pruning guide ahead will keep it looking effortless, so you can focus on enjoying the view.
📚 In This Guide
- What you need
- Instructions
- Tips and common mistakes
- Wrapping up and next steps
What you need
- ● Pruning shears: Bypass pruners (sharp, clean, and disease-resistant) – 1 pair (for small branches).
- ● Loppers: 8–10" bypass loppers for medium branches (½"–2" thick) – 1 pair.
- ○ Pruning saw: Curved-tooth saw for thick branches (2"+) – 1 (optional but handy!).
- ● Disinfectant: 70% isopropyl alcohol or bleach solution (1:9 ratio) – small bottle (to prevent spread of bacteria/fungus).
- ● Rubbing alcohol wipes: For quick tool cleaning between cuts – pack of 50+.
- ● Garden gloves: Cut-resistant (nitrile-coated) – 1 pair (protects from thorns and sap).
- ● Tarp or drop cloth: Heavy-duty (10’x12’ or larger) – 1 (to collect debris).
- ○ Pruning sealant: Tree wound paint (optional, for cuts >½") – small jar.
- ● Best time to prune: Late winter or early spring (before buds swell) – aim for February–March in PNW.
- ● Weather check: Prune on a dry, frost-free day (avoid wet or freezing conditions).
- ● Tree condition: Inspect for dead, diseased, or crossing branches before starting.
- ● Safety first: Wear closed-toe shoes and ensure the area is clear of pets/kids.
- ● Extension pole: For hard-to-reach branches – 1 (6–10’).
- ● Sharpener: File or pruner sharpener – 1 (keep blades in top shape!).
- ● Notebook/pencil: To sketch pruning plan or note branch locations.
- ● Mulch: Organic mulch (wood chips) – 5–10 gallons (post-pruning to retain moisture).
Step-by-Step pruning guide for your Pacific Northwest Mount Fuji cherry tree
Here's how to shape and protect your tree for winter while keeping those iconic spring blooms.
✂️ Step 1: Time Your First Cut After Flowering
Wait until late May or early June—after your Mount Fuji's flowers fade but before new growth hardens. This timing ensures you don't remove next year's blooms hidden in the buds. Look for fully opened flowers turning brown and dropping petals as your signal.
Prune on a dry, overcast day to reduce stress on the tree. I always use sterilized pruners (wipe blades with rubbing alcohol) to prevent bacterial infections. Start by removing any dead, diseased, or crossing branches—these compete with the tree's energy and invite pests.
✂️ Step 2: Shape for Wind Resistance and Airflow
Focus on opening the tree's center by cutting back branches that grow inward at a 45-degree angle just outside the branch collar. This creates space for air circulation, which is critical in the Pacific Northwest's damp winters. Aim to reduce the canopy density by about 20-30% total.
For larger branches over ½ inch thick, make your cut just outside the branch collar (the swollen area where the branch meets the trunk). Never leave stubs—this invites decay. If you're unsure where to cut, imagine the branch growing naturally and trim where it would naturally taper off.
✂️ Step 3: Thin Out for Frost Survival
Selectively remove overcrowded branches—especially those growing straight up or rubbing against others. These are the first to break under ice or heavy snow. Focus on branches that are thinner than a pencil first, as they're easier to remove and less stressful for the tree.
Here's the thing—never remove more than 25% of the tree's foliage in one season. Your Mount Fuji relies on its leaves to build energy for winter dormancy. If you see new growth slowing after pruning, you've cut too much. Water deeply after pruning to help the tree recover.
⏰ Step 4: Final Winter Prep Before Frost
In late October, do a quick inspection and prune any suckers (shoots growing from the base) or water sprouts (vertical shoots from the trunk). These drain the tree's energy and are more vulnerable to frost damage. Wrap the trunk with tree wrap if you haven't already—this prevents sunscald during winter temperature swings.
Mulch the base with 3-4 inches of shredded bark (but keep it 6 inches away from the trunk) to insulate roots. Water deeply before the first hard freeze to encourage root growth, which helps the tree withstand PNW winters. Avoid heavy pruning now—wait until spring to remove any frost-damaged branches.
Tips & tricks for perfectly pruned Mount Fuji cherry trees
These simple yet game-changing tips will help you prune your cherry tree like a pro—without sacrificing next year's stunning blooms.
Timing is Everything: In Step 1, when you're waiting for flowers to fade in late May or early June, here's what I do: Mark your calendar for the day after you see petals start falling. This gives you a clear visual cue that the tree's energy is shifting from blooms to new growth. If you're unsure, do a quick "finger test"—gently press a bud; if it's firm and green, it's safe to prune.
Branch Collar Know-How: Step 2 mentions cutting just outside the branch collar, but here's the secret: The collar is your tree's natural healing ring. When you make your cut, look for the slightly swollen area where the branch meets the trunk. If you can't see it clearly, trace the branch's natural taper line—this is where it would naturally thin out. Using a sharp, sterilized pruner ensures clean cuts that heal faster and prevent disease.
Thinning Strategy: For Step 3, focus on removing branches thinner than a pencil first. These are the easiest to remove and create the most airflow. I like to step back and look at the tree from all angles—this helps me spot overcrowded spots. Remember, you're not just pruning for aesthetics; you're creating a tree that can handle PNW winters better. That 25% foliage limit isn't arbitrary—it's what keeps your tree healthy.
Winter Prep Insight: In late October, when you're removing suckers and water sprouts, here's a pro move: Use a pair of sharp pruning shears for smaller branches and a pruning saw for thicker ones. For the mulch, I always use shredded bark because it breaks down slowly, providing long-term insulation. The 6-inch clearance from the trunk prevents rot while still insulating roots.
Pro Tips for Mount Fuji Flowering Cherry Tree
- These simple yet game-changing tips will help you prune your cherry tree like a pro—without sacrificing next year's stunning blooms.
- Timing is Everything: In Step 1, when you're waiting for flowers to fade in late May or early June, here's what I do: Mark your calendar for the day after you see petals start falling.
- Branch Collar Know-How: Step 2 mentions cutting just outside the branch collar, but here's the secret: The collar is your tree's natural healing ring.
Frequently asked questions
When is the best time to prune my Mount Fuji cherry tree for frost survival?
The ideal window is late winter to early spring (February–March), before buds swell but after the coldest snaps. Pruning too early risks frost damage to fresh cuts, while waiting too long may stress the tree as it prepares for blooming season. Pro tip: Avoid pruning during freezing rain—it can seal wounds poorly.
How do I protect my cherry tree from PNW frost damage?
Mount Fuji cherries are semi-hardy (USDA Zone 5-8), but PNW winters can push limits. Thin out dense branches to improve airflow, and avoid heavy pruning in fall—new growth is frost-sensitive. Wrap young trees with burlap during extreme cold snaps (<10°F), and mulch the root zone with 3–4 inches of wood chips to insulate roots.
Can I prune my cherry tree in fall, or is spring-only?
Fall pruning is risky but possible with caution. If you must prune in October–November, limit cuts to 10% of the canopy and focus on dead or diseased wood. Avoid heavy shaping—new growth won’t harden off before winter. Spring pruning is always safer for blooms and frost resilience.
What if my cherry tree’s branches die back after frost? Can I fix it?
Don’t panic! Wait until late spring (after last frost) to assess damage. Cut back dead wood to live buds (they’ll look green or plump). If the tree is over 50% damaged, it may struggle to recover—consider root-pruning nearby competitors to redirect energy. Hydrangea vinegar (3% solution) can help sterilize tools if you spot fungal issues.
Are there frost-resistant alternatives to Mount Fuji cherry?
Yes! If frost is a recurring issue, try these hardier PNW cherries:
- ‘North Star’ cherry (Zone 3–8): Blooms early, handles heavy snow.
- ‘Kanzan’ cherry (Zone 5–9): Double-pink flowers, better cold tolerance.
- ‘Stella Compact’ (Zone 4–8): Dwarf variety, ideal for small spaces.
Pro Tip: Mark your pruning calendar!
Use a garden flag near your tree to note:
- Last frost date (check Old Farmer’s Almanac for your zone).
- Extreme cold alerts (set phone reminders!).
- Bloom timing (prune after flowers fade to preserve next year’s buds).
Wrapping up and next steps
Pruning your Mount Fuji flowering cherry tree for Pacific Northwest frost survival isn’t just about technique—it’s about care. By following the right steps—timing, tools, and gentle shaping—you’ll help your tree thrive even in chilly climates.
Remember, patience and consistency are key, and soon, you’ll be rewarded with stunning blooms that brighten your garden year after year! 🌸
Ready to take the next step? Mark your calendar for late winter or early spring—your tree’s future beauty starts with your first careful cut. Happy pruning! ✂️