
Pruning
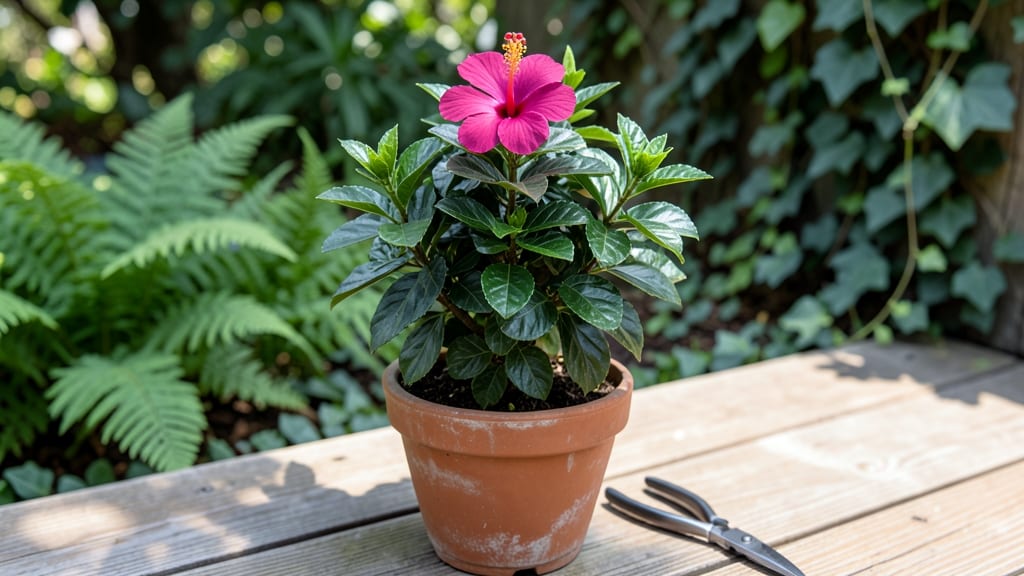
Growing a miniature hibiscus tree in containers lets you enjoy tropical beauty without the space—or the pruning battles—of full-size varieties. 🌿 I’ve nurtured these compact wonders for years, and their velvety blooms prove that small plants can pack a big punch.
The key? Matching their needs to your space, from bright indirect light to well-draining soil that keeps roots happy without soggy roots.
These little powerhouses thrive in 5-10 gallon pots, making them perfect for patios, balconies, or sunny windowsills. They love warmth—65-85°F is ideal—and their glossy leaves turn slightly crimson when they’re happy.
Feed them every 4-6 weeks with a balanced fertilizer, and you’ll be rewarded with blooms from spring through fall. The pruning is minimal too: just trim leggy growth after flowering to keep that lush, bushy shape.
What you’ll end up with is a year-round tropical accent that attracts hummingbirds and fills your space with fragrance. The flowers—often in shades of pink, red, or white—open wide in the morning and close by afternoon, like nature’s own clock.
With the right care, your miniature hibiscus can live for decades, becoming a cherished centerpiece that grows with you.
Whether you’re a beginner or a seasoned gardener, these trees adapt beautifully to containers. The biggest mistake? Overwatering or letting them sit in drafts. Stick with me, and you’ll have a thriving, blooming bush that feels like a vacation in every pot. Let’s get those roots settled!
📚 In This Guide
- What you need
- Instructions
- Tips and common mistakes
- Wrapping up and next steps
What you need
- ● Miniature hibiscus plant: Choose a dwarf variety (e.g., Hibiscus rosa-sinensis ‘Mini Star’ or ‘Lil’ Kim’), ideally 12–18 inches tall at purchase.
- ● Container: A well-draining pot (10–15 gallons) with drainage holes. Terracotta or ceramic (for heat retention) or fiberglass (for lightweight durability) are great options.
- ● Potting mix: A blend of 50% peat moss or coco coir, 30% perlite or pumice, and 20% compost (or a pre-mixed hibiscus-specific mix).
- ● Pruning tools: Bypass pruners (for clean cuts)
- ● Sterilized sharp scissors (for fine trimming)
- ○ Support structure (optional but helpful): A small bamboo stake or tomato cage (4–6 feet tall) to train growth.
- ● Gloves: Heavy-duty gardening gloves to protect hands from thorns.
- ● Multipurpose fertilizer: A balanced 10-10-10 or 20-20-20 NPK formula (diluted to half-strength).
- ● Slow-release pellets: Organic options like osmocote for steady nutrition.
- ● Mulch: Pine bark or shredded leaves to retain moisture.
- ● Spray bottle: For misting leaves (especially in dry climates).
- ● pH tester kit: To monitor soil acidity (ideal range: 6.0–6.5).
- ● 💡 Sterilize tools with rubbing alcohol to prevent disease.
- ○ 🌡️ Use a heat mat (optional) if growing in cool climates.
- ● ✨ Prune in late winter (before new growth) for best results.
Step-by-step guide to cultivating a thriving miniature hibiscus tree
Here's how to coax a lush, compact hibiscus into a stunning container specimen.
🌱 Step 1: Select and Prepare the Right Container
Choose a 12-15 inch diameter pot with drainage holes—hibiscus roots need room to spread but hate soggy feet. I prefer unglazed ceramic because it breathes and prevents root rot. Add a 2-inch layer of coarse gravel at the bottom for drainage, then a 1-inch layer of orchid bark mix to create air pockets.
Fill the pot halfway with a well-draining potting mix (equal parts peat moss, perlite, and coarse sand). Hibiscus roots need oxygen, so avoid dense garden soil. Press the mix down gently—just enough to remove air pockets, but don't compact it. The surface should look loose and fluffy.
🌿 Step 2: Plant and Stake for Stability
Remove your miniature hibiscus from its nursery pot and gently loosen the roots if they're circling. Place the plant in the center of your prepared pot, ensuring the top of the root ball sits 1 inch below the rim. This prevents water from spilling over the edges when you water.
Fill the remaining space with more potting mix, pressing lightly around the base to eliminate gaps. Insert a 5-foot bamboo stake into the soil beside the plant, angling it slightly for support. Tie the main stem loosely to the stake with soft plant ties—you don't want to strangle the growth. This helps young plants stand upright, especially in containers where wind can rock them.
☀️ Step 3: Establish Ideal Light and Watering Routines
Miniature hibiscus thrives in bright, indirect light—think 6-8 hours of morning sun followed by afternoon shade. A south-facing window works well, but direct midday sun can scorch delicate leaves. If you notice leaves turning yellow with crispy edges, move the plant back 2 feet from the window immediately.
Water when the top 1-2 inches of soil feel dry to the touch. Stick your finger in—if it comes out clean, it's time to water. Pour water slowly until it drains freely from the bottom holes, then empty the saucer. Overwatering is the #1 killer of container hibiscus, so always let excess water escape completely. In summer, you might water every 2-3 days; in winter, once a week is usually enough.
💧 Step 4: Feed and Prune for Compact Growth
Start fertilizing 4 weeks after planting with a balanced liquid fertilizer (10-10-10) diluted to half strength. Apply every 2 weeks during spring and summer, then reduce to once a month in fall. Hibiscus loves food but burns easily—always water the plant first to avoid fertilizer shock. You'll see new growth within 2-3 weeks if the plant is happy.
Prune in late winter to shape your miniature tree. Cut back one-third of the current season's growth just above a leaf node or bud. This encourages bushier growth and prevents leggy stems. For a more formal look, trim side branches to half their length—just enough to maintain a rounded silhouette. Always use clean, sharp pruners to avoid tearing the bark.
Tips & tricks for perfect miniature hibiscus tree care
Here's what nobody tells you about keeping your compact hibiscus thriving in containers.
Container Material Matters: While unglazed ceramic is ideal, terracotta pots also work well—they wick away moisture and prevent root rot. Avoid plastic containers, which trap heat and moisture, creating the perfect environment for fungal diseases. If you choose plastic, drill additional drainage holes along the sides to improve airflow. The key is ensuring excess water escapes completely after each watering.
Root Health Check: After planting, gently press the potting mix around the root ball to eliminate air pockets, but resist the urge to compact it. The mix should look loose and fluffy—like a well-aerated cake batter. Compacted soil suffocates roots, leading to stunted growth. I learned this the hard way after watching a client's hibiscus struggle for months due to overly dense soil.
Lighting Strategy: Those 6-8 hours of morning sun are critical for photosynthesis, but afternoon shade is equally important. If you notice crispy leaf edges, it's a sign of too much direct sunlight. Move your plant gradually—about 6 inches closer to shade each week—to avoid shocking the plant. For indoor growers, a sheer curtain can diffuse harsh midday rays while still allowing plenty of light.
Pruning Precision: When shaping your miniature tree in late winter, make your cuts just above a leaf node or bud at a 45-degree angle. This encourages new growth from that exact spot. Avoid cutting too close to the bud, as it can prevent proper regrowth. For a more formal look, trim side branches to half their length—this creates that perfect rounded silhouette without sacrificing too much foliage.
Pro Tips for Miniature Hibiscus Tree
- Here's what nobody tells you about keeping your compact hibiscus thriving in containers.
- Container Material Matters: While unglazed ceramic is ideal, terracotta pots also work well—they wick away moisture and prevent root rot.
- Root Health Check: After planting, gently press the potting mix around the root ball to eliminate air pockets, but resist the urge to compact it.
Frequently asked questions
Got questions about keeping your miniature hibiscus tree thriving in containers? Here are answers to the most common ones—so you can enjoy those stunning blooms without the guesswork!
How often should I prune my miniature hibiscus tree?
Prune your miniature hibiscus twice a year—once after flowering (late winter/early spring) to shape it and again in mid-summer to encourage new blooms. Light trimming between prunings keeps it tidy. Use clean, sharp shears to avoid damaging branches.
Can a miniature hibiscus survive winter indoors?
Yes! Move it indoors before temperatures drop below 40°F (4°C). Place it near a sunny window (south-facing is ideal) and reduce watering. Avoid drafts or sudden temperature swings, which can stress the plant. A grow light helps if natural light is limited.
Why aren’t my miniature hibiscus leaves turning red?
Red foliage (like ‘Scarlet Punch’) needs bright, indirect light—direct sun can bleach colors. If leaves stay green, relocate it to a sunnier spot (4–6 hours of light daily) or supplement with a grow bulb. Overwatering or poor drainage can also dull vibrancy.
What’s the best soil mix for container-grown hibiscus?
Use a well-draining mix like 50% peat moss or coconut coir, 30% perlite or pumice, and 20% compost. Hibiscus roots hate soggy soil—add a layer of gravel at the pot’s bottom to prevent waterlogging. Repot every 2–3 years for fresh nutrients.
How do I fix yellow leaves on my miniature hibiscus?
Yellow leaves usually mean overwatering or poor drainage. Let the top inch of soil dry out between waterings, and check for root rot (smelly, mushy roots). If pests like spider mites are the culprit, spray with neem oil or insecticidal soap. Trim affected leaves to redirect energy.
Can I grow a miniature hibiscus from a cutting?
Take a 4–6 inch cutting with 2–3 leaves, dip it in rooting hormone, and plant it in moist perlite or sand. Keep it warm (70–75°F) and humid (use a plastic bag) until roots form (4–6 weeks). Transplant once rooted—it’s a great way to propagate!
Wrapping up and next steps
Growing a miniature hibiscus tree in containers is a rewarding way to enjoy vibrant blooms without the space demands of full-sized plants! With the right pruning techniques—like shaping, deadheading, and seasonal trims—you’ll keep your compact beauty thriving year after year.
Remember, patience and consistency are key, and soon, your little hibiscus will reward you with a lush, blooming canopy.
Ready to take the next step? Pick a sunny spot, grab your pruning shears, and start shaping your tree today! 🌿✨